Showing posts with label unschooling. Show all posts

Friday, January 28, 2022

Enjoying Winter and the Natural World - Outdoor Hour Challenge

This week's challenge includes a variety of different activities that focus on enjoying winter and the natural world. We also explored ways that we could enjoy the outdoors when it was too cold and it was better to be inside.

We have been having many days and nights with double-digit below zero temperatures or "feels like" temperatures. Needless to say, it's not pleasant weather to be outside in. However, we did have a break in Wednesday's weather with it being in the mid-20s. So, Olivia and I went outside to gather some snow for experiments and went on a walk around part of our farm.

We did a couple of different experiments with snow:

Filtering Snow

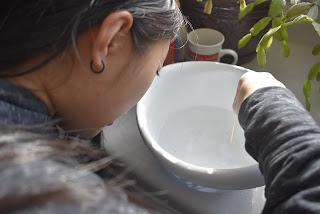
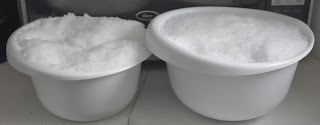
We gathered some snow in two clean mixing bowls and brought them inside the house to melt. 


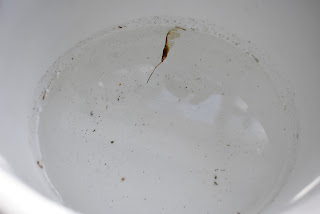
After the snow melted, we looked at the items that were left in the water. 


There was a lot of dirt - more so than we anticipated - both particles and a film of dirt on the bowl and on the surface of the water. There was a box elder seed pod in my bowl. We also saw a lot of small pieces of vegetation in the melted snow.

We noticed that my bowl of water - which also had ice in it - had more dirt and debris in it than Olivia's bowl which was all light, fluffy snow. 


We could have taken this a step further by filtering the water through a coffee filter and then using a hand lens to examine the particles left in the filter. However, we were satisfied with what we were seeing by just observing the water. 

One thing that Olivia noticed was that her bowl of water had quite a few bubbles in the bottom of the bowl. Taking a toothpick, she moved the bubbles around. They would float to the top of bowl. They were trapped air or air pockets! 


After we were done observing the contents in the bowl and popping air bubbles, we measured the water from the melted snow. Each bowl had 3 cups of water. 


Although one bowl was bigger than the other, the smaller bowl had ice which would have had a higher water content than snow.

Snow Produces Water

We filled a two-cup measuring cup with fresh snow and let it melt. 


It resulted in 2/3 cup of water.

I looked up how much water a deer needs to survive during the winter. For every 100 pounds, a deer needs to consume 6 cups of water. We figured out that 12 cups of snow equals 4 cups of water. So, a deer would need to eat 18 cups of snow to equal 6 cups of water...and that's just one day! Without reliable water sources during the winter, deer would have to really look for snow to get enough water. 

Snowflakes 

Next, we talked a bit about snowflakes. We realized that we had done a snowflake nature study back on December 19, 2013. This was Sophia's nature journal entry:


This was Olivia's nature journal entry: 


“Water in its various changing forms, liquid, gas, and solid,
 is an example of another overlooked miracle - 
so common that we fail to see the miraculous in it.”
~ The Handbook of Nature Study, page 808 ~

I read about the geometry of a snowflake - page 809 - of The Handbook of Nature Study. A six-rayed snowflake has angles of 60 degrees. If a snowflake only has three rays, the angles between the rays are 120 degrees. 

What also is fascinating about snowflakes is their symmetry. In The Handbook of Nature Study it says, "If one ray of the six is ornamented with additional crystals the other five are decorated likewise."

Also of interest is where the snowflakes form. Those that form in the higher clouds where it is cooler, will be more solid in form and "the spaces in the angles being built out to the tips of the rays." 

Snow crystals that are "formed in the lower currents of air, and therefore in warmer regions, on the other hand, show their six rays marvelously ornamented. The reason why the snow crystals are so much more beautiful and perfect than the crystals of hoar frost or ice, is that they are formed from water vapor, and grow feeling in the regions of the upper area."

Mr. W.A. Bentley, who we read about when the girls were younger, identified nearly 5,000 distinct snowflake designs! 

Bird Watching

When Sophia and Olivia were younger, they would count how many birds they would see at the feeder during a set period of time. It was interesting to track which ones frequented the feeder more often.

On Wednesday, January 26th, we looked at the tracks that the birds are making by our home where the feeders are located. There are several more highly-visited feeder areas including this one by the dining room. There's 1 suet feeder, an open feeder on the ground, a round seed feeder in the tree and another one on the post, an open feeder near the propane tank, and an area to put seeds on top of the roosting box.


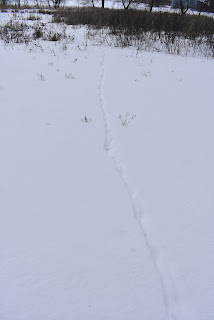
Another thing that Olivia noticed in the pasture were pheasant tracks. They are very distinctive because not only can you see the feet, but the tail leaves a trail as well.


On Thursday, January 27th, when we started observing birds around 1:30 p.m. (5 minutes per feeding station), there were NO birds that came to any of the feeding areas. It was the strangest thing. About 10 minutes later, the birds came back and were feeding at them. 


The dining room feeder (partially pictured above with the platform feeder) was so busy with activity that I couldn't keep up with counting the birds! Roughly, in five minutes, there were: 

- 19 dark-eyed juncos
- 6 American tree sparrows
- 4 black-capped chickadees


I then did bird watching at the backyard feeders. At those three stations, there are 3 suet feeders, a hanging round seed feeder from a post, a column seed feeder, 2 finch feeders, and an open tray feeder with a cover. I saw the following birds in a five-minute time period:

- 14 dark-eyed juncos (male and female)
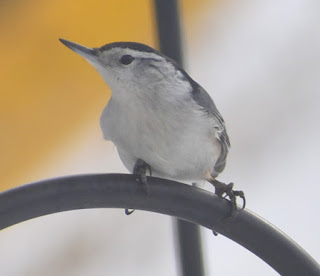
- 2 nuthatches
- 2 black-capped chickadees
- 1 American tree sparrow

The female dark-eyed juncos are gray and white and super cute. They are all fluffed up to keep warm on these cold days. 


The nuthatch alternates between feeding at the suet feeder and searching the pine tree for food.


The American tree sparrow has a cute brown cap and two bright-white wing bars. It also has a stripe leading from the corner of its eye towards its neck.  


Brief Time Outside and Finding Winter Colors

We spent some time outside even though it was cold to see some things that had changed since the fall when we were regularly going out to explore the land.

Even though initially Sophia and Olivia felt the landscape was rather bland with only shades of brown and dull green, there ended up to be much more color and texture than we anticipated.

“There is enough to see outside in winter to satisfy any poet.
 In fact, winter may be even better because 
there aren’t so many things going on in nature 
that they crowd each other out.
It’s easier to notice what’s there.”
~ Charlotte Mason volume 1, page 86 ~

I was curious if we could find most of the colors of the rainbow - plus the neutral colors - during our time outside on January 26th. Here's how we did:

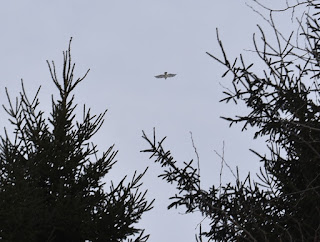
Green - pine trees. The pine trees don't look green, but they are. I happened to look up and see a hawk flying overhead. Was surprised that when I took the picture that the hawk was in between the tops of the pine trees. 


Brown - weeds and dead pine needles; pine cone; and cattails. This cattail was on the back part of the property, to the north of the mini-pine tree forest. The pine cones were under some trees that are in the west pasture. There were lots of rabbit tracks under the trees and around the pine cones. 


Looking at the birds, I saw many American Tree Sparrows. 


White - snow. These are some tracks in the snow that are leading to a branch that is partially-buried. The tracks went to the side of the branch where there was some shelter from the weather.


Gray 

The gray squirrels are prolific this year. They like the corn that I put out. The goal is to keep them away from the more expensive birdseed. In concept, it works...in real life, not so much.


Black

While bird watching, I saw many black-capped chickadees and dark-eyed juncos. The male juncos have the darker coloring - more of a black than the gray-colored females. The black-capped chickadees, like the one below, always seem to be the first birds to find the new birdseed when I fill the feeders.


The colors we didn't find were red, orange, yellow, blue, indigo, and purple - all the vibrant colors we would see in the Spring, Summer, and Fall. That being said, on other days we will see red on male cardinals, orange on the beaks of female cardinals, and blue in the sky and on blue jays. Sunrises and sunsets would show any of the colors we didn't see also. 

That wraps up our nature study about winter, snow, snowflakes, birds, and colors during the winter.

Monday, January 6, 2020

Three Kings Day - Epiphany + Recipe for Dad's Sourdough Pancakes

On January 6th of each year, Epiphany is celebrated. This was a well-known fact when I was growing up because my dad was born on Epiphany and he always said he was an "Epiphany baby"...even when he was older.

My dad blowing out the candle on his 
banana sundae ice cream dessert on his 78th birthday. 

One special thing that my parents did each year was have the priest from church come over to bless our home. I remember the chalk letters and numbers above our front door that the priest wrote after he gave a blessing. My parents, sister, brother, and I would stand by the front door as he did this.

Front entry way of my parents' home. 
The door to the right is where the chalk blessing was written.

I found a pin on Pinterest that led to Liturgy that explained the chalk house blessing in more detail. The website said, "On Epiphany (or New Year) you can bless your house. You can make this as simple or as intricate as you like; include (liturgical) greeting (eg. “The Lord be with you…”), song or carol, holy water (sprinkling door, each room), reading (eg. Epiphany Gospel, start of John’s Gospel), more prayers, Lord’s Prayer, incense, assigning parts to different members of the household, collect for Epiphany. Many homes are the dwelling for one person – the blessing of a home is equally appropriate."

The next part is about what is written in chalk: "Take (blessed) chalk (of any color) and mark on the lintel of your front door 20 + C + M + B + 11 [for 2020 you would change the 11 to 20: 20 + C + M + B + 20] saying:

The three Wise Men,
C Caspar,
M Melchior,
B and Balthasar followed the star of God’s Son who became human
20 two thousand
11 and eleven years ago [for 2020: “20 and twenty years ago].
++ May Christ bless our home
++ and remain with us throughout the new year. Amen.

God is love, and those who abide in love abide in God, and God abides in them. Christ, God’s incarnation, is present in the love and care we manifest to each other in our ordinary daily lives together.

From A New Zealand Prayer Book page 762
C M B above the door, also stands for Christus Mansionem Benedicat, Latin for “May Christ Bless this House.”

*~*~*~*~*~*~*~*~*

My dad died the day before the Epiphany in 2012. He was 79 years old. Had he made it just one more day, he would have reached 80 years old. In some ways, I'm happy his birth and death are not on the same day. One day is more somber and sad, while the other is a bittersweet reminder of all the wonderful birthdays we could celebrate with my dad.

My dad and mom on my dad's last birthday: January 6, 2011.

*~*~*~*~*~*~*~*~*

One thing I did this year was make a batch of sourdough starter at the end of 2019 and then made sourdough pancakes on January 5th in memory of him.


He would make this starter periodically and we would have the pancakes. They were a treat for us. The recipe below is from one he wrote on his typewriter. The words used are typed below just like he did including the word "till" for "until."

SOURDOUGH STARTER

1 package active dry yeast
1 1/2 cups warm water
2 cups sifted all-purpose flour
1 tablespoon sugar

Dissolve yeast in 1/2 cup o the water; stir in remaining water, flour, and sugar. Beat until smooth. Cover with cheesecloth; let stand at room temperature for 5 to 10 days, stirring 2 to 3 times a day. (Time required to ferment will depend upon room temperature; if room is warm, let stand a shorter time than if room is cool.) Cover and refrigerate till ready to use.

TO KEEP STARTER GOING

Add 3/4 cup water, 3/4 cup sifted all purpose flour, and 1 teaspoon sugar to remaining starter after some is used. Let stand at room temperature till bubbly and well-fermented, at least 1 day. Cover and refrigerate till used again. If not used within 10 days, add 1 teaspoon sugar. Repeat adding sugar every 10 days.

SOURDOUGH PANCAKES

Great served with whipped butter and melted jelly or syrup.

1 cup sifted all-purpose flour
2 tablespoons sugar
1 1/2 teaspoons baking powder
1/2 teaspoon salt
1/2 teaspoon baking soda
1 beaten egg
1 cup Sourdough Starter
1/2 cup milk
2 tablespoons cooking oil

Combine flour, sugar, baking powder, salt, and soda. Combine egg, sourdough starter, milk, and oil; stir into flour mixture until combined. Using 2 tablespoons batter for each pancake, bake on hot, lightly-greased griddle till golden, turning once. Makes about 28 pancakes.

Dad with Sophia and Olivia on July 18, 2008, 
after we went to a stamp show on Olivia's half birthday.

Thursday, June 22, 2017

Wood Burning - ABC of Summer Fun (Letter W)

Continuing with the ABC of Summer Fun, Sophia, Olivia, and I took a wood burning class at the Wyoming Center for the Arts on June 15th. This represents Letter W on our list of activities we want to do this summer.

Both of the girls have wanted to try wood burning now for some time. They had expressed their interest in taking a session about wood burning at a 4-H winter workshop day. However, they didn't get into the class due to full enrollment.

The projects done at the 4-H workshop were simple because there was only about 50 minutes for the class.

The class we took was 3 hours and led by an artist. The experience we had provided a more in-depth look and creative instruction - so things worked out fine.

After the artist introduced himself; the class members introduced themselves; and the artist gave some background and instructions about the wood burning, we could begin on our projects.

The first step was to select an image that we wanted to start with and place it on a piece of wood. Olivia chose an image of a pheasant.


I chose a butterfly.


For the first project, Sophia decided to create her own image by sketching it directly onto the wood. For her second project, Sophia used one of the photocopied images.

If the designs weren't hand-drawn on the wood, we used a piece of carbon paper and tape. The tape affixed the image where we wanted it and the carbon paper went under the image. We used a pen to trace the outline of the image and a few details.

The next step was to take a smaller piece of wood and practice using the wood burning tool. It is quite different than a paintbrush, colored pencil, or marker.


Your hand is further up the barrel and can't go near the point since the metal tip is all heated. It gets pretty hot too...it takes just a split second to pull one's hand away when the tip is accidentally touched.

Also found out that longer hair should be tied back. The girls didn't have any challenges with their hair, but twice mine touched the hot tip and the smell of burning hair permeated the room. It's not a pleasant smell.


At any rate, after practicing on the smaller wood pieces, we tried our hand at the designs we chose.


Depending on how much emphasis you wanted on the image, you could hold the wood burning tool like a pencil and trace your image lightly; press down more to darken the lines, or hold it at an angle and burn off sections of the wood.


Since the butterfly was black, I used the side of the tip and held it down as I moved it slowly on the wood. It definitely darkened the areas that I wanted to be black.


Sophia did a very nice job using the side of the tool to add subtle detail and shading.


She did both lighter shading with the fish and darker shading with the rose that she drew.


Olivia's pheasant was much lighter in comparison to what Sophia and I did. She added lots of little dots and marks on the wings and chest to represent feathers.


We had a mixed reaction to wood burning. Sophia enjoyed it and definitely wants to do more wood burning projects in the future.

Olivia and I both felt like we were introduced to a new art form and gained some skills that we didn't have prior to the class. However, we both have other types of art and crafts that we prefer.

If anything, this class gave me a huge insight into the level of work and talent involved with wood burning. It is significantly more complicated than I anticipated. Seeing projects that have been wood burned at the county and state fairs now will be much more interesting now that we know the process and skill needed to do the images.


Tuesday, June 20, 2017

Lutz Backyard Railroad Garden - ABC of Summer Fun (Letter L)

When I was putting together the list of things to do for the ABC of Summer Fun, I came across the Lutz Backyard Railroad Garden. I had read about outdoor railroad gardens, but never have seen one operating in someone's backyard.

There are four times during the summer that the Lutz Backyard Railroad Garden is free and open to the public. Sunday, June 18th, was the first time for 2017.


The train winds itself through little vignettes. One of the first things we saw were two rides you would see at a fair. Both had music and were operational with the horses going around and the Ferris wheel turning.


There was a volcano with smoke coming out it.


The train traveled over bridges and by waterfalls.


It traveled through small towns. If you look closely on the right side of the photo, there is a popcorn maker (the red stand). Every once in a while, the "popcorn" would pop up in the little glass enclosure.


There were many water features including this fountain and multi-layer waterway that led to a mill and waterwheel.


Tucked into every corner, there was something to either see or read.


There were bridges to cross and gates to pass through.


One of the intriguing things was this hand-built water contraption that would drip water down from the top into the red tubes. When they filled or got heavy enough, they would tilt and then fill the next tubes. The process would repeat itself until it filled the bottom white tube with water. The water would go up to the top again and continue the process.


There was a little area with a gondola that moved. Each of the cars shown below would move up and down on the wire. Below it was a water fountain that would go off periodically.


The tracks were nestled into rocky areas and between many annuals and perennials. It was an interesting combination of gardening and railroad hobbies.


The trains and anything that can be taken or damaged by the elements are brought indoors into a shed. The trains go on the track and then there's a lift section at the end by a little door that leads to the shed. This is where things are stored.


One part of the railroad garden had an emergency. Firefighters were putting out a fire. There was smoke coming out from a couple of the windows.


The girls were looking at one of the parts of the display.


When you see people next to the train, buildings, and plants it gives an idea what the scale of the railroad garden is and how much work is involved.


This was so much fun to see the railroad garden. There are a couple more free-and-open-to-the-public railroad gardens that are located in the Twin Cities. We are going to go to these this summer to see how others set up outdoor railroads.


After seeing Lutz Backyard Railroad Garden, we drove about five minutes to Caponi Art Park. We hadn't been there, and I was curious to see what it looked like.

One of the sculptures was called Pompeii.


There was another interesting geometric one along the trail that wound through forests and grassy areas.


The rock work was impressive and creative.


We didn't stay at the park a long time because a storm was coming in. Felt it was better to get back to the car before it started raining.

All in all, it was a fun day seeing two places that we hadn't seen before. The railroad garden, by far, was the highlight. It was inspiring, fun, and such a fascinating combination of two hobbies that we are interested in: trains and gardening.