Sunday, October 28, 2012

Take a Stitch Tuesday - Ray Stitch - Week 43

As with last week's Take a Stitch Tuesday challenge, the stitch proposed this week - the Buttonhole Wheel Cup - is one I know I wouldn't use in embroidery projects I do.

So, I looked on the internet for another embroidery stitch that I would like. I found one called the Ray Stitch which was an easy and enjoyable stitch to do. It also is called the fan stitch...both which are appropriate names given the look of the stitch.

The sampler I did before taking it out 
of the embroidery hoop.

There are eight straight-stitches that make up the ray stitch. It's the type of stitch that fills up a space well.

Close up of the ray or fan stitch.

I put the sampler into my journal along with a personal reflection, list of items for which I'm grateful, the name of the stitch, and some images that represented the week.


The bottom image on the left hand side is a sculpture of a trio of owls. It reminded me of going to the Warner Nature Center and seeing the screech owl up close.

There also are some holiday stamps to remind me of the craft shows that Sophia, Olivia, and I went to on the weekend. We enjoy going to them because it is inspiring to see the variety of work that people do. There's such a diversity in style and products offered...and it is kind of a "kick-off" to the holiday season for us.

Saturday, October 27, 2012

Countdown to Halloween - Haunted House Theme

Today is the tenth day of the 13-day Countdown to Halloween. The theme today is "Haunted Houses."

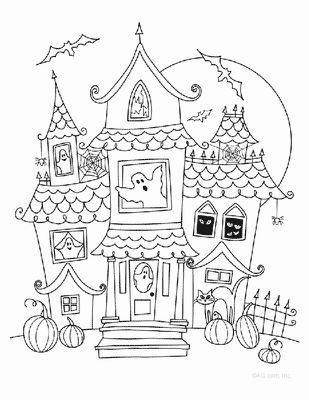
Olivia's haunted house picture that she colored.

With all three of us not feeling up to par today, what we did was quite limited compared to other days. Nonetheless, we had a little food snack and the girls did a quick coloring page with a haunted house theme.

Food 

Bento Lunch had a cute idea for a Halloween-theme lunch. The main part of the lunch had a piece of cheese cut into the shape of a haunted house. So, we tried cutting some different haunted houses from cheese and served them with crackers.

The haunted house shaped cheese and crackers
we had for dinner.

One of the art projects I wanted to have Sophia and Olivia do we didn't have the right kind of ingredient to make the unusual paint. More about that project is below in the section "Art Project."

Coloring Pages

There were two coloring pages of haunted houses (coloring page and another one) that the girls could pick from for filling in with markers. Both chose the same picture to color.

Sophia's picture that she colored.

Art Project

I was going to have the girls do a haunted house coffee painting. The brown tones are great for the eerie look of a haunted house. However, the only coffee I had on hand was coffee that needs to be brewed (versus instant coffee). I found out that coffee for brewing doesn't make water brown...so we will have to wait to do this project another day.

As a reference for the future, these are the steps to the project:

The first step will be to have Sophia and Olivia each set up their work area. They will need to spread out newspaper, have a container filled with water, a thin paintbrush, a coloring sheet that has an image of a haunted house (to use as an example and for ideas), and a piece of white paper. 

In addition, both girls will share small containers of coffee paint. This will be done by mixing different amounts of instant coffee grounds in water. With more coffee grounds, the paint shade is darker.

Next, the girls will be told that the project is to be "drawn" with a paintbrush and that it is essentially a landscape (e.g., no ghosts, zombies, headstones).

After the outlines are done, Sophia and Olivia will fill in their paintings by making as many different tones of brown as they can. Their finished paintings will have a range of white to light to medium to almost black-brown. 

P52 Photo Challenge - Leaves - Week 43

For the 43rd week in the P52 Photo Challenge, the theme is "leaves." There aren't too many leaves on the trees at this point. Some of the oak trees are holding onto their leaves as are the willows.

The rest of the leaves are on the ground. At some point, they will need to be mowed. In that process, they turn into tiny pieces and decompose back into the ground.

Gretel sitting among the leaves in the backyard.

In areas where there are more leaves, I either rake or mow them under the base of trees. In this way, the leaves naturally become part of the earth rather than being bagged up and tossed into a landfill somewhere.

Everything in the world is connected...and there is always a way for something or someone to help another.

Friday, October 26, 2012

Countdown to Halloween - Mummy Theme

Today's theme for the 13-day Countdown to Halloween is "Mummies." We did a food treat, did some language arts activities, and an art project.

Food Treat

We made Mummy Dogs after seeing the idea on The Idea Room.

Two of the Mummy dogs that we made.

To make Mummy Dogs, we used a tube of crescent roll dough and hot dogs.  Each person wrapped the dough around their hot dogs slightly different so each Mummy Dog turned out different.

The girls wrapping crescent roll dough around hot dogs.
(Yes, that's my camera strap in the upper right hand picture.
That's why I should take at least a couple of pictures
so I can choose which one turns out.)

Olivia and I cut the dough and wrapped it around the hot dogs.

Olivia's Mummy Dogs.

Even with the same way of cutting the dough, the wrapping process makes each Mummy Dog unique.

Sophia didn't cut the dough for her Mummy Dogs. She wanted the hot dog almost all covered - like a corn dog.

Sophia's Mummy Dogs.

We bake them at 350 degrees for about 15 minutes. (The recipe says the baking time could be between 12-15 minutes.) When they came out of the oven, we added drops of ketchup for the eyes.

Language Arts - Mummy Jokes

Since both the girls are at the age where they like jokes, here are a few mummy jokes I shared with them:

Q: What is the mummy's favorite musical program?
A: Name that tomb.

Q: What is the mummy's favorite flower?
A: Chrysanthamummies.

Q: Why don't mummies have hobbies?
A: They are too wrapped up in their work.

Q: Where do mummies go for a swim?
A: To the dead sea.

Q: Why don't mummies take vacations?
A: They're afraid they'll relax and unwind.

Language Arts

Both the girls enjoyed the Mummy Madness puzzle. After answering the clues, they put the letter matching a number into the correct box on the grid. The letters revealed the answer to the question about why people were so interested in stealing, buying, and using mummies.

Sophia working on the Mummy Madness puzzle.

According to Net Places, "You can understand why tomb robbers would steal gold jewelry. But why steal a mummy? Well, for hundreds of years, mummies were used all over Europe. In fact, they were so popular that the supply of real mummies ran short. Creative peddlers would make 'new' mummies using any dead body they could find."

The answer from the puzzle will surprise you - as it did us - as to what mummies were used for at one time.

Art Project

Today's art project focused on drawing a decorated mummy's coffin. Using pictures that other children drew of mummy coffins, the girls drew the outline first.

The girls looking at the examples of other children's drawings
on the computer.

Then, each added details to the coffin. Olivia chose to add color to her picture.

Olivia's drawing.

Sophia chose to keep her picture in black and white.

Sophia's drawing.

Although both weren't particularly happy with how their drawings turned out, I think it's important to have them try things they aren't completely comfortable with and see what happens. The process of creating is more important at this stage than the final product. At least it is in my eyes.

Puzzle

From One Zillion Books, there was a more complicated mummy maze which the girls started doing. There are multiple starting and finishing points on the maze. This is one of the most complicated mazes they've ever done before.

Apple Granola Dessert

One of the magazines I enjoy reading is Taste of Home. My mother started giving me a subscription to this magazine many years ago. It has down-to-earth recipes that are easy to make. The majority of ingredients for the recipes I generally have on hand.

One of the pins I saw recently was for an Apple Granola Dessert. The recipe used ingredients that were already in my cupboards and refrigerator.

Apple Granola Dessert that I made.


It is very simple to assemble in the slow cooker. The recipe doesn't call for much liquid which was something I questioned when I initially started making the recipe. The other thing was the long time period for cooking it - up to 8 hours.

Thankfully, I tried this recipe when I was home all day. It took only about 4 hours on low until the apples were soft. In fact, around the edges some of the apples were getting to be rather "toasty" and a bit too dark. Had it cooked for 4 more hours...I would have had a burnt mess on my hands.

The flavor is not overly sweet since only honey is used - not granulated and/or brown sugars. Since I'm used to having a more sweet dessert, it tasted somewhat bland. More honey or sugar could be added, if desired.

Also, this is not a apple crisp that is made in the oven with a crispy crust on top. The granola is mixed with the apples and softens - so it is a different texture than I anticipated.

With those things being said, here's the recipe:

Ingredients:

4 medium tart apples, peeled and sliced (I used Granny Smith apples)
2 cups granola cereal with fruit and nuts
1/4 cup honey
2 tablespoons butter, melted
1 teaspoon ground cinnamon
1/2 teaspoon ground nutmeg
Whipped topping, optional

Directions:

In a 1-1/2-qt. slow cooker, combine apples and cereal. In a small bowl, combine the honey, butter, cinnamon and nutmeg; pour over apple mixture and mix well. Cover and cook on low for 6-8 hours. Serve with whipped topping if desired. Yield: 4-6 servings.


Nutritional Facts

1 serving (1 each) equals 372 calories, 15 g fat (5 g saturated fat), 15 mg cholesterol, 117 mg sodium, 60 g carbohydrate, 5 g fiber, 5 g protein.


Thursday, October 25, 2012

Countdown to Halloween - Owl Theme

Today's theme in the Countdown to Halloween was "Owls." I found quite a few great ideas for owls - food treats, art projects, service projects, and science activities.

The reality was that I have been sick for most of the month and on the 25th I didn't have the energy to do much of anything. Sophia and Olivia also were focused on homeschooling and want to keep on schedule, so they were okay with not doing a lot of activities related to owls. We concentrated on the core subjects instead to stay on track.

So, we ended up homeschooling from about 9:00 a.m. to 3:30 p.m. Within that time frame, Olivia went to the local elementary school to get some help with reading, math, and speech. Then the girls had equestrian vaulting lessons while I did some errands and picked up books at the library.

When we came home, I made dinner while they frosted cupcakes we made this past Saturday (for the monster cupcakes) and decorated them to look like owls.

The idea comes from Reel Mama who made the cupcakes with her daughter. They are simple to make. Simply frost the cupcakes with chocolate frosting.

Add two Reese's Peanut Butter Cups at the top of the cupcake. Put a dab of frosting in the center of each candy and then place an M&M on top of that.

Sophia's cupcakes she decorated. 
She enjoyed adding the white frosting detail - like eyelashes and glasses.


Add a Mike & Ike candy for the beak...and you're done.

The cupcakes Olivia decorated.
The eyes and beaks all match on her cupcakes.

It's a simple dessert and one that the girls enjoyed making.

Olivia and Sophia with the owl cupcakes they decorated.


I'm hoping that before Halloween we have a chance to go to the local nature center that has a couple of rescued owls that live there. There will be some days where it will be warmer and not raining, so we will try to get there on one of those days.

We may even make the owl-shaped pancakes one day too.

Embroidery Journal Project - October

During October, I made another quilt square for the Embroidery Journal Project. Each of the cotton-fabric squares is 12" x 12" and features different images that represent the major activities of the month.

This month I chose to focus on Halloween and fall activities since that was how we spent a good portion of the month. 


The highlight of the month was doing the 13-day Countdown to Halloween. Each day we focused on a different theme, such as owls, witches, pumpkins, and ghosts.

This image combined two themes of the countdown:
owls and witches. 
The hat is blue because Sophia's witch costume this year
included a blue hat.

In addition to the countdown, the girls enjoyed carving pumpkins twice. One time was at home as we do each year, and the other was at the 4-H club meeting where the youth carved pumpkins that were for a nursing home.


Sophia, Olivia, and I - along with another family - delivered and set-up the pumpkins in the different courtyards at the nursing home. The staff and residents seemed so happy to see the pumpkins again this year. (The 4-H club has been doing this for a number of year now, and we have volunteered for three years to deliver and set them up.)

The images of the moon on the embroidered quilt square remind me of the beautiful full moon on Halloween night. The clouds were slowly moving in front and to the side of the moon giving an eerie look to the sky. Yet, the beauty of the moon shining so brightly reminded Olivia of the full moon we saw in September 2011 when we came out of a restaurant with friends in Boston (this was as part of a trip to New England).

Only two more quilt squares left for 2012 and I will have completed 12 for a quilt that I'll make during 2013. It will be a nice reminder of the positive things that happened and fun memories we created during 2012.

Wednesday, October 24, 2012

Countdown to Halloween - Ghost Theme

The theme for the 13-day  Countdown to Halloween today is "Ghosts." We made two food items and did a crossword puzzle today.

Food Treats

Ghost Pancakes

Using the recipe from the Betty Crocker Cookbook, I made a batch of pancakes. The ghost shapes are just random blobs of the batter in no particular pattern.

Ghost pancakes on the griddle.

The eyes are chocolate chips. I put them onto the raw side of the pancakes while the first side was cooking.

Ghost pancakes ready to eat.

Sophia and Olivia enjoyed having the ghost pancakes for breakfast, and thought it would be good to have them again next year.

Ghostly Pizza

The recipe for ghostly pizza comes from My Recipes. It serves 8 people. The ghost shape was clear with the unbaked mozzarella. However, once it was baked the image of the ghost wasn't as evident. 

Nonetheless, the girls enjoyed the pizza. Even better: I let them spread a blanket on the floor for an indoor picnic (it was overcast and misting outside...kind of a dismal day weather wise).

Ingredients:

Cooking spray
1 tube of pizza dough
Spaghetti sauce (about 3/4 cup)
Pepperoni slices
8 ounces sliced mozzarella cheese
Olives

Directions:

Preheat oven to 400ºF. Spray a baking sheet with cooking spray. Press and stretch dough evenly to cover bottom of sheet. (If dough resists at first, let it rest for a minute and then continue.)

Sophia and Olivia spreading the pizza dough on the baking sheet.

Spread sauce in an even layer over dough, leaving a 1-inch border around all sides. Bake until underside of dough is golden (lift up pizza with a spatula and take a peek), about 15 minutes. (Note: the girls wanted a softer crust, so we didn't pre-bake the crust.)

Use a ghost-shaped cookie cutter or a knife, cut ghosts from cheese. Place ghosts on top pizza. Place two pieces of olives on each piece of cheese for eyes.

Pizza ready to go into the oven.

Bake for 5 minutes (if the crust was pre-baked) or 15 minutes or so if the crust wasn't pre-baked.

The girls ready to eat their Ghostly Pizza.

Language Arts

Sophia and Olivia did a ghost-theme crossword puzzle which they both enjoyed.

Craft Project

After the girls come back from choir practice tonight, we are going to try making two different versions of origami ghosts. One version is here: http://en.origami-club.com/halloween/ghost/ghost/index.html
 and the other is here: http://origami.about.com/od/Holiday-Origami/tp/Origami-Ghost-Instructions.htm.

We're going to try them with both white copy and kite paper and see which one turns out better. The former can be hung anywhere while the latter type of paper would be best in windows (like the window stars I make).

4 White Window Stars
Window stars that use kite paper.
We'll try making ghosts using the same kind of paper and
see how they turn out compared to ones made with copy paper.

I'll put a picture of the ghosts on this post tomorrow once they are completed and on the windows.

Tuesday, October 23, 2012

Countdown to Halloween - Spider Theme

Today's theme for the 13-day Countdown to Halloween is "Spiders." We enjoyed the variety of activities that we did today - especially the art project and one of the food treats.

Art Project

Sophia and Olivia made images of spiderwebs after seeing the idea on Art Projects for Kids.

Sophia's finished spider web picture.

On a 9" x 12" sheet of black construction paper, the girls each made a dot with a pencil somewhere near the center of the paper. They drew straight lines out from the center, going to the edges of the paper: about 2 lines up, two to the right, then the left and the bottom edge.

Next, they drew a series to concentric circles around the center dot. It's easier to keep the lines simple, with lots of space in between.

Then, using white glue, they traced all their pencil lines.

Olivia tracing the pencil lines she made with glue.

To keep control of the glue line, it helped to keep the nozzle dragging on the paper when they squeezed the glue bottle.

Sophia putting glue on the black construction paper.

After the glue dried, Olivia and Sophia used chalk pastels to color on the paper and blend the powder in with their fingers.

Olivia using white chalk pastels for the next section 
of her spider web.

Rubbing is essential as it blends the chalk into the paper, and cleans it off the glue.

Sophia rubbing the chalk pastel into the paper.

Just a note...the glue does take quite a while to dry. The girls put the glue onto the paper around 10:30 a.m. At 6:30 p.m., there will still sections that had not dried completely.

Olivia's finished spider web picture.

We used a hair dryer to dry some of the glue. The other parts, the girls just worked around and were careful not to touch.

Both girls enjoyed this project, and Olivia wants to do another one in a different way to see how it will turn out.

Science/Trivia Fact

Indiana Public Media shared this information which I shared with Sophia and Olivia:

Most people think of spider webs as the organized, circular webs of "orb weaving" spiders. But actually there are many kinds of webs, made by different kinds of spiders.

Spiders of the family Theridiidae, or “cobweb spiders” are responsible for many of the loose, haphazard looking webs found in the corners of houses, barns, and sheds.

Like most spider webs, the webs of cobweb spiders are sticky. When the spiders move away or die, the abandoned webs start to collect airborne lint and dust.

The resulting dust laden strands hanging around lead to the false idea that cobwebs are not made by spiders.

One infamous species of cobweb spider is the venomous black widow, but you’re much more likely to encounter the harmless, tiny brown cobweb spider known as the “common house spider“.

These household spiders eat flies, mosquitoes, and other pests. So, maybe a cobweb or two around the house is not such a bad thing.


Food Treat

Doughnut Spiders 

For breakfast, we had Doughnut Spiders. (The idea came from Prepared Not Scared.) Both the girls enjoyed this simple-to-prepare breakfast. Being able to frost their doughnuts was fun for them.

Two of the doughnut spiders we made.

Ingredients:

Chocolate Covered Doughnuts (We used a variety of doughnuts - plain, powered sugar, and cinnamon)
Pretzel Sticks
M&M's
Milk Chocolate Chips

Directions:

Stick the pretzels into the sides of the doughnut.

Sophia placing the pretzels around the doughnut.

Dip the M&M's into melted chocolate chips and add them to the donuts to make the spider's eyes. (We used frosting since we had that on hand and it was easier to use.)

Olivia putting frosting on the doughnut so it holds 
the M&M eyes in place.

Use a miniature chip for the eyeball centers using the melted chocolate or frosting.

Olivia with her finished doughnut spiders.

Alternatively, chocolate frosting that can be piped out from a tube to make the eyeball pupils.

Sophia with her doughnut spiders.

Spooky Spider Snack

We also tried to make the Spooky Spider Snack. The recipe came from a pin that was linked to Kitchen Fun with My Three Sons. Let me assure you that the image we saw did not look anything like the finished version. Actually, we never completed making it. Why? I'll explain below.

To make the Spooky Spider Snack, you need: 1 plum, 12 pretzel sticks, edible eyes (we used frosting and M&Ms), and a big hand full of dark grapes.

We poked 3 holes on each side of the plum with a knife. This was the easy part.

Then, we took 6 pretzel sticks and pushed them into the holes. This went moderately well...just a few broken pretzels.

Next, we poked a hole on the ends of the grapes and slide them onto the pretzel sticks leaving just a bit of the pretzel showing. This did not go well at all for Olivia. The pretzels broke as she tried to put the grapes onto them. She didn't want to continue...she just wanted her doughnut spider which was fine.

Sophia got one grape onto each pretzel, and then said the next grape wouldn't work. Sure enough, the end of the pretzel was soggy and simply squished as another grape was added.

How in the world the person on Kitchen Fun with My Three Sons created the legs is beyond me. We tried pretzels with no luck. Then we tried toothpicks.

Sophia said she was just going to put the eyes on and call the project done. So, if we were following the directions, we would have put on edible eyes on the plum with cream cheese or peanut butter.

Since we used frosting and M&Ms for the doughnut spiders, we just used those. The staying power of M&Ms on the side of a plum: about 7 seconds.

See? I wasn't kidding. This sad-looking spider had much to be desired.
Despite its appearance, the fruit at least was good. 
The pretzels inside the grapes were soggy and inedible.
We don't plan on doing this project again.

At this point, we just wanted to eat breakfast. Make a spider from grapes and plums was no longer fun. It was become frustrating. So, we ended up eating the rest of the fruit that was meant for the other spider plain.

For those who aren't hungry and perhaps want to try their luck at making a fruit spider, the rest of the process looks something like this:

Fill up the other pretzel sticks with grapes and poke a hole on the end grape with the kitchen knife. Press that onto the end of the pretzel that is showing. The spider now should be standing up on your plate.

Fun Activities

The girls did a:
- Spider maze
- Spider crossword with answer key
- Spider word find

They enjoyed doing each of these puzzles. The maze, they said, was very easy. The crossword was a good review of some facts they knew about spiders as well as a good way to learn a couple new things. The word find was fun, and they were able to find all the words.

Monday, October 22, 2012

Countdown to Halloween - Skeleton Theme

For the fifth theme of the 13-day Countdown to Halloween, we focused on "Skeletons." Although we have being doing a daily service project as part of the countdown, we did not do one today since the girls had their homeschool co-op and we had to do some errands for part of the day. So, we didn't get to do a few of the things planned for the day.

Nonetheless, we did a couple of food treats today. Making food has been a highlight for both of the girls. Olivia liked making the black cat cookies and Sophia liked the skeleton bone breadsticks we made today.

The two treats we made are below:

Veggie Skeleton

I saw a pin for a veggie skeleton that was linked to Feeding Four Little Monkeys. There also was a cat vegetable skeleton, but we picked the human skeleton since we didn't have bean dip or several of the types of vegetables used with the cat version.

The veggie skeleton that 
Sophia and Olivia made.

Having something healthy to eat was a welcome change from the desserts we have been making. It was a fun way to present vegetables; and involved both the girls in terms of cutting and arranging the vegetables. It also was an opportunity to learn: Olivia learned how to slice mushrooms and cucumbers today.

The veggie skeleton's head is made from some lettuce leaves, two olives, and French onion dip in a small bowl. Both of the girls wondered why they should add lettuce since the skeletons they've seen don't have hair...they're just bones.

The body was made from celery, baby carrots, green pepper (the original recipe uses red pepper), mushrooms, grape tomatoes, cauliflower, broccoli, and cucumbers.

Sophia and Olivia arranged the vegetables on a cookie sheet that had a paper towel on it. It barely fit on the cookie sheet - so an even larger platter could have been used.

Sophia put the French onion dip in a bowl and added two olives. She drew a mouth in the dip.

The girls looked at the picture of the veggie skeleton that was on Feeding Four Little Monkeys.

Sophia pointing out to Olivia where one of the vegetables should be placed.
She's looking at the example from Feeding Four Little Monkeys.

The image helped them place each vegetable in the proper place.

The girls arranging the vegetables to create the skeleton.

By the time we were done preparing dinner, it was getting late. They were ready to eat even before the food was on the table.

Olivia and Sophia ready to eat dinner.

If we were going to do this again, I would have the vegetables cut and ready to go earlier in the day. It would certainly help not having as much happening all at once when getting things ready for dinner.

The skeleton was a hit...there were hardly any vegetables left by the end of dinner.

Salty Bones

The other treat we made today was Salty Bones. The idea was from the book Family Fun Healthy Halloween Treats.

This time the skeleton was disassembled...the girls ate from the pile of "bones" (or lightly-salted breadsticks).

To make the bones, we unrolled a tube of refrigerated breadsticks (the 11-ounce tube makes 12 bones) and separated it into the 12 rectangular pieces.

Working with one piece at a time, we slightly stretched the dough to lengthen it a bit and then used kitchen scissors to cut a 1-inch slit in the center of each end.

Sophia and Olivia cutting and forming the ends of the breadstick dough
to look like bones.

They shaped the resulting four flaps of dough into knobs that looked like the ends of a bone.

Next they placed the dough bones on an ungreased baking sheet, spacing them a few inches apart, and sprinkled on a little coarse salt. We baked the bones at 375° until they were a light golden brown, about 12 minutes.

Baked Salty Bones that Sophia and Olivia made.

The girls dipped the Salty Bones into spaghetti sauce. This was a great way to enjoy them. We had many breadsticks leftover, so it looks like we'll be having them with a few more meals this week.

Sunday, October 21, 2012

Countdown to Halloween - Vampire Theme

Today's theme in the 13-day Countdown to Halloween is "Vampires." We made a food treat, did some language arts activities, and did a service project today.

Food Treat

We made vampire cookies today. The pin for the recipe comes from Bright Ideas. It makes 24 cookies; and is an easy one to make. It does require 2 hours of refrigeration time before baking, so plan accordingly.

Vampire cookies that we made.


Ingredients:
· 1 ½ cups flour
· ¾ teaspoon baking soda
· ½ teaspoon cinnamon
· ½ cup butter, softened
· ½ cup packed brown sugar
· 1 egg
· Red food coloring
· ¼ cup red decorator’s sugar
· 24 pieces MILKY WAY® Minis
· 1 tube vanilla frosting

Directions:

Combine the flour, baking soda and cinnamon in a medium bowl. Set aside.

Beat the butter and sugar in a large bowl with an electric mixer until light and fluffy. Add the egg; beat well. Slowly add the flour mixture into the dough until blended. Add enough food coloring to tint the dough a bright red. Cover the bowl with plastic wrap, and refrigerate at least 2 hours.

Preheat oven to 375°F. Line the cookie sheet pans with the parchment paper.

Using a rolling pin, roll out the dough on a lightly floured surface to 1/4-inch thickness. Use a cookie cutter to cut out 24 lip shapes. Otherwise, you can form the dough into 24 balls and flatten each slightly to create free-form shaped lips using your hands to pinch and shape the dough. Transfer these to the prepared cookie sheets. Re-roll the scraps if necessary.

Sprinkle the cookies with red sugar. Bake 7-10 minutes, or until golden brown. Remove from the oven, and immediately press a MILKY WAY® Minis into the center of each cookie.


Sophia pressing the candy bars onto the cookies.

Cool completely.

Cookies cooling before they are frosted.


Use vanilla frosting to pipe fangs over the candy.

Finished vampire cookies.


Tip: If short on time, consider using store-bought refrigerated sugar cookie dough. Begin by kneading 2/3 cup of flour into the dough, then roll and cut according to the above directions. One roll of cookie dough makes approximately 18 cookies.

Note: The cookies themselves don't have a lot of flavor. I also realized after we baked them that we forgot to put the decorator sugar on them so they aren't as sparkly as the original pin.

Having a lip-shaped cookie cutter also would have lent itself well to doing this recipe. We used an image of lips that we found on the internet that were about 4 inches wide. After we printed and cut out the image, we cut the dough using the image and a sharp knife. A cookie cutter would have been much easier and helped with consistency in appearance.

Language Arts

Both Sophia and Olivia did a vampire word find. They enjoyed doing this activity in the afternoon.

Sophia also did a vampire crossword puzzle based on the book Twilight. She was able to do most of the crossword puzzle, but couldn't figure out all the clues because she didn't see the movie.


Service Project 

We donated Band-aids to the food shelf. In addition to collecting food, non-perishable food items - like Band-aids are accepted as well.

Band-aids that we donated.

Other non-perishable items (e.g., detergents, cleaning products, toilet paper, soap, shampoo, any other products that are non-perishable) are equally as important as food because families in need still need these items, but a limited budget may make it challenging to purchase them.