Saturday, September 22, 2012

Take a Stitch Tuesday - Whipped Running Stitch - Week 38

The 38th week for Take a Stitch Tuesday was supposed to be the drizzle stitch. The stitch requires threading and unthreading the needle; looping the thread around one's finger; and re-threading the needle to create a stitch similar to the cast-on stitch that I learned a few weeks ago.

Just looking at the stitch, I know that I will never use it. It sits up from the fabric - like a little caterpillar...but not as cute. The stitch seems more work than it's worth, particularly since I don't create a lot of underwater scenes or images of coral with my embroidery (both are common ways the stitch is used).

Instead, I looked at some embroidery websites and found an easy stitch that I could see using in a decorative way with quilting and embroidered items I make. It's called the whipped running stitch.

\
Whipped Running Stitch.

In contrast to the drizzle stitch, the whipped running stitch is very basic. It's a good stitch for people who are learning how to embroider or who are looking for easy stitches to do that don't require a lot of concentration.

At this point of the year, I need basic, easy things. Nothing complicated. I want to do stitches that I know I will enjoy doing in the future. The whipped running stitch is definitely one of those type of stitches.


As with other weeks, I created a two-page journal entry with personal reflection, list of things for which I'm grateful, the name of the stitch, and images that reflect the happenings of the week. The images and what they represent include:

=> Two doves - autumn is a challenging time period so this is a reminder to take care of myself and seek peaceful activities and thoughts.
=> Cat stamp - ties into one of the things I'm grateful for relates to the pets.
=> Pegasus constellation stamp - reminds me Thursday morning when I sat outside for about 45 minutes; and enjoyed the constellations and planet in the eastern sky.
=> Bird stamp - some of the birds are now migrating south, but the birds that stay here during the winter are visiting the feeders and bird bath more that the weather is getting chillier.
=> Flowers - the annuals that are by the back door are still so colorful and pretty. I'd like to plant annuals there again. It has been so nice to see a lot of bright colors each time I go in and out of the door; or let the dogs outside and bring them back inside again.

3 Things that are Important to Me

When I thought about the three things that are important to me, I thought of many different things:

=> Compassion
=> Gratitude
=> Kindness
=> Happiness
=> Animals and birds (domestic, livestock, and wildlife)
=> Nature
=> Peace/peaceful environment in which to live
=> Creativity and creative inspiration
=> Art (visual, music, dance, and theater)
=> Laughter
=> Sharing
=> Forgiveness
=> Spiritual inspiration and growth
=> Volunteering to make a difference locally and globally
=> Time comfortably spent alone to balance time spent with others (this is vital for introverts, like me)
=> Knowledge/wisdom

However, if I had to narrow it down to only three things of importance, my top three things would include:

=> Basic needs. Nothing extravagant or wasteful...just enough to get by would be fine with me. Just as long as I have oxygen to breathe; enough food and water; clothing; and shelter...I'm content.

=> Basic self-affirmation. For me, this includes having a loving family; connections with others; and a purpose for living.

=> Good health. Although good health isn't something that is guaranteed at any age, as I get older, this seems to take on a new meaning. Particularly as I age and have seen my parents get into their 70s and 80s, the things that I take for  granted now - my memory/mind, mobility, eyesight, good blood pressure, healthy heart - all are things I hope to have when I am older.


Whey Beyond the Naked Truth

A Crafter’s Dream Christmas Giveaway

I'm so excited to bring you, along with My Merry Messy Life, Earning-My-Cape, and Tutus & Tea Parties, A Crafter's Dream Christmas Giveaway! 

This is a group giveaway opportunity with a Christmas, crafting, and supporting small business theme! Each blogger is offering her/his own giveaway worth $25 or more. It will run from October 21, 2012 to November 4, 2012 and bloggers, as well as shop owners, are welcome to sign up to join in the celebration. 

Bloggers who are not crafters and shop owners who are not bloggers can still join the giveaway by pairing up together! If you need help finding a shop or blogger to link up with, My Merry Messy Life, Earning-My-Cape, and Tutus & Tea Parties will do their best to help.  


About our theme:

With Christmas just around the corner, the time to start crafting gifts for family and friends is now. Some of the blogs in the giveaway group will be giving away some wonderful craft supplies. 

Sometimes we want to give a handmade gift, but just don't know how to make it or have the time to do it. This is a great opportunity to support shops and small businesses who offer handmade items. Some of the blogs in our giveaway group will be highlighting small businesses and offering giveaway items from them as well. For example, Harvest Moon by Hand will be offering a handmade item from its shop.

Even if you don't win the giveaway, we hope that you will keep these small businesses in mind when shopping for that perfect gift for your special someone.

Here is how it will work:

Bloggers:
  • Each blogger will run their own unique giveaway, worth at least $25 or more, on their own site using Rafflecopter as the entry form. Please set your Rafflecopter to start at 12:01am October 21, 2012 and end at 12:01am November 5, 2012. You have total control over what you would like to give away (as long as it ties in with our Christmas/craft/small business theme) and to whom (country). 
  • Please announce that you have joined on Twitter using this hashtag - #ACraftersDream, and/or make the announcement on your Facebook Page.
  • Facebook Group - (this is optional) find our group, A Crafter's Dream Giveaway Group, on Facebook and request to join (you must be using Facebook as your actual name and not through your blog page for it to work)
  • Please write a post announcing you have joined the giveaway, and include the html from the form that you will fill out.
  • Grab the giveaway button and put it in a prominent place to promote it on your site! The more bloggers who sign up, the more entries we ALL get!
  • Please fill out this form to get started.

Shop Owners:
  • You can team up with a blogger on your own, or we can help match you with a blog to sponsor with a giveaway item worth $25 or more, from your shop.
  • Please announce that you have joined on Twitter using this hashtag - #ACraftersDream, and/or make the announcement on your Facebook Page.
  • Facebook Group - (this is optional) find our group, A Crafter's Dream Giveaway Group, on Facebook and request to join (you must be using Facebook as your actual name and not through your blog page for it to work)
  • Please fill out this form if you would like help being paired up with a blog.
Bloggers, please enter your blog link below.


P52 Photo Challenge - Birds/Flying - Week 38

This week's theme for the P52 Photo Challenge is Birds/Flying. I liked the theme this week because bird watching is something that I enjoy doing each day.

We have 11 feeders at the farm. The majority are hanging in the trees. However, there is one large feeder on a table by the family room window that has both vertical and platform seed feeders as well as a suet feeder; and another platform feeder on the mudroom roof which is next a window where we do homeschooling for the majority of the day.

There have been quite a few birds at the feeders and bird bath recently. Some are migratory birds that are heading south for the winter, while others are year-round birds who stay and brave the cold, Minnesota winters.

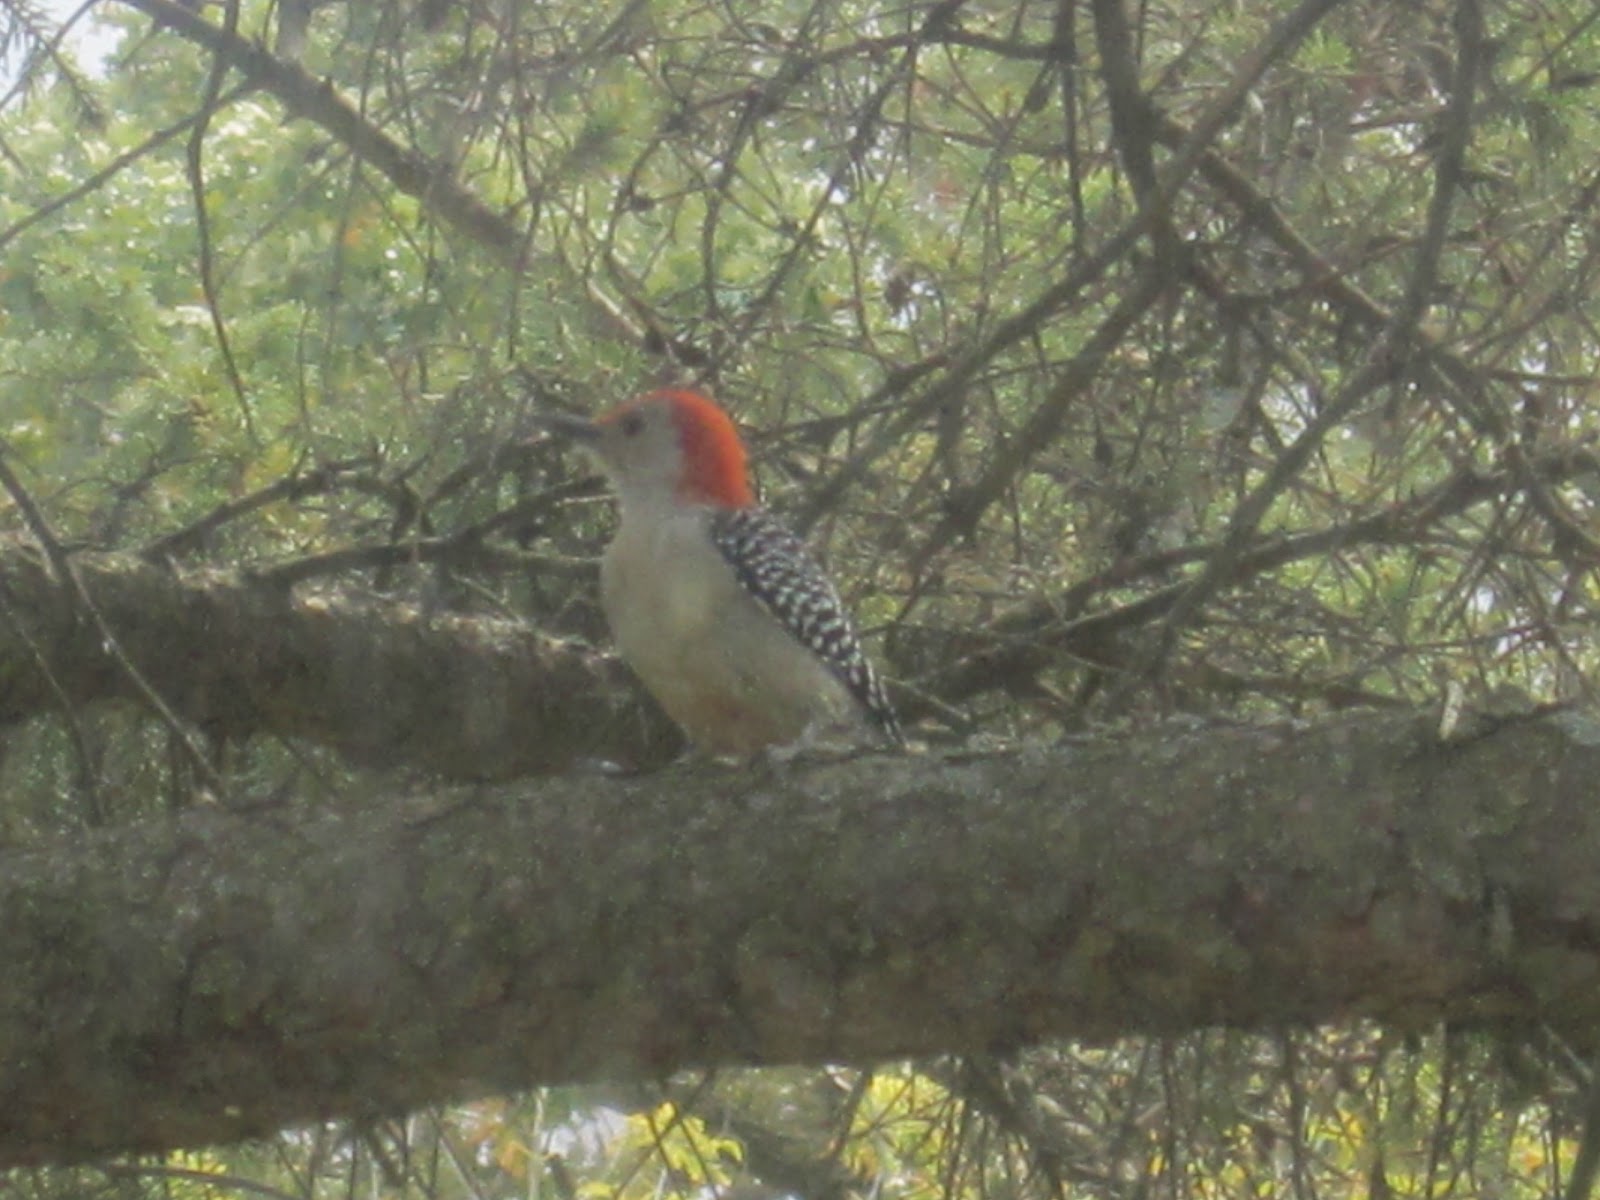
Red-bellied woodpecker that enjoyed drinking
from the hummingbird feeder.
He stayed at the feeder for a long time. 
It was a surprise - and joy - to find him there.

We still have the hummingbird feeder up in the pine tree in the backyard. It will stay there until the nights get too cold to keep the sucrose mixture in liquid form. At that time, I'm hoping that all the hummingbirds are in much warmer locations.

Until then, the hummingbirds are sharing their feeder with butterflies and much larger birds who seem to enjoy the extra energy the sucrose mixture gives them on these cool autumn days.

Project 52 - p52 weekly photo challenge with Kent Weakley

Friday, September 21, 2012

Miniature Peach Pies

I came across an image for miniature cherry pies that were made in muffin tins, and thought that they it would be a good starting point for homemade peach pies.

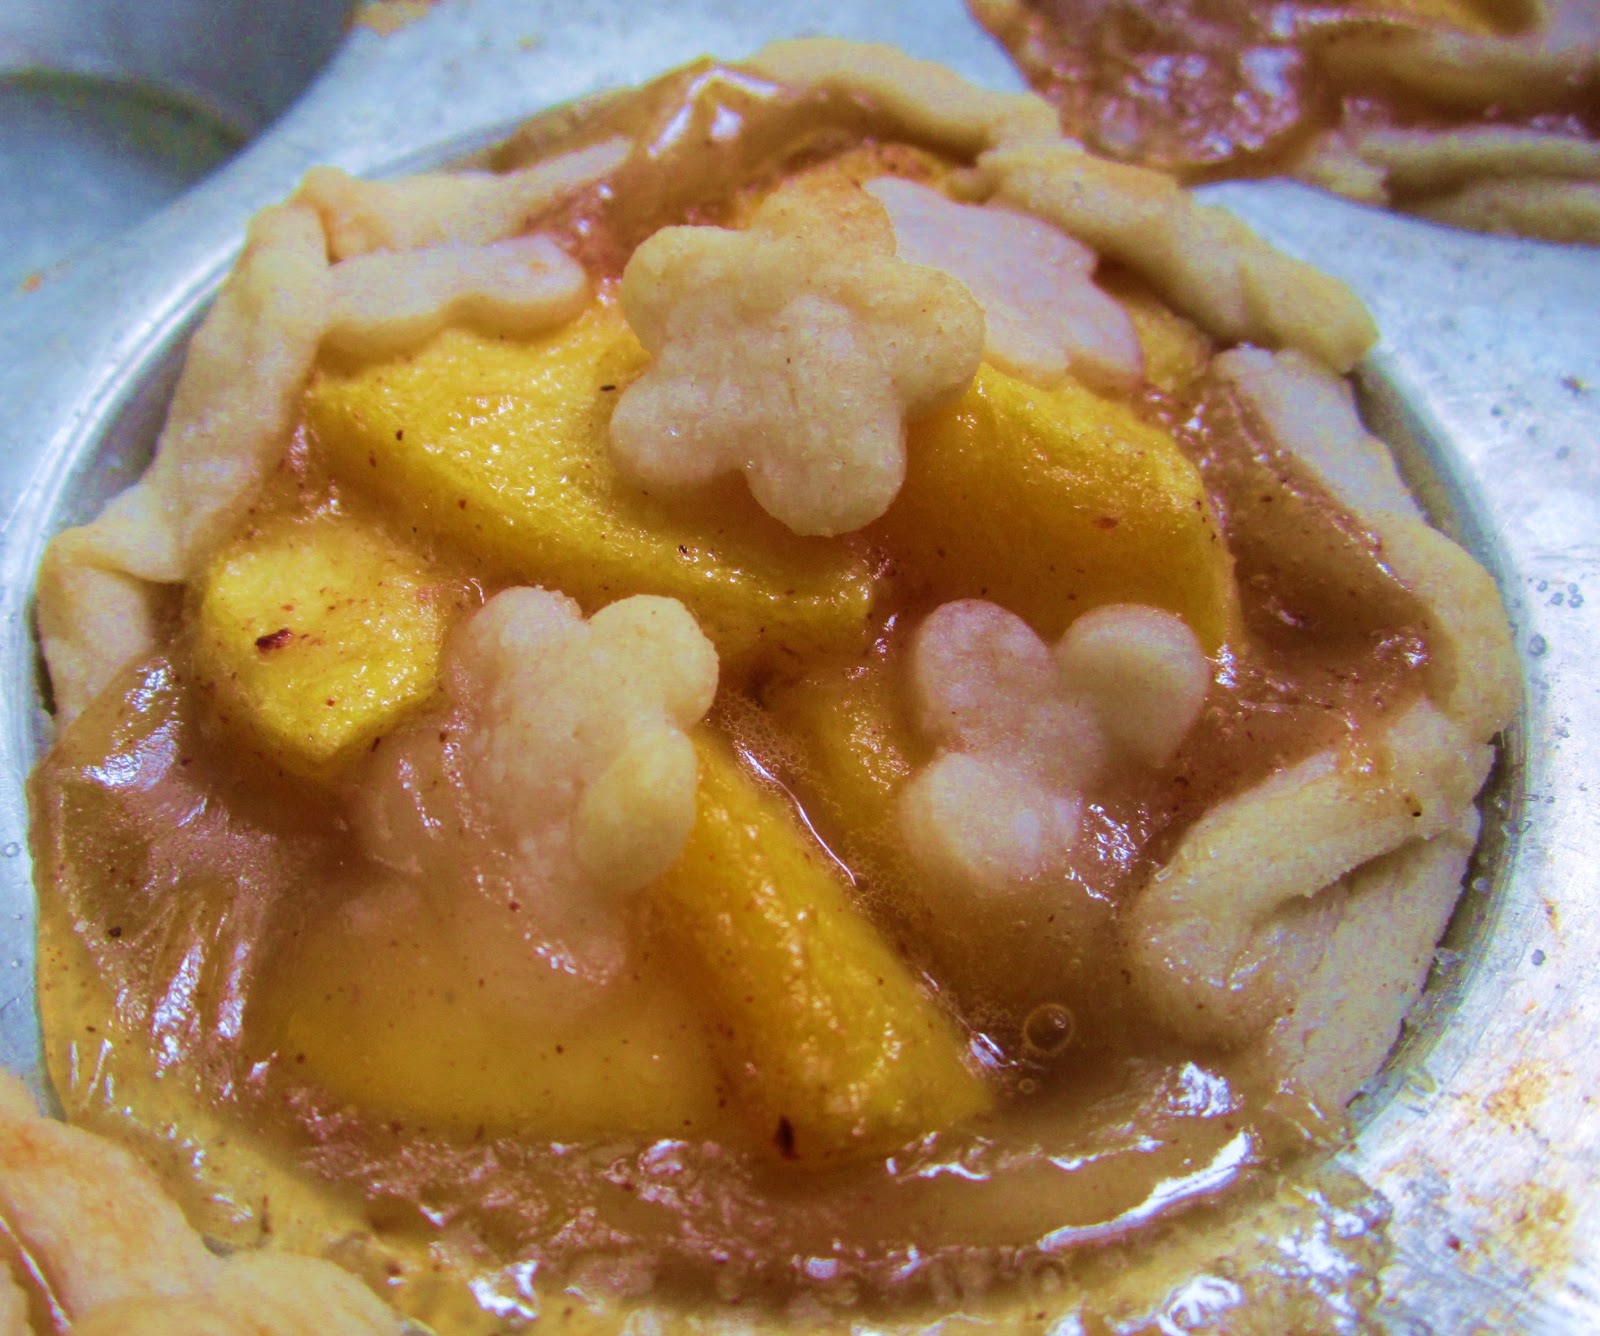
Miniature peach pie that Sophia made.

So, I started with making a recipe for the pie crust. The original recipe on Adventuress Heart used a recipe that she found in Matha Stewart Living. However, my grandma had an excellent pie crust recipe that she used when she was a baker, and I have used it as well for 30+ years.

Pie Crust Ingredients

1 cup lard
3 cups flour
1 teaspoon salt
1 tablespoon sugar
½ cup very cold water

Pie Crust Directions

Make pie crust by combining all the ingredients except water. Mix well. Gradually add a little bit of water at a time until the ingredients form a ball of dough.

Turn out dough onto a clean work surface. Divide in half, and place each half on a piece of plastic wrap. Shape into flattened disks. Wrap in plastic, and refrigerate at least 1 hour or overnight. The dough can be frozen for up to 1 month; thaw overnight in the refrigerator before using.

The next step was to make the pie filling. I used a recipe from my Betty Crocker cookbook.

Pie Filling Ingredients:

6 cups sliced fresh peaches (6-8 medium)
2/3 cup sugar
1/3 cup all-purpose flour
1/4 teaspoon ground cinnamon
1 teaspoon lemon juice
1 tablespoon margarine or butter (we didn't use this)

Pie Filling Directions:

Mix sugar, flour, and cinnamon in a large bowl. Stir in peaches and lemon juice.

Miniature Peach Pies Assembly:

The little pies are made in a cupcake pan. No greasing or spraying is necessary. Just cut the dough and put it right in each spot. We used a small bowl to create a circle and then a knife to follow around the indentation.

Olivia assembling one of her miniature peach pies.

For the top crust, we used a smaller measuring cup to cut the circles (1/3 cup worked well). Once the circle of dough is cut out, you can make it any design you prefer - lattice, plain crust, or crust with decorative designs.

If you would like, use some eggwash to create a nice sheen on the little pies before baking. (We skipped this step, and opted for just sprinkling some sugar on top which was fine...it saved an egg that can be used for something else.)

Bake at 425 degrees for 20-30 minutes. (We set the timer for 15 minutes and began checking it every five minutes at that point until the pastry was crispy and browned.)

One of Olivia's peach pies.

Thoughts:

The original picture of the miniature cherry pies is certainly eye-catching. Although the taste of the miniature peach pies was excellent, the presentation is definitely lacking. I have absolutely no idea how those little pies came out so perfectly from the cupcake pan.

Also, the miniature peach pies were a lot more work than a traditional pie. In the future, I'm sticking with the standard size pie or finding reusable miniature pie tins in which the person can eat from them rather than having to remove the little pie from a muffin tin.

Four of the miniature peach pies 
ready to come out of the muffin tin.

My mom used to do this with apple pies - making and freezing lots of little single-serving ones. However, the single-serving pies my mom made were larger than the muffin tin sizes we made today. Perhaps there's something new that has been created in the past 30 years that would address this issue.


Addicted to Recipes Button, Page button

Red Birds (Robins, Cardinals, and House Finches) - Outdoor Hour Challenge

During our third week of homeschooling this year, we focused on learning about the red birds that we see around the farm (robins, cardinals, and house finches).

Using the Handbook of Nature Study as well as the Outdoor Hour Challenge about red birds, I shared the following information with Sophia and Olivia:

Robins

=> A few robins can find food to nourish them during the northern winter, but for the most part they go in flocks to the southern states where they live mostly upon fruits and berries.

First Robin of the Season
The first robin of the season in the apple tree.
(Taken on March 21, 2008.)

=> They do not nest or sing when the live in the South.
=> Father robin is more bold in his color than his mate. His beak is yellow, there is a yellow ring about the eye, and a white spot above it.
=> Mother robin has a paler back and breast and no black upon the head.
=> The songs are best heard in the early dawn and in the evening.
=> The robin's nest has a lot of strong grass, fine straw, leaves, and rootlets. The female bird will use soft mud to create the nest, and then molds it to her body by turning around and around.

Robin Building a Nest
Robin bringing materials back to her nest.
(Taken on April 22, 2011.)

=> There are generally four eggs which are greenish blue in color.
=> Both parents share the monotonous business of incubating.

Robin Sitting on her Nest
Robin sitting in the nest in the oak tree.
(Taken on April 30, 2011.)

=> Both parents feed the young and often the father feeds the mother bird while she is brooding.
=> Young robins eat about 68 earthworms daily. If the worms were laid end to end it would measure 14 feet.
=> The young birds' eyes open when they are 6-8 days old.
=> At 11 days, they are pretty well feathered.

Juvenile Robin
A juvenile robin we saw in South Dakota.
(Taken on June 9, 2012.)

=> Robins don't sing much after the breeding season is over until after they have molted.
=> They are fond of cherries and other pulp fruit.
=> The chief enemies are cats, crows, and squirrels.

Cardinals

=> The cardinal gets its name from the dress of a high functionary of the church.
=> Its beak is thick and large. It also is red in color - a rarity in beak color. It is framed in black feathers which makes its beak stand out more.
=> The beak is so strong it can crush the hardest of seed shells or driest of grains.
=> The cardinal is smaller than robin.
=> The only bird that rivals the cardinal in redness is the scarlet tanager which has black wings.
=> The crest is useful in expressing emotions. When all is serene, it lies back flat on the head. However, if there's any excitement - joy, surprise, or anger - it lifts until it is peaked as an old-fashioned nightcap.

Cardinal and Chickadee
The cardinal with a black-capped chickadee at one of the feeders here.
(Taken on February 22, 2011.)

=>  The cardinal's mate is of quiet color.
=>  Both the males and females sing. Most female birds don't sing, so this is an unusual trait of the female cardinal.
=>   The nest is built in bushes, vines, or low trees. The nest rarely goes more than 6-8 feet above the ground; and is well-hidden wherever it is located.
=>  The nest is made from weed stems, tendrils, twigs, bark of the grapevine, and coarse grass. It is lined with fine grass and rootlets.
=> Three or four eggs are laid; and they are bluish white or grayish with dull, brown marks.
=> Father cardinal is an exemplary husband and father. He care for and feeds his mate tenderly and sings to her gloriously while she is sitting; and he works hard catching insects for the nestlings.
=> The male cardinal also is a brave defender of his nest and will attack any intruder, however, large, with undaunted courage.
=> While the female bird is hatching the second brood, the father keeps the first brood with him and cares for them. Often the whole family remains together during the winter, making a small flock.
=> The food consists of weed seeds, corn, wheat, oats, grasshoppers, beetles, and flies. They also will eat garden and wild berries.

Some Birds Feeding
A male cardinal with dark-eyed juncos eating some seeds.
(Taken on December 19, 2010.)

=> To get cardinals to visit, put some corn out on the ground. They actually prefer to stay in location for the summer and winter, so this will encourage them to stay in one spot.

Birds Feeding on the Snow
Cardinals eating some seed we spread out on the snow in the backyard.
(Taken on December 11, 2010.)

House Finches

(These facts are from Wild Birds Unlimited since the Handbook for Nature Study didn't have a section about house finches.)

=>Male house finches display a wide variety of plumage coloration ranging from gray to bright crimson. The coloration comes from carotenoid pigments found in some wild foods. The more pigment present in the foods eaten when they are molting new feathers…the redder the male.
=> House finches roost at night in close proximity to each other. They sometimes huddle together for warmth; and often repeatedly use their favorite roosting spots.

House Finch
House finch on a branch.

=> House finches like nectar and can become quite a nuisance at hummingbird feeders. If that happens, simply offer them a dish of nectar for their own use.
=> To attract house finches, provide a water source for them. They can drink up to 40% of their body weight on a hot summer day.

Male House Finch having some nectar.
House finch at a hummingbird feeder.

=> House finches are almost vegetarian feeders. In fact, about 97% of their diet is made up of vegetable matter including buds, fruits, and seeds.
=> At feeders, where they can be frequently seen, they prefer small sunflower seeds.
=> House finches’ diets are the most vegetarian of any North American bird. Unlike most other seed eating birds, finches don't switch to eating insects during the summer nesting season. They continue to eat mostly seeds. That being said, when insects are abundant, they will eat some of them.
=> House finches rarely use bird houses to build their nest in. Rather, they prefer ledge, coniferous trees, street lamps, hanging planters, and ivy on buildings.
=> House finches generally produce at least two broods each nesting season.
=> A few female house finches have laid a second clutch of eggs several days before fledging their young from a previous brood. This may be due to the male bird's predominant role in raising the young from the earlier nest.

Outdoor Hour Time

We went outside for about 20 minutes to see if we could find any robins, cardinals, and/or house finches. While we were outside, we also filled the bird feeders.

Sophia and Olivia filling a bird feeder.
(Taken on September 21, 2012.)

The only birds we saw when we were outside were black-capped chickadees who seemed very interested in watching us fill the feeders. They flew to branches and watched us for awhile, and then flew off and would sing in a nearby tree.

Nature Journal

The girls each did an entry in their nature journals about red birds.

Sophia's nature journal.
She has her own 8 1/2" x 11" spiral-bound notebook.
The pages are all white so she can draw, glue images in it, or
include nature photographs she has taken.

They each wrote key facts they wanted to remember about cardinals, robins, finches, and/or red-bellied woodpeckers. The images are from magazine clippings I had accumulated throughout the years.

Olivia's nature journal entry about red birds.
She included three images - two of cardinals and one of a robin.
She also liked the poem about cardinals.
Olivia also has her own 8 1/2" x 11" blank book 
for her nature journal.

Bird Observations while Baking Peach Pies

After we came back inside and worked on our nature journal; we began working in the kitchen making miniature peach pies. Within a few minutes Sophia said, "Mom! There's a robin at bird bath." Sure enough, there it was drinking some water.

Robin on the edge of the bird bath and
two northern flickers on the ground.

Not more than a minute later, a couple of northern flickers flew and landed by the bird feeders and bath.

A northern flicker in the backyard.

Within five minutes, Sophia said, "Did you see that? A huge pileated woodpecker just flew by!" She went to the family room and out that window is a big feeder. Sitting right on top of it was the pileated woodpecker. Needless to say, she was very excited. (I wasn't quick enough to get a picture of it, unfortunately.)

We also saw another bird that has been visiting us often over the past week: a red-bellied woodpecker. It has been enjoying eating from the hummingbird feeder...of all places.

A red-bellied woodpecker in the pine tree.

Sophia, Olivia, and I continued to watch the many - and wide variety - of birds that visited the feeders and bird bath while we finished making the pies: blue jays, goldfinches, black-capped chickadees, and robins.

A blue jay sitting on top of the bird bath.

There was even a flock of mourning doves in the driveway. Normally we only see two at a time...never eight!

Mourning doves in the driveway.

Just as we were finishing our work in the kitchen, a bright red male cardinal showed up in the apple tree. 

Cardinal hiding in the tree.

He hopped from branch to branch as he made his way closer to the feeder. Hopefully he will find the freeze-dried meal worms that we left on the feeders. It will be interesting to see if he and the other birds enjoy this surprise treat.

All in all, it has been a fun afternoon watching the many birds who ate at the feeders and drank water or took a bath in the bird bath.

Stuffed Pizza Rolls

Recently, Sophia, Olivia, and I came home after their equestrian vaulting lesson and we needed to make something quick for dinner. On my meal plan for the week, I had put stuffed pizza rolls for dinner.

I saw a picture of these homemade pizza rolls, and clicked over the Six Sisters Stuff where there was a recipe for Stuffed Pizza Rolls. The site noted that the recipe originally was from Our Best Bites.

Stuffed Pizza Rolls that we made.
They were very good; and 
we will definitely make them again.

They are sometimes called "inside out pizza" because the pizza ingredients are tucked inside the dough. The pizza or dipping sauce makes these great appetizers or snacks. However, for us, this ended up being dinner.

Ingredients

1 roll refrigerated pizza dough (we used one loaf of frozen bread dough)
2 tablespoons grated Parmesan cheese
1 tablespoons olive oil or melted butter
1/2 teaspoon garlic powder
1 teaspoon dried Italian seasoning
Mozzarella cheese, diced or grated
Pizza toppings of your choice (e.g., onions, peppers, sun-dried tomatoes, pepperoni slices, sausage, mushrooms)
Marinara or pizza sauce for dipping (we used spaghetti sauce)

Directions

Preheat oven to heat specified on pizza dough package (we heated the oven to 400 degrees).

Unroll the pizza dough onto a lightly-floured surface. Roll the dough so it's about 12" by 8." Using a pizza cutter, cut the dough into 24 squares. (Note: in retrospect, the pizza dough may be easier to use. The frozen bread dough, though thawed, didn't roll out as easily. We also didn't get 24 pieces - we got 12 pieces of dough from one loaf of frozen bread dough.)

Place cheese and desired toppings on each square. (Remember not to put the marinara/pizza sauce on the dough - it's for dipping once the rolls are baked). Keep in mind that you want to use some restraint with the toppings since you need to be able to enclose the toppings in the dough.

When all of the dough squares have toppings and cheese on them, carefully pull up the edges of the dough and wrap it around the toppings. Pinch to make sure each ball is sealed completely. Then, place each pizza roll seam side down in a lightly-sprayed pan. (Note: we used three different small pans so we knew who made each pizza roll.)

Brush the tops of the dough balls with melted butter or olive oil. (Since we were trying to make dinner quickly, we simply use the spray oil over the top of the dough balls.) Sprinkle with garlic, Italian seasoning, and Parmesan cheese. (Note: Olivia chose to skip the toppings; and Sophia and I chose the garlic powder and Parmesan cheese.)

Bake the stuffed pizza rolls in the oven for about 15-20 minutes or until golden brown on top. (Note: We set the timer for 10 minutes, and then kept checking on them every two minutes until they were golden brown.)

Serve warm with warmed pizza or marinara sauce on the side for dipping.

Stuffed Pizza Rolls with dipping sauce.


Photobucket

3 in 30 September Update - #3

This is the progress I made on my 3 in 30 goals for September:

1. Organize fabric. Most of the fabric I use for projects are in bins grouped by color. However, there are some pieces of fabric that are in bags that I want to put in the bins. Also, I'd like to go through all the fabric and donate the pieces I don't care for any longer and/or plan to use.

Homeschooling took the majority of my time this past week. Also, on two days there were a variety of servicemen who were here fixing and/or installing things around the home due to water damage; and trimming  trees outdoors. I'm very pleased with all the things that were done with homeschooling and home repair. 


One of the guys who did the tree trimming used this fork lift
to move trimmed branches and limbs from the trees to the fire pit.
By the time they were done trimming trees, the fire pit 
grew to be about 10' wide x 12' tall. 
There's going to be a BIG fire once more rain falls and 
it is safe to have fires again.

I want to organize all the fabric by the end of September. I plan to work on this on tomorrow and Sunday so this project can be crossed off my list.

2. Begin to organize taxes. Last month when I cleaned my office, I came across an expandable file. I had set it up one year to put receipts and other documentation in for each category for taxes (e.g., health care, mortgage payments, homeschooling expenses). I'd like to take what I have saved thus far and put them in the appropriate categories to make tax-time easier in 2013.

I completed this task last week.

3. Plan meals for the month. Sophia will be making food as part of her Eastern Hemisphere curriculum; Olivia will be making food as part of Five in a Row; and both the girls will be making food as part of the Cantering the Country curriculum (U.S. geography).  So, each week there are more lunches and dinners being prepared through homeschooling than there are from what I have on hand. 

I need to schedule these homeschooling meals and balance them out with food that I make so that the girls aren't cooking for each of the meals. This also will use items that we have on hand so we aren't wasting food.


On Sunday of the third week of September, I created a meal plan for the third and fourth weeks of the month. The recipes were from cookbooks that tie into three curricula we're using: Five in a Row, Cantering the Country, and Sonlight's Eastern Hemisphere. I also used Eat Your Way through the U.S.A., and two Chinese cookbooks.

Egg rolls that Sophia made this past week.
This was part of her Eastern Hemisphere study.

Unfortunately, after doing the meal plan I balanced the checkbook and then looked at anticipated costs during the upcoming week (I had several home repair jobs scheduled to address water damage issues).

Needless to say, I had to re-do the meal plan and look at the food that I had on hand. If I could substitute or skip an ingredient or two in a recipe, then it remained on the meal plan. If it needed key ingredients that I didn't have on hand, then it is scheduled during October.

Although this was frustrating, it also has been a way to use up what I have on hand and be creative in the kitchen.

Some of the new recipes we tried this past week included stuffed pizza rolls:

Stuffed Pizza Rolls. 
All the pizza toppings are inside the buns.
The topping is garlic powder and Parmesan cheese.
To eat, we dipped the pizza rolls into warm pizza sauce.

and paella:

Olivia made paella to tie into the book Ferdinand
(a book that is part of the Five in a Row curriculum). 
This is a child-friendly version of paella 
with chicken, shrimp, and pepperoni. 
Traditional versions have more varieties of seafood that 
typically aren't available (or fresh) in Minnesota.

Thursday, September 20, 2012

Take a Stitch Tuesday - Pistil Stitch - Week 37

The 37th week for Take a Stitch Tuesday features the pistil stitch. The stitch essentially is a French knot with a tail. I had delayed learning this stitch because I thought it would complicated. French knots are not my strongest embroidery skill.

Yet, for some reason, the pistil stitch is an easy stitch to learn and do. It lends itself well to flowers as well as tails of birds or feathers on top of a quail's head.

Close-up of the three flowers I did using the pistil stitch.
The background is wool felt; and 
the flowers are done with cotton embroidery floss.

I chose to do a trio of flowers using the pistil stitch. Although I normally do two different small samplers, I am   - most likely - going to do only one from this point forward.

Even though the samplers are small, learning a new stitch takes some time and now that homeschooling has resumed for the new school year, my time is limited. I would rather do one sampler and stay on schedule than do two and fall behind.


As with other weeks, I created a two-page journal entry with personal reflection, list of things for which I'm grateful, the name of the stitch, and images that reflect the happenings of the week.

The corgi and stamps represent my dad. His favorite dog was a corgi, and we had two of them when I was a child. Collecting stamps was something my dad introduced me to, and I have passed along stamp collecting as a hobby to Sophia and Olivia.

The two leaves represent the changing colors I'm seeing. The maples and sumacs are my favorites - with their orange and red leaves.

I'm finding that my stash of images to add to my journal is diminishing. That was one of the goals of doing the embroidery journal (to use up what I had on hand). Although I would like to have a wider variety of images and things to work with...it is nice to be using up supplies rather than just having them sit on a shelf. Eventually, this will create more space in the closet which will be good.

Fruit and Yogurt in Wonton Cups

This month, Sophia is learning about the Eastern Hemisphere as part of her history/geography lessons. The focus for the first six weeks is on China. One of the things she made was wonton soup.

We had some wonton wrappers that we didn't use, and I came across this pin from Super Healthy Kids. Thought it would be a good way to use up the wrappers.

The Fruit and Yogurt in Wonton Cups can either be used as a healthy mid-afternoon snack or a dessert. With only a few ingredients, it is something that children could make as well. (A parent may want to make the wonton cups ahead of time so the child only has to assemble the ingredients.)

Fruit, yogurt, and granola all tucked into wonton cups.
These little snack bites that I made for dinner one night
were gone in minutes!

The first step is making the wonton cups. I sprayed a mini-muffin tin, and then pressed a wonton wrapper into each space. The original recipe said to bake at 375 degrees for about 8 minutes until they started to turn golden. At about 6 minutes, they were starting to turn golden.

After the wonton cups cool, fill each one with:

=> Yogurt – I used strawberry-banana yogurt.
=> Granola – Just a little bit.
=> Fruit – I used diced kiwi, blueberries, and strawberries.

Easy, quick, and delicious! They are the perfect snack or dessert for children and adults alike.

What are some ways that you get your children to eat more fruit?

10 Motivational Quotes

These are ten quotes that I find inspiring: