Wednesday, October 31, 2012

12 in 12: October Update

During 2012, Sophia, Olivia, and I are doing a special challenge that we've named 12 in 12. We are doing 12 different activities that help people in need, animals, or the environment. 

This is how we did during October: 

- Take 1 bag of food to the food shelf. This month we decided to donate boxes of bandages instead of food. Non-food items are needed as much as food since often times these necessities are as difficult to purchase on a limited income.


Olivia with the boxes of bandages.

Most likely, the food shelf will divide the boxes into smaller units so more families can have some bandages on hand.

- Volunteer 1 hour at a community organization that is chosen each month (can be the same one or different one).

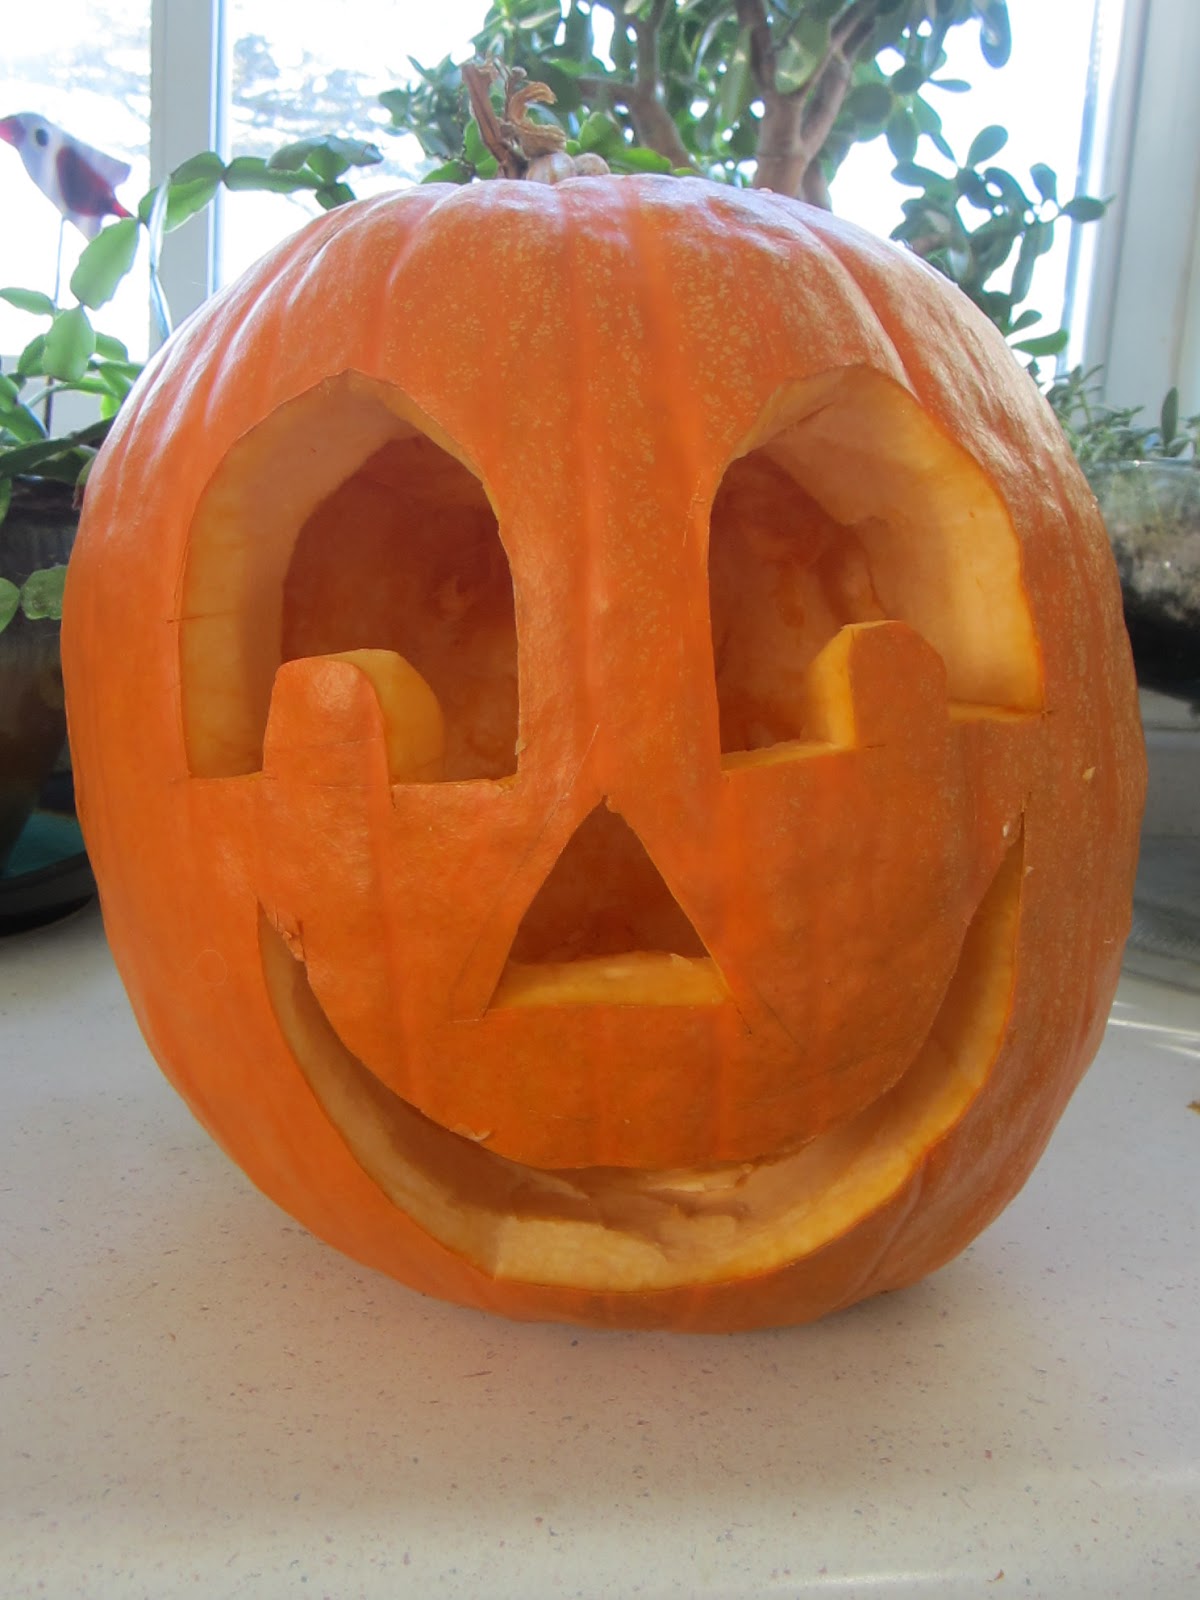
This month the girls carved pumpkins at their 4-H meeting with other club members. This is a project that the girls have done for several years now that they enjoy doing.

Sophia carving a pumpkin.

Last year when we delivered the pumpkins, we were told that the ones with the happy faces would be used in the courtyard by the unit where people who have Alzheimer's Disease and dementia live. The scarier-looking pumpkins can often frighten the residents, so they like to display happy things in this unit.

Olivia carving a pumpkin.

On a personal note, I was happy to see there were quite a few happy pumpkins this year. This is an issue close to my heart since my Dad (the girl's grandfather) had Alzheimer's Disease and died earlier this year (on January 5, 2012).

On Wednesday, we - along with another family from the 4-H club - brought the pumpkins to Parmly Care Center and put them in various courtyards.

The girls with another 4-H club member.
They are in one of the courtyards at Parmly Care Center
where they placed the pumpkins that club members carved.

Both the staff and residents were delighted to see the pumpkins, and were so appreciative of the children's efforts.

Olivia by the pumpkin she carved.

The other project we did was volunteer at the Sharing Shop and helped get the quarterly sale set up. The shop and sale is sponsored by a local church.

Throughout the year, they collect clothing and household items.  Then, each quarter they offer a giveaway in which anyone who comes in can take a bag of clothing for free. Additional bags are only $1. If you volunteer, you are able to take as many bags of clothing and other items that you need.

Sophia zipping up a coat before she puts it on the rack.

We were assigned to work on coats and winter wear. There were at least five racks and a table packed with coats, ski pants, hats, and gloves by the time we were done.

Olivia going through the coats and 
determining what size hanger should be used.

The fellowship hall was filled with tables and racks of items, and ready for the public by the time we left.

- Donate 1 bag of clothing to a second-hand shop.

We went through the girls' coats from last year and donated ones that they no longer could fit into. These were donated to Family Pathways.

Two bags of clothes that were donated to Family Pathways.

They also found a small bag of clothing that they no longer needed that they were ready to pass along to others who may need the items.

Donate 1 bag of toys and other non-clothing items to a second-hand shop.

The larger black bag in the photo above included some household items that we no longer needed.

- Donate 12 books that we no longer read to organizations needing books.

We donated 35 books to Family Pathways. These were books that were not ones we could use for the library that we are creating in Lesotho, Africa, through the African Library Project.

35 books that were donated to Family Pathways.

- Donate $12 to an organization that helps individuals, animals, or the environment.

This month we did a 13-day Countdown to Halloween. On one of the days we focused on owls. We decided to visit Warner Nature Center since they have owls there.

When we arrived, there was a volunteer who was working with the owls and raptors there. She came out with one of them, introduced us to it, and explained why it couldn't be released into the wild.

One of the owls at Warner Nature Center.

We chose to sponsor one of the raptors there by donating $20. Sophia wanted to pick the American Kestrel.

The kestrel arrived at the Raptor Center in August 2002 after being found on the ground after the tree he was in fell. A human took him in and raised him for a few weeks, but by that time he was already imprinted on humans. So, it now doesn't know how to hunt, defend its territory, or do other things a kestrel in the wild would do.

The donation will help provide food, shelter, and care to the kestrel over the coming year.

- Write 1 letter to someone who has made a difference in our lives.

I wrote an email to Tom H. who was my Dad's Stephen Minister. In the email, I included an excerpt of something my Dad had written when he was going through training to become a Deacon.

It reminded me of Tom's philosophy, compassion, and care he extended to my Dad when he was in the middle and late stages of Alzheimer's Disease.

Tom wrote back to me that what I wrote to him means more to him than I will ever know. My Mom said that he called her after receiving the email because he was so moved by what I wrote to him.

- Donate 1 bag of pop cans to places that collect them to raise funds.

We brought a bag of cans to the collector at Northwoods Humane Society. The collector nearing the top, so  once they bring it in they'll receive another sum of money in exchange for the cans.

The girls putting cans in the can collector.

The funds will help the kittens, cats, puppies, and dogs that are at Northwoods until they are adopted.

One of the many cats available for adoption.

Although there were many new animals at Northwoods this month, there were ones we saw last month who were still waiting for homes.

Olivia petting two of the dogs needing new homes.
The one on the left was found abandoned in a ditch with 12 puppies.
The one on the right is at Northwoods because the owner died.

It's always difficult to visit the animals, see ones who are so loving and would be wonderful companions, and then have to leave. Hopefully by the time we return the animals we visited will have found new homes.


- Donate 1 bag of Purina Kitten Chow to Northwoods Humane Society.

We donated a bag of Kitten Chow to help feed the kittens who are at Northwoods. We were surprised by the number of kittens who were there this month.

Sophia with the Kitten Chow we donated.

Normally, spring time is when there are significantly more kittens. However, there seemed to be quite a few waiting for homes this month.

This cat was so playful and kept sticking its paws
out through the bars. It was such a gentle cat.

As usual, there were many beautiful older cats also waiting for homes. They each had such distinct and delightful personalities.

- Spend 1 hour outdoors doing projects that help wildlife.

We continued to fill the feeders with seed and hummingbird food. Despite the fact that the hummingbirds have migrated, there are two types of woodpeckers who visit the hummingbird feeder regularly - a red-bellied woodpecker and downy woodpecker.

We also made a bird feeder from a pumpkin.

Two of the feeders we filled during the month.

A variety of birds have been visiting the feeder on the mudroom roof. There's a window next to the roof where we can watch the birds while we are homeschooling.

The pumpkin feeder was first discovered by and has been frequently visited by black-capped chickadees.

Some of the many birds that visit the feeder.
These pictures were taken within a half hour
when there was constant traffic to the feeder.

- Make and randomly drop off 1 toy for a child to find as part of The Toy Society. I made a hand-embroidered wool felt robin.

Hand-embroidered robin that I made.

It's the perfect size for little hands- it's small enough to fit into a child's palm.

Hand-embroidered toy ready for someone to find.

I put the robin on the periodicals shelf next to Parenting magazine. Even if an adult finds it, chances are that s/he has a child that would enjoy playing with the toy.

- Share 1 time the gift of music (piano and/or harp) or singing with others.

Sophia played the piano for her grandma when we visited her on October 14th.

Sophia playing the piano at her grandma's home.

Sophia also sang and played the wooden sticks at church on October 28th. Olivia wasn't feeling well, so chose not to perform this month.

Sophia performing at the October 28th service.


I expect to pass through life but once.
If therefore, there be any kindness I can show,
or any good thing I can do for any fellow being,
let me do it now.
~ William Penn ~ 

Tuesday, October 30, 2012

Countdown to Halloween - Pumpkin Theme

Today is the final day of the 13-day Countdown to Halloween. The theme for today is "Pumpkins." We did the following activities with food, nature/wildlife, and art:

Food

Pumpkin Ginger Bread

This pin is linked to All Recipes. We enjoyed this bread for breakfast. It is moist and has a subtle flavor - despite 5 teaspoons of spices.

It did take a long time to bake the two 9x5 inch loaves, so perhaps making it in mini-loaves or cupcake pans would shorten the time it needs to bake and keep the exterior as soft as the interior of the bread.

Pumpkin Ginger Bread that I made.

Ingredients:

3 cups sugar
1 cup vegetable oil
4 eggs
2/3 cup water
1 (15 ounce) can pumpkin puree
2 teaspoons ground ginger
1 teaspoon ground allspice
1 teaspoon ground cinnamon
1 teaspoon ground cloves
3 1/2 cups all-purpose flour
2 teaspoons baking soda
1 1/2 teaspoons salt
1/2 teaspoon baking powder

Directions

Preheat oven to 350 degrees F. Lightly grease two 9x5 inch loaf pans.

In a large mixing, combine sugar, oil and eggs; beat until smooth. Add water and beat until well blended. Stir in pumpkin, ginger, allspice cinnamon, and clove.

In medium bowl, combine flour, soda, salt, and baking powder. Add dry ingredients to pumpkin mixture and blend just until all ingredients are mixed. Divide batter between prepared pans.

Bake in preheated oven until toothpick comes out clean, about 1 hour.

Pumpkin Face Snack

There was a simple idea on The Creative Mama that showed a pumpkin face made from raw okra, goldfish crackers, raisins, and banana.

Sophia's pumpkin face.

Instead of using the okra, we put the banana top on Sophia's plate. Olivia chose not to have the banana top on her plate.

Olivia's pumpkin face.

Roasted Pumpkin Seeds


Some of the 6 cups of roasted pumpkin seeds 
that we made today.

We made roasted pumpkin seeds again this year. I saw a pin that was linked to a recipe in Hudson Valley Magazine.

Ingredients:

1½ cups pumpkin seeds
2 tablespoon olive oil or non-stick cooking spray
1 teaspoon salt (Note: this is a lot of salt. It could be halved easily and still taste great.)

Directions:

Separate seeds from pulp and strings. Rinse in water and pat dry.

Toss dried seeds in olive oil and place in a single layer on baking sheet lined with parchment paper. (Or lay flat on baking sheet and spritz with cooking spray.) Season with salt

Place in 325º F oven, stirring often to ensure even browning until a pleasant aroma is apparent (approximately 25 minutes).

Remove immediately and transfer to pan or plate to cool. May be stored in air-tight container for a few days.

Nature/Wildlife

There was a pin that suggested carving a pumpkin and filling it with birdseed.

The carved pumpkin ready to have the bowl of birdseed added to it.

Looking closer at the pumpkin, there was a shallow ceramic plant tray filled with seed in the inside so the entire pumpkin isn't filled with seed.

The bowl of birdseed. There's another bowl underneath the white one.
Surrounding the bowl are scraps from the pumpkin. 
This is to hold the bowl in place.

So, we carved a pumpkin and put it out next to one of our feeders that is by where we spend the majority of our time homeschooling.

The regular feeder and the pumpkin feeder. 
There's a chickadee in the pumpkin eating some seeds.

It was less than an hour before the chickadees found the feeder. Not all of the chickadees ate from the pumpkin, but many of them did.

Here's another chickadee eating at the pumpkin feeder.

Art Projects


Carving Pumpkins

As we do every year, we carved pumpkins. Olivia didn't know what she wanted to make when she began cleaning out her pumpkin. She manged to clean the pumpkin out using a spoon and not her hands. She, by far, had the cleanest hands out of the three of us.

Olivia cleaning out her pumpkin.

Sophia picked the tallest pumpkin so she could make a scary cat face. Her cat has fangs and long whiskers.

Sophia working on the face of her pumpkin.

Montague enjoyed watching the pumpkin carving process, and checked out everyone's work. He manged to take a couple pieces of pumpkin when we were focused on carving.

Montague making the rounds to see how everyone is coming along 
on their pumpkin carving.

 Gretel was more well-mannered and just watched us carve the pumpkins. Maybe she was thinking that if she stared at us long enough we'd buckle under the pressure and give her some pumpkin scraps. It worked. We did.

Gretel staring at Sophia while she worked on her pumpkin.

One by one, we finished the pumpkins.

My pumpkin.

When they were done, they went on the counter briefly.

Sophia's pumpkin.

Then we put them outside. Tomorrow they will be lit and we'll see what they look like glowing in the dark.
Olivia's pumpkin. She made a dog complete with big carved floppy ears on the side
and a tail on the back of the pumpkin.

It was a fun way to spend the morning.

Positive/Negative Pumpkin

Olivia's Positive/Negative Pumpkin.

Sophia and Olivia made a Positive/Negative Pumpkin. The pin links to Art Projects for Kids. Each one was given a square piece of black paper and an orange that is half the width of the black. With the orange lying on top of the right side of the black, the girls were to imagine the center line as the middle of a pumpkin.

Sophia cutting out the pumpkin shapes from the orange paper.

Starting on the middle line, they drew half of a pumpkin. Next, one eye and one half of a mouth were drawn. When complete, the eye and mouth were cut out, all as complete shapes, not bits and pieces.

Olivia placing the orange pieces onto her black sheet of paper.

The newly-cut shapes were flopped from their cut out positions, and then glued down with a glue stick.

Sophia's Positive/Negative Pumpkin.

Monday, October 29, 2012

Countdown to Halloween - Bat Theme

On the 12th day of the 13-day Countdown to Halloween, the theme is "Bats." Because the girls had their homeschool co-op today, we didn't have as much time at home to do a lot of holiday projects.

So, we focused on one recipe that we wanted to try: Bat Bites.

Sophia with the Bat Bites she made.

The pin links to My Recipes that says, "These bite-sized bats have an adult-friendly flavor from the goat cheese, cream cheese, and pesto mixture. The kids will love to shape the bats' bodies, decorate their faces, and give them wings. Keep it simple by preparing just about everything ahead of time."

Three Bat Bites that we made.

We chose to ship the goat cheese and just use cream cheese in its place. Also, we made only a half a batch (8 servings) rather than a whole batch since we didn't know what the recipe would taste like. After making it, we definitely would do a full batch next time.

Ingredients

• 4 ounces cream cheese, softened
• 8 ounces soft, mild goat cheese, at room temperature (we used cream cheese instead)
• 1/4 cup pesto
• 2 tablespoons coarsely ground black pepper
• 2 tablespoons poppy seeds
• 8 pitted olives, sliced (we used green olives with pimento centers)
• 32 peppercorns (we used the olives with pimento centers)
• 32 triangular blue corn chips

Directions

Mash together cream cheese, goat cheese and pesto. Chill for 40 minutes.

Shape mixture into 16 2-inch balls, about 1 heaping tsp. each. Roll in black pepper and poppy seeds to cover. Press two olive slices into balls for eyes and place peppercorns in centers for pupils.

Olivia with her Bat Bites.
She used cream cheese only for the inside and
poppy seeds only for the outside.
This was easier for her to eat - no spicy or unusual ingredients
to have to handle.

Insert chip on either side of ball for wings; serve.

Sunday, October 28, 2012

Countdown to Halloween - Candy Corn Theme

Today's theme - "Candy Corn" - marks the 11th day of the 13-day Countdown to Halloween. Here are the things that we did:

Candy Corn Pizza

This recipe came from Oprah. It's not made with candy corn...rather, it is pizza made with two different kinds of cheese - mozzarella and cheddar.

The recipe said, "When you cut the pizza into triangles, the melted orange and white cheeses produce slices that look like big pieces of candy corn."

You can use either a pre-baked pizza crust (such as Boboli), the ready-made pizza dough that is usually found in the refrigerator section of the grocery store, or homemade dough (the last option is what we did, using a recipe for pizza dough from the Betty Crocker Cookbook).

Ingredients:

• 1 large pizza crust, 1 pound pizza dough, or 1 batch of homemade dough
• 1 cup pizza sauce
• 8 ounces (2 cups) shredded mozzarella
• 4 ounces (1 cup) shredded orange cheddar cheese
• Pepperoni

Directions

Preheat the oven to 450°. Put the pizza crust (or spread the pizza dough into a round) on a baking sheet sprinkled with cornmeal. (Note: we just sprayed the baking sheet with cooking spray.) Smooth the sauce over the crust.

Next, put a ring of pepperoni around the outer edge of the pizza. Then, scatter the mozzarella in a thick circle in the very center of the pizza. Scatter the cheddar around the remaining space, leaving a visible rim of sauce, pepperoni, and crust. (Keep the two cheeses as separate as possible so they melt into distinct rings of color for the best effect.)

Pizza ready to bake in the oven.

Bake for 10 to 15 minutes if using a pre-baked crust, or 20 minutes if using pizza dough. Cut into candy-corn triangles (which will show a white mozzarella tip, then an orange cheese middle and a line of red sauce and white crust), and serve immediately.

Baked Candy Corn Pizza.
The two colors of cheese look the same once they're baked.
The pre-baked version had more distinct colors.

As a side note, when we made the Candy Corn Pizza it only looked this way prior to baking. Once the pizza was baked, both the cheeses looked the same color.

Sweet and Salty Halloween Treats

This pin for Sweet and Salty Halloween Treats is linked to Cake Info. It is a very easy recipe to make, and was a dessert that we all enjoyed. We made two different versions - one with the candy corn on top and one without the candy corn. Olivia preferred the latter treat while Sophia and I preferred the former version.

Ingredients:

Mini Pretzels (we used the pretzels that are shaped like squares)
Hershey Kisses Hugs
Candy Corn

Directions:

Preheat oven to 350 degrees F. Line a cookie sheet with parchment paper or foil. Place pretzels on cookie sheet, not touching. Unwrap Hershey's Kisses and place on top of pretzels.

Olivia putting the Hershey Kisses Hugs
on each pretzel.

Place filled cookie sheet in oven. Bake for 3-5 minutes but no longer. You will know they are ready when the Hershey Kisses start to get shiny.

Take out of the oven and gently place candy corn on top of Hershey Kisses, pushing down very gently.

Candy corn that were just pressed down
into the melted candy. 
Don't press too hard...or the melted candy 
oozes over the edge of the pretzel.

Cool and then transfer to serving platter or wrap up as gifts.

Completed Sweet and Salty Halloween Treats.

Candy Corn Jello

This pin is linked to The Butterfly Jungle which had a nice picture of a larger serving of Candy Corn Jello. We chose to make individual servings of this dessert, so the layers are not as big as they are in the original pin.

Individual serving of Candy Corn Jello.

The bottom yellow layer of the dessert is lemon jello with pineapple. The jello needed to set for 1 1/2 hours before the canned pineapple could be added. At this point, we transferred the jello and fruit to separate serving dishes.

Once the jello is completely set, put a layer of mandarin oranges on top. Then add a layer of whipped cream on top of that.

Candy Corn Jello.

Other ideas for the yellow layer are: pineapple only or lemon pudding.

Halloween Snack Mix

Munchkin Munchies had an simple ideas for a Halloween snack mix. This pin is linked to the original recipe.

Using the recipe as a starting point, I ended up measuring each ingredient versus dumping in the entire box or container. If I had used entire boxes of food, the amount of snack mix would have far exceeded what we could have consumed.

Halloween Snack Mix

In a large bowl, mix the following ingredients:
- 2 cups 4-Cheese Cheez-Its
- 2 cups salted peanuts
- 2 cups pretzel sticks
- 10 ounces of Reese's candy bits
- 12 ounces of caramel corn
- 2 cups chocolate-whole wheate Cheerios (some are a lighter color and others are a darker color)
- 2 cups candy corn

The original recipe also calls for Cocoa Puffs and candy pumpkins.

Service Project 

We filled two containers with the snack mix and brought it to my mom/the girl's grandma.

Olivia in a sheep costume and 
Sophia as a witch.
They are with their grandma. 

They also brought their costumes and dressed up to show her what they will look like on Halloween when they go trick or treating.