
This a great project to do if you have a lot of fabric scraps on hand. I chose fabrics in pinks and purples since this will be a gift I give to Sophia in one of the care packages I will be making for her this year when she's at college.

There are only a few supplies needed:
16 – 2″ wide strips of scraps, each 5″ long
Backing fabric (approximately 7″ x 13″)
Thin piece of batting (about 10" x 16")
Binding (about 2 1/2" x the perimeter of the mug rug)
First, cut the 16 strips (each being 2"x5"). Arrange into the pattern that you want for your mug rug.

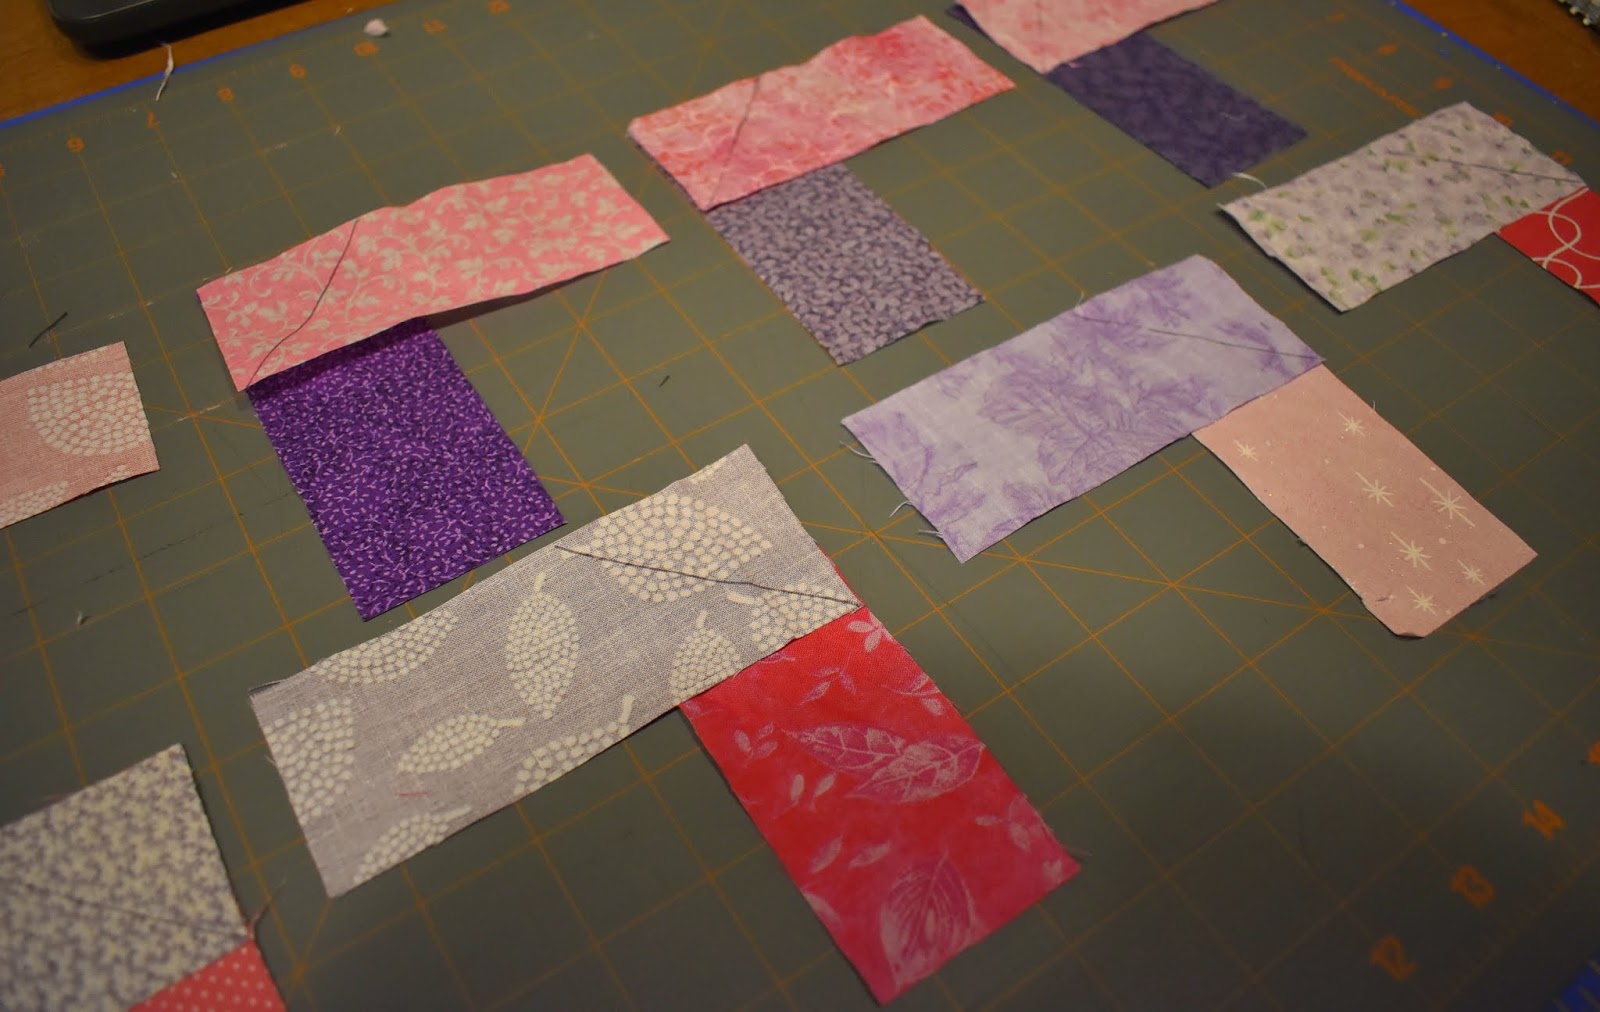
Separate the strips into two sets of eight strips each. With one of your sets of eight, pair up two of the strips. Align them perpendicular to one another with right sides together as shown below.
Sew the strips together with a diagonal seam from the bottom left corner to the top right corner of the overlapping section. Trim the excess fabric using a quarter inch seam and press the seam open.

Repeat these steps with the other set of eight strips, but (and this is important) arrange the strips so that the strip on top extends off to the left, instead of to the right as you did with the first set. See the photo below for how to do this step.
On this new set of eight strips, your diagonal seam should extend from the bottom right to the top left of the overlapping section. This will result in four more sewn strips containing a diagonal seam, but the diagonal seam should appear as a mirror image to the ones sewn from the first set. The picture below shows how the sewn angle differs between the two sets of fabric strips.
Open and press the seams for all the pairs of strips.

Arrange the strips in the order you want them to be sewn. Note: alternate the strips from your first and second sets so that the diagonal seams create a zig-zag effect.

Match the seams as shown in the picture above and sew the strips together to create your mug rug top. Sew the strips together. and iron the seams flat. See the photo below for the sewn top.

Your mug rug will now measure 12.5″ in length. Trim the width as desired. I trimmed mine to 6.5″ wide.
Place the quilt top (right side up), the batting, and then the backing (right side down). Pin the three layers together and quilt them. I followed the seams vertically and horizontally.
Create binding using one of the fabrics from your mug rug or a complementary one. I cut a 2 1/2" strip and cut it the length of the perimeter of the mug rug.
Attach the binding to the mug rug. I followed a YouTube video about how to attach bias tape to a project.
One thing that I would do differently is attach the front of the bias tape following the instructions in the video. Then, rather than machine sewing bias tape to both sides of the mug rug, I would hand-sew the back of the bias tape onto the backing. For me, since I'm not skilled at attaching bias tape, it would look neater if I hand sewed it.
This was a fun, easy project that I would do again. It would be interesting to see what the mug rug would look like in different color combinations and/or various holiday prints.
1 comment:
I know nothing about quilting, but this is really pretty. :)
Post a Comment