Monday, February 7, 2011

52 Weeks of Giving - Weeks 5 and 6 (Help Seniors and Color-A-Smile)

I'm combining Weeks 5 and 6 since I didn't take any pictures of the girls helping during Week 5.  As with an earlier week, the girls helped their grandparents again during Week 5.  They helped unload, sort, and put into the freezer a quarter side of beef. 

They also visited the adult day care program that their Papa (grandfather) attends twice a week.  Since there were about 50 clients there that day and they were sitting down to have lunch together, pulling out a camera just didn't feel right.  So, the girls talked with Papa for a bit and then went back to wait with the pet therapy dog (Roxy) until my mom and I were done talking with my dad.  It was good to see where he attends twice a week since the program is having such a positive impact on him.

After enjoying a quick lunch with Nana (the girls' grandmother), we took her grocery shopping so she could stock up on groceries (since she and my dad no longer can drive).  They helped find items that Nana needed, and also helped get some a few items that I needed as well. 

*~.:.~*~.:.~*~.:.~*~.:.~*~.:.~*~.:.~*~.:.~*

During Week 6, the girls colored pictures for Color A Smile.  Color A Smile collects crayon drawings from school children.  Every month they distribute these drawings to nursing homes, Meals on Wheels Programs, and individuals all across the country.  Their goal is to make people smile!

Sophia coloring a St. Patrick's Day design.

Olivia coloring a spring design.

Children can pick from a variety of designs or they can choose to draw their own image on the blank Color a Smile sheets.  At the bottom of the drawing, the child prints/handwrites her/his first name and age. 

Sophia working on a picture that will be sent to
someone in a nursing home, in the Meals on Wheels program,
or in need of cheering up.

I showed the girls a variety of designs.  They picked out three each for grandparents and to mail to Color A Smile who will distribute them to seniors.  They chose St. Patrick's Day and Spring designs to mail to Color a Smile so that they would have plenty of time to mail it to recipients.  The Valentine's Day designs are being mailed or brought to their grandparents.

Completed pictures waiting to be mailed or hand-delivered.

Sunday, February 6, 2011

52 Books in 52 Weeks - Week 6 - Elaine's Circle

This marks the sixth week of 52 Books in 52 Weeks.  Some of the books that I mentioned that I've been reading aloud to the girls I'm still working on...like Carry On, Mr. Bowditch.  It's not Sophia's favorite book (though it is a well-written account of Nathaniel Bowditch's nine-years of indentured servitude and his experience of being a captain of his own ship as an adult).  I also am continuing to read Gentle Ben, and hope to finish it this week (just finished reading it on Sunday afternoon!).

If these were the only books that I was reading outloud and personally, they would have been done a long time ago.  However, they are only some of the many books that I read to the girls.  In fact, I'm looking at a stack of books at least a foot high that need to go back to the library (these are ones that I've read aloud to the girls during the past couple of days).  Sophia also reads or listens to books on tape above and beyond what is required for her homeschooling curriculum.

While returning books to the library this past week and checking out new ones, I came across Elaine's Circle by Bob Katz which was in the education/homeschooling section. 


The description on the back of the book says, "Elaine Moore, a veteran teacher in Eagle River, Alaska, is a firm believer that the classroom is, first and foremost, a community--and that learning is best when shared in a circle of peers. When one of her students, ten-year-old Seamus Farrell, is diagnosed with terminal brain cancer, Elaine, her students, and her innovative methods of teaching are put to their most severe test.

"Elaine's Circle is a heart-wrenching look at the remarkable achievements of a dedicated teacher and a group of children who take he at her word when she tells them, 'Learning is not just something we do in school.  It so something we do until the day we die.'"

The first chapter immediately drew me in as the author described Elaine's voice:  "When she first trained to become a schoolteacher, Elaine Moore was warned that her voice would be her one big liability."

A couple pages later, after describing her voice, the author said that Elaine "...wanted her students to have an abiding respect for learning - and an appreciation for words was fundamental to this goal .... Soft words spoken slowly, woven into stories and conversation, and dispensed with affection - that was Elaine Moore's art."

She "loved to tell stories to her kids...mostly just tales drawn from her own experience."  The children were captivated by her stories - like ones involving a mean teacher she had when she was a girl in a one-room farm community schoolhouse or the German prisoners of war housed on her farm.

Elaine's "unflagging optimism" showed itself in her "belief that bad things often yielded unexpected good."  Yet, this belief was challenged initially when she had to share some difficult news with her students only a couple days before Christmas break - when everyone was so cheerful.

She received a call from a parent of one of her students (Seamus Farrell) who she had found the "most challenging, and interesting, to teach." 

Seamus wasn't an efficient or fast learner.  He could read, but wasn't overly zealous about assignments.  He was confused, at times, over math concepts.  As the book said, "There was never any doubt that he was bright.  Indeed Elaine operated on the assumption that most kids are innately bright.  The only questions were:  Could she find a way to effectively teach him?  Could she succeed well enough to allow him to succeed?  That's how she viewed her mission."

The news she received from Susan Farrell (Seamus' mother) was sobering:  Seamus had a brain tumor and was going in for surgery immediately.  Seamus wanted his mother to tell Elaine and the rest of the students about the surgery since he cared so much about his classmates and teacher.

This didn't surprise Elaine because she did a lot to foster a sense of community and belonging within her classroom.  One way she did this was through "Circle Time."  She explained that "a circle has no beginning and no end.  Native American groups recognize the power of the circle.  It is a universal symbol of wholeness.  The circle exists throughout our world in many manifestations, if we only know where to look."

One of things that Elaine did with her class each holiday season was contact the Salvation Army in Anchorage (Alaska) and ask them to assign to her class a family in need.  Each child was to donate $5 to help the family.  The catch was that they couldn't get the money from their parents or from their piggy banks.  Instead, they had to earn it.  So, the children each did different chores to earn the money (e.g., shovel a neighbor's driveway, stack firewood, clean out a garage). 

The children also decorated cards that would be included with the gifts that went to the family in need.  After they were done, she told her class, "You've given your time and effort to help someone in need. You've made our circle larger."

*~.:.~*~.:.~*~.:.~*~.:.~*~.:.~*

That gives a glimpse into the first 40 pages of this 219-page book.  I have a feeling that this will be one of those books that I won't want to put down and will keep reading.  Already, Elaine's philosophy and method of teaching is one that I can identify with (even though I homeschool both my daughters). 

Perhaps I feel drawn to this book this week because of meeting on Tuesday that I had with the special education team at the local elementary school.  I had asked that Olivia be assessed since she is struggling with reading and math. 

The special education team invited me to come in and talk with them about Olivia; show samples of her work; and describe some of the learning and sensory challenges she's experiencing - it was clear that an assessment process would need to begin soon.  Hopefully, this will help identify areas of learning that she's struggling with...and to help her reach her full potential.

The other aspect that I like about this book and Elaine's philosophy is the emphasis on giving of oneself and making a difference in the world - within one's family, locally, state-wide, nationally, or globally.  There's so many ways to give...to share...to impact others.  Elaine's Circle, I'm sure, will clearly demonstrate that and be a source of inspiration.  This may give me some ideas for the 52 Weeks of Giving project that the girls and I are doing this year.

Saturday, February 5, 2011

Winter Series Outdoor Hour Challenge #5 - Pine Trees


2011 Winter Series Outdoor Hour Challenge #5 - Pine Trees

Inside Preparation Work:

This week read in Anna Comstock's Handbook of Nature Study pages 670-675 to learn more about pine trees. One of the interesting things we learned was that "the very tip of the central stem in the evergreens is called 'the leader,' because it leads the growth of the tree upward." 

After reading the pages, we went on a short ten-minute drive to take Olivia to/from speech therapy.  Both girls pointed out some very tall leaders on pine trees that we saw on the drive. 

Back at home, we noticed that Sophia's tree had one clear leader while Olivia's appeared to have two leaders.  However, in re-reading the Handbook of Nature Study it appears that it may be actually "two stems near the top...[which] is a story of injury to the tree and its later victory."

Heading out to explore pine trees in the yard.

Outdoor Hour Time:

It was suggested from the Handbook of Nature Study website that a parent spends 15 minutes outdoors this week with her children in the family's yard or street.  We ended up spending close to an hour outdoors since it was over 30 degrees outside (very warm compared to the single-digit or below-zero temperatures just a few days ago).  It was wonderful to be outside and enjoy spending a Friday afternoon exploring nature at a deeper level.

The first thing I did was have each of the girls select a pine tree from the front- or backyard. Sophia picked one, but Olivia wasn't sure which one she wanted to study.  I suggested that she look at the Austrian pine that Papa (my dad...the girls' grandfather) and Uncle Jim planted in the front yard.  When it was transplanted, it was so small that it fit in a wheelbarrow.  It's been nice to see the tree grow so well during the past 15 years.

Once the girls picked their pine trees, I spent time with each one individually as she answered questions that the website suggested.  While one was answering questions and collecting pine needles and pinecones, the other was free to play and enjoy being outside.

Below are the questions I asked Sophia and Olivia.  These were in the Handbook of Nature Study as well as on the website.

What is the general shape of the pine tree?

I asked Sophia to take several steps back from her tree and look at its overall shape.  She said it looked like a rectangle to her.  Later, inside I had her look at the picture below.  She said she still sees a rectangle.

Sophia by a white pine.

Olivia stood in front of the Austrian pine.  Initially, she thought it looked like an oval.  However, when looking at the picture below on the computer and tracing the outline of the tree with a finger, it became clear to her that the tree wasn't shaped like an oval, but a triangle.  

Olivia by the Austrian pine.

Is there one central stem running straight up through the center of the tree to the top?

Both girls answered this questions "yes."  According to the Handbook of Nature Study, "All cone-bearing trees have typically a central stem from wich the branches come off in whorls." 

On the Real Trees for Kids website, it said, "If your tree is a pine tree, you can estimate its age by counting the whorls (places where branches have grown out each year). The number of whorls will give you the age of the tree. However, this only works with pine trees...fir and spruce trees don't work the same way."

Pine trees have a central stem from which all
branches grow from...many at a 90 degree angle.

We looked up the trunks of several of the pine trees.  All had the one central stem.  The angles that the branches came out of the central stem varied between 60-90 degrees, with the majority closer to the 90 degree angle.

What color is the bark?

The bark color for both the trees that the girls examined were similar in that they were "brownish" and "gray."  Sophia also said hers had an "ash" color as well.

Bark of an Austrian pine.

Is the bark ridged or in scales?

White pine with two different bark textures.

Sophia noticed that the white pine that she was examining had two different textures of bark.  From the base of the tree to her shoulders, the texture was rough whereas from her shoulders to the top of the tree, the bark was smooth.

Olivia's Austrian pine had the same texture from base to tip.

Study the pine leaves. How many needles in the bundle?

Sophia's white pine had 4 needles per bundle.  I had her pick two different bundles to see if there were the same or different number of needles.  "There are 4 in both!" she was excited to see.  (Note:  The Handbook of Nature Study says that a white pine has five needles in a bundle.  However, the tree company that planted the trees in the backyard said that the trees that they planted were white pines.  So, I'm not sure why there is a difference in needle count.)

Olivia's Austrian pine had 2 needles per bundle.  Like Sophia's tree, the bundles consistently had 2 needles per bundle.  This is consistent with what's written in the Handbook of Nature Study.

The start of new pinecones.

Does it have pinecones?

Both pine trees that the girls were studying had pinecones.

The white pine had cones near the top of the tree.

Sophia was able to get one pinecone off a nearby white pine tree.  However, on her tree the pinecones were all at the top of the tree.

Olivia picking pinecones.

The Austrian pine had many pinecones from the base to the top of the tree.  This was good for Olivia because she could pick a few pinecones from her tree to study indoors.

Two pinecones in the afternoon sunlight.

The Handbook for Nature Study website suggested that children are given time and the opportunity for a nature journal entry. So, Sophia and Olivia each wrote some observations in their journals about the pine tree they examined as well as included a bundle of pine needles from the tree they studied. 

Sophia's journal entry about pine trees.

They measured the length of the needle and noted how many needles were in a bundle.  Sophia's white pine needles were 3.5 inches long; and Olivia's Austrian pine needles were 4 inches long.

Olivia's journal entry about pine trees.

Also in their nature journals, they traced the outline of a pinecone, noted how many rows the pinecone had, and taped one small part of the pinecone into their journals. 

Other things we did related to pine trees:

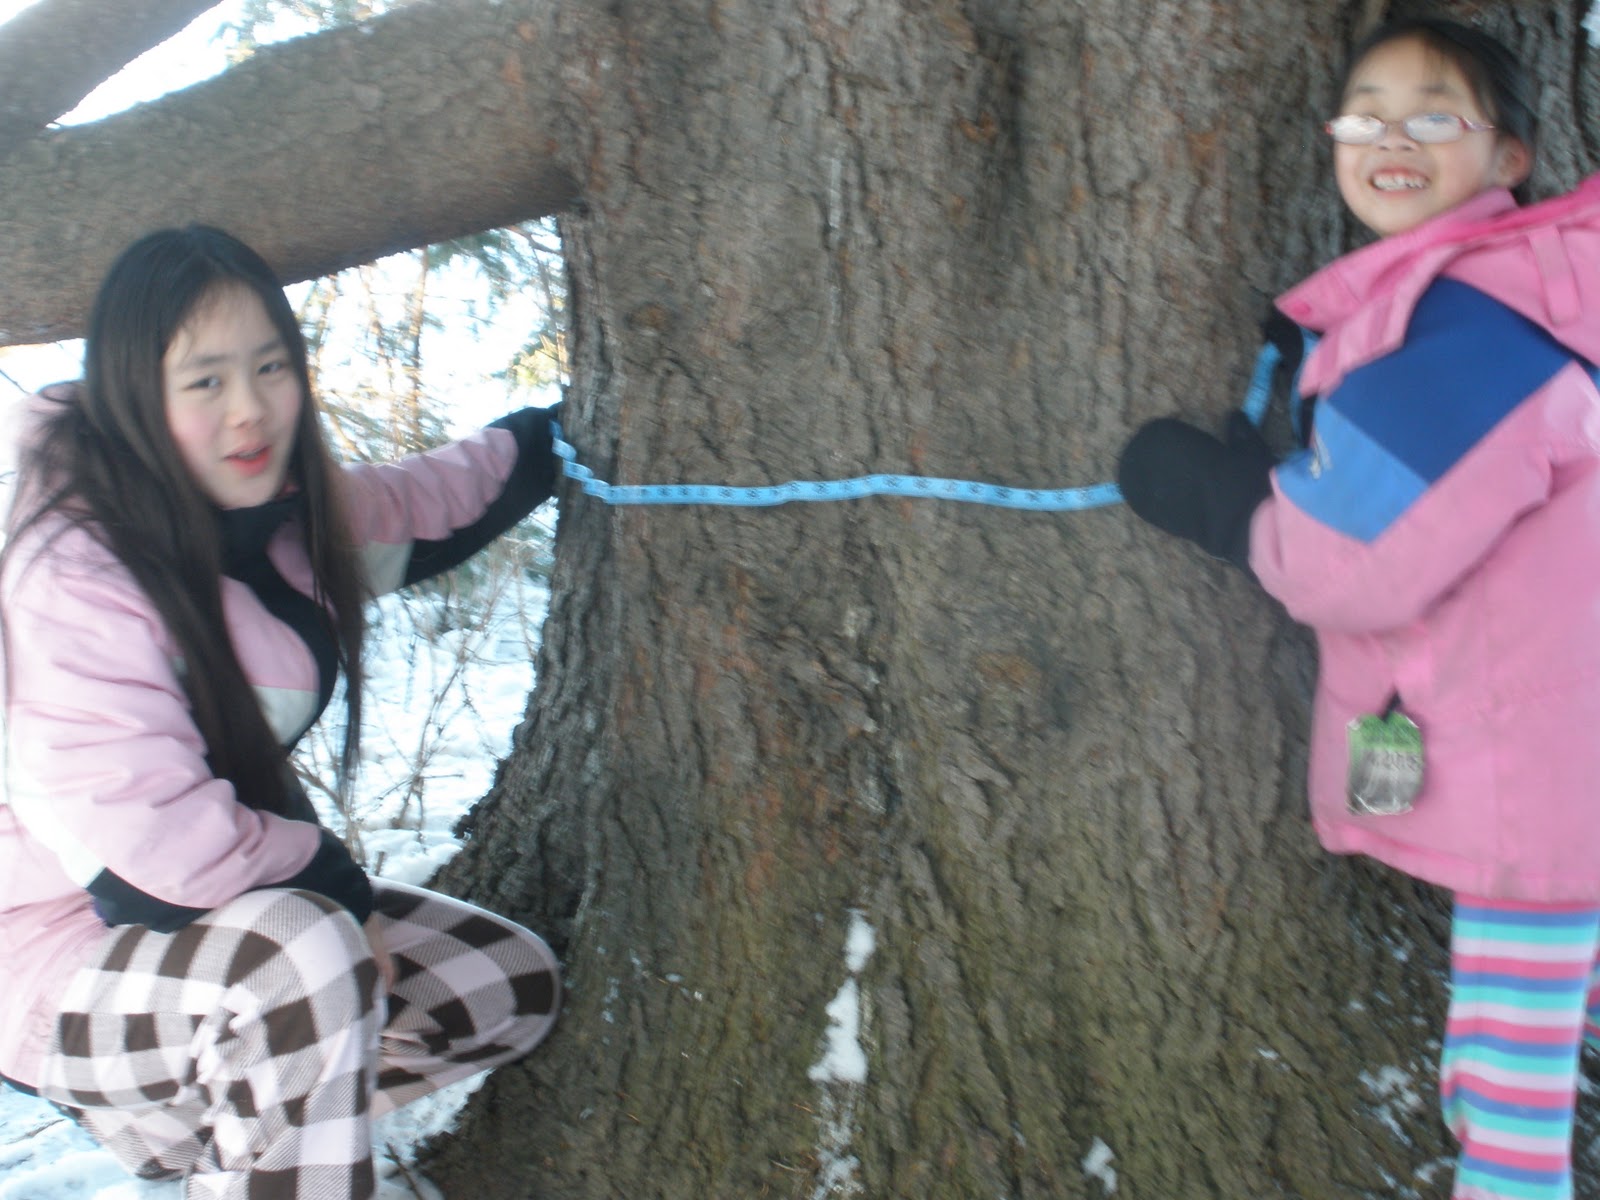
Measure a pine tree - The girls measured two pine trees - the largest one at the farm as well as the one right next to it.  I had each one estimate the circumference of the largest tree (how many inches around).  Sophia initially guessed 60 inches and Olivia guessed 70 inches.  Once Sophia saw a 60-inch tape measure she changed her estimate to 75-80 inches. 

The largest tree at the farm.

The circumference of the largest tree here: 120.5 inches! The tree next to it was much smaller - 44 inches.


Measuring a pine tree in the front yard.
 
Climb a pine tree - The girls both wanted to climb onto some of the largest lower limbs of the biggest pine tree at the farm.  Sophia was able to get up into the tree on her own.  Olivia needed a bit of a boost.
 

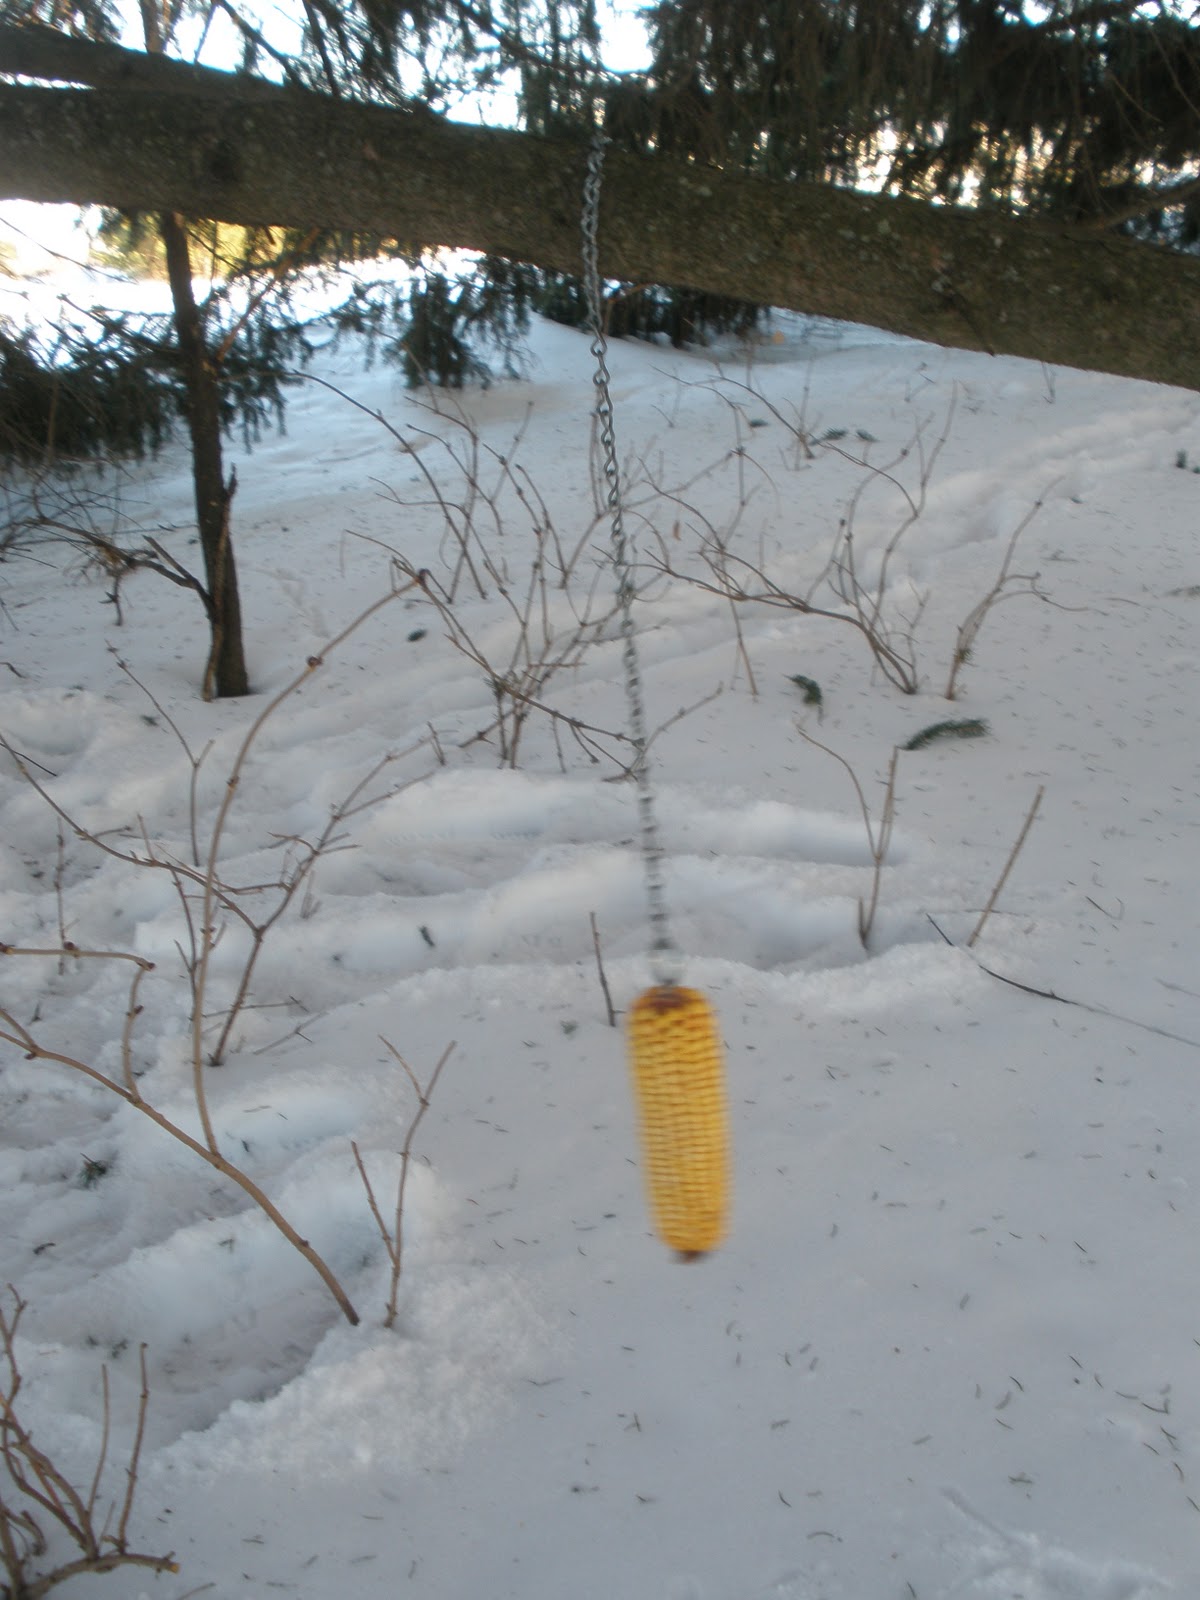
Find evidence of wildlife near the pine trees - The corn cob feeder needed a new corn cob since the old one was missing.  The girls put a new corn cob on the eye screw/chain feeder.

Simple feeder for the pheasants.

There were pheasant tracks leading to and underneath the row of pine trees on the east side of farm. 

Pheasant tracks.

There were rabbit tracks under the pine trees.

Rabbit tracks.

One of the trees under the largest pine tree had bark missing on its trunk. 

Tree with bark missing.
This tree is under the pine trees.

Not sure what animal would strip the bark like this.  This is probably 3 1/2-4 feet off the ground, but under the pine tree - so it's not the most accessible spot.  Any ideas?
 
We plan to do more activities about pine trees - painting and drawing them; and observing which animals and birds visit a specific pine tree over the course of a week.  We all agreed that this was a fun way to spend the afternoon.  We're looking forward to our next nature study!

Friday, February 4, 2011

Flashback Friday - Koalas and Kangaroos

I've always enjoyed being around animals - domestic, livestock, or wild.  One of my favorite memories is of traveling to Australia back in 1995.  Traveling along the east coast from Sydney to Cairns, there were many opportunities to see wildlife - the majority of which I have never seen in the United States.

By far, the most vivid memory I have is of visiting Lone Pine Koala Sanctuary in Brisbane (Australia).  It's the world's first and largest koala sanctuary and has over 130 koalas. It is rated as one of the top 10 zoos in the world by AOL. 

In addition to enjoying seeing the widlife in a beautiful, natural setting, there are opportunities to hold koalas and hand-feed kangaroos.

Me holding a koala. 

See the koala's paws?  Apparently if the koala is comfortable, it will tighten its grip - just like it would in a tree before it rests.  I became the tree moments after this picture was taken.  The little koala there had quite the grip.  I didn't mind for a while because it was soft and such an incredible opportunity. 

Another interesting thing about the koala's paw:  there are five digits on each front paw, two of which are opposed to the others, much like our thumbs are able to be moved differently from the fingers. This helps them to hold firmly onto the branches and to grip their food. The second and third digits on their hind paws are fused together to form a grooming claw.

Since visiting Australia, holding a koala has been banned in New South Wales (a new law in 1997).  However, people can still hold koalas in Queensland - where Lone Pine Koala Sanctuary is located. 

In Queensland, koalas can only be held for less than 30 minutes per day. They must also get every third day off. This ensures that they get plenty of time to eat and sleep. At Lone Pine, they "clock on" and "clock off" their koalas when they go to the koala cuddling area.

According to the Australian Koala Foundation, "Koalas are in serious decline suffering from the effects of habitat destruction, domestic dog attacks, bushfires and road accidents. The Australian Koala Foundation estimates that there are less than 80,000 koalas left in the wild, possibly as few as 43,000."   

To read more about koalas, visit the Australian Koala Foundation.

The other animal that stands out from the trip to Australia is the kangaroo.  I had never seen a kangaroo (except on t.v.), so this was incredibly interesting for me to see them hop around.  I was able to feed some kangaroos at Lone Pine Koala Sanctuary where there was a 5-acre kangaroo reserve. 

There were over 100 kangaroos and wallabies hopping about.  Thankfully, not that many swarmed around when I came in with a bag of kangaroo food that was available at the little stand at the sanctuary. (I would have been a bit scared if that had happened.)

I remember opening the gate and going into the enclosure, and wondering where all the kangaroos were.  It was only a few minutes and there they were - standing at the top of a small hill.  Then they starting hopping down towards me.  It was a bit intimidating until only a brave handful of kangaroos came to me.

Me feeding some kangaroos

This small group of five kangaroos were the most eager to eat.  The little ones were less intimidating than those two larger ones that were almost as tall as I was.  It was fun to feed them.  They were all quite docile and friendly.  Though, one of those big kangaroos, wasn't too happy when the food ran out.  It wanted more.  I felt like that would a great time to leave the enclosure...I didn't want to know what a kangaroo who wanted more food was capable of doing. 

Lone Pine Koala Sanctuary had five different species of kangaroos and wallabies (Grey Kangaroo, Red Kangaroo, Pretty-faced Wallaby, Swamp wallaby, and Red neck Wallaby).  The kangaroos I fed all appear to be the same species to me.

What was exciting, too, was that there were all different ages of kangaroos there.  I especially enjoyed seeing the joeys inside the pouches.  It reminded me of the Halloween costume my mom made for me one year when I was about six years old.  I was a kangaroo and my mom put a a toy kangaroo in the costume's pouch.

Thursday, February 3, 2011

Celebrating Chinese New Year by Reading, Cooking, & Homeschooling

Today marks the start of the Chinese New Year - the Year of the Rabbit.  Part of today's homeschooling focused on the Chinese New Year.  I read the girls a book about Chinese New Year as well as a book that I've read to them in the past that they've enjoyed:  The Runaway Rice Cake by Ying Chang Compestine. 

In the back of the book, there's a recipe for Baked Nian-Gao (or New Year's cake).  According to the book, the most improtant dish in a New Year's Day meal is Nian-Gao.  It states, "Eating Nian-Gao during the New Year's celebration birng safety and fortune to the entire family for the year."

So, I let the girls read the recipe in the book, measure the ingredients, and bake the cake.  Here's the recipe:

Dry Ingredients

1 pound glutinous rice flour (also called sweet rice flour) [I didn't have this type of flour on hand so we just used all-purpose flour instead)
1 1/4 cups sugar
1 tablespoon baking powder
1/2 cup raisins
1/2 cup nuts [we didn't use these because we don't care for nuts in cakes]

Wet Ingredients

3 eggs
3/4 cup canola or vegetable oil
1 1/2 cups water

Preheat oven to 375 degrees.  Combine all the dry ingredients ina large mixing bowl.  Mix thoroughly.  In a separate bowl, beat the eggs.  Add the other wet ingredients to the eggs and stir.

Olivia is adding water to the vegetable oil and eggs.

The girls are stirring the dry and wet ingredients one last time before combining them:


Pour the wet ingredients into the dry ingredients.  Mix well.  Coat a 9-inch round cake pan with nonstick cooking spray.  Pour in the batter.  Bake for 40 minutes.  The Nian-Gao will rise when done.  A knife poked into the center will come out clean.

Note:  The dough comes almost to the top of the pan, so I put a cookie sheet underneath it just in case it rose a bit too much and overflowed.  It didn't, but it was worth doing.  It took much longer than 40 minutes to bake.  Either my oven isn't hot enough, or it just takes longer than the recipe suggests.  It took almost 55 minutes to bake. The Nian-Gao has a nice flavor to it.  Everyone liked it.  It's especially good warm...right out of the oven.

In addition to the Nian-Gao, we made sushi.  Even though it isn't a Chinese dish, it reminded me of when the girls were adopted from China.  Many times - and at multiple restaurants throughout China - sushi was served.  There was always a vegetarian sushi option which Sophia and I prefer.  Olivia just likes the rice.  As she says, "I don't like to eat seaweed" (the green wrapping).

Sophia placed sushi rice, carrot slices, and
a green onion on top of the sushi paper.

Even though Olivia doesn't eat sushi, she still wanted to peel and cut a carrot into slices.  She passed on slicing the green onions.

Olivia is working with the carrots while Sophia is rolling the sushi.

Sophia is almost done rolling one of sushi roll. 
The rice is rather sticky.

Once the girls were done with the nian-gao and sushi, they took a break while I put everything together in a muffin tin.  Some of the items had a Chinese connection...others didn't.

Top row: orange (good luck/fortune), grapes, rice, long noodles (long life)
Middle row: sushi, coleslaw, nian-gao (see above for meaning), nian-gao (see above for meaning)
Bottom row: oranges (good luck/fortune), grapes, rice, long noodles (long life)


The girls brought out placemats and chopsticks that are from China.  They were purchased when Sophia was adopted in 2001.

The girls starting to eat their Chinese New Year lunch.


Shibley Smiles


Muffin Tin Monday at Her Cup Overfloweth

Wednesday, February 2, 2011

Mid-Week Motivation


Sometimes, in the middle week, it's nice to get a little inspiration to carry oneself through the rest of the week. I thought it would be good to have a weekly post where everyone can share what they are working on or have recently completed for their family or themselves; or given as a gift.

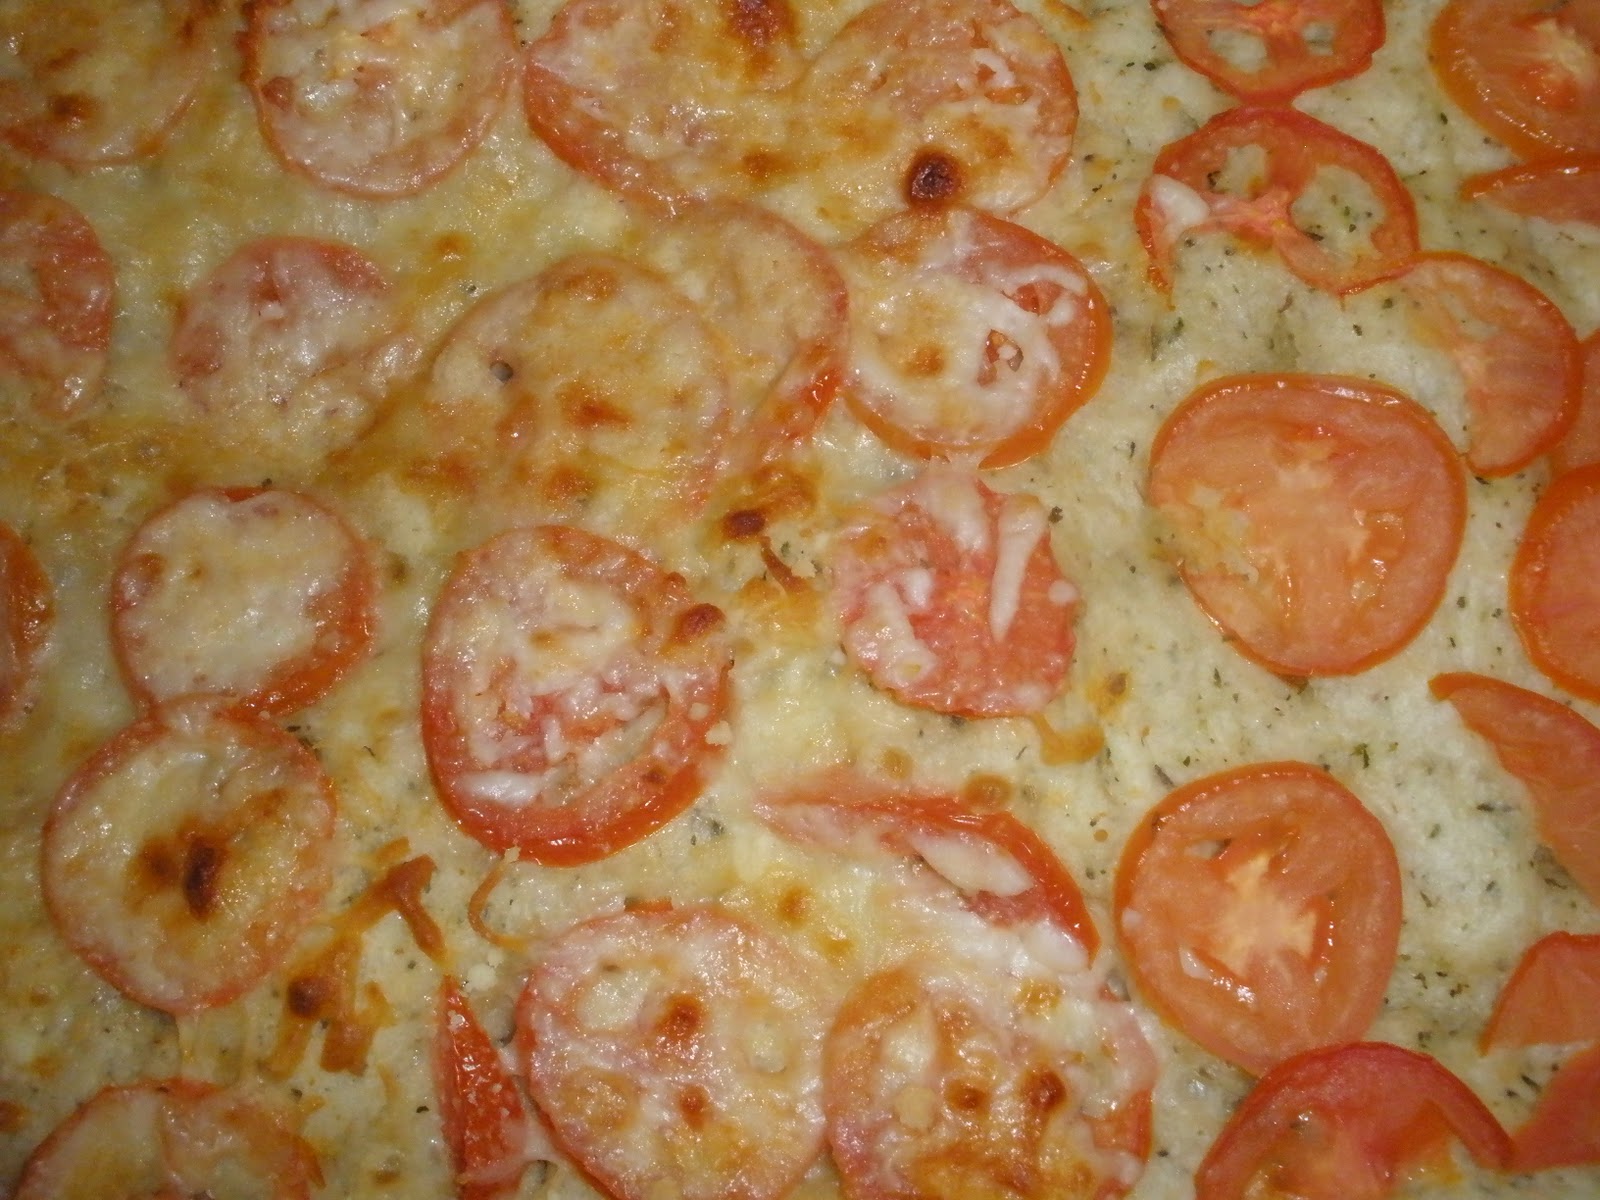
This week, I made Tomato-Herb Focaccia.  The recipe is from the February/March 2011 issue of Taste of Home magazine.  Taste of Home is a great magazine because the majority of recipes have ingredients that typically would be in your kitchen.  There are not a lot of unusual or speciality ingredients which makes it easy when you want to try a new recipe.

Tomato-Herb Focaccia

Note about the picture:  The cheese isn't as browned as I would prefer it, but Olivia (who is 8 years old) doesn't like the cheese to be too dark otherwise she thinks it is "burnt cheese" and won't eat it.  The left side has cheese and the right side doesn't so Sophia can eat it (she has a dairy allergy).

Here's the recipe:

Tomato-Herb Focaccia

Ingredients

1 package (1/4 ounce) yeast
1 cup warm water
2 tablespoons olive oil, divided
1 1/2 teaspoons salt
1 teaspoon sugar
1 teaspoon garlic powder
1 teaspoon each dried oregano, thyme, and rosemary, crushed
1/2 teaspoon dried basil
dash pepper
2 to 2 1/2 cups all-purpose flour
2 plum tomatoes, thinly sliced
1/4 cup shredded part-skim mozzarella cheese
1 tablespoon grated Parmesan cheese

Directions

In a large bowl, dissolve yeast in warm water.  add 1 tablespoon oil, salt, sugar, garlic powder, herbs, pepper, and 1 1/2 cups flour.  Beat until smooth.  Stir in enough remaining flour to form a soft dough (dough will be sticky).

Turn onto a floured surface; knead until smooth and elastic, about 6-8 minutes.  Place in a greased bowl, turning once to grease the top.  Cover and let rise in a warm plce until doubled, about 1 hour. 

Punch dough down.  Cover and let rest for ten minutes.  Shape into a 13" x 9" rectangle; place on a greased baking sheet.  Cover and let rise until doubled, about 30 minutes.  With fingertips, make several dimples over top of dough.

Brush dough with remaining oil; arrange tomatoes over the top.  Sprinkle with cheeses.  Bake at 400 degrees for 20-25 minutes or until golden brown.  Remove to a wire rack.

*~.:.~*~.:.~*~.:.~*~.:.~*~.:.~*

I made some changes to the recipe since I didn't have all the ingredients.  Instead of garlic powder, I used garlic flakes.  Instead of the oregano, thyme, rosemary, and basil I used a pizza seasoning with has a variety of herbs and spices. 

Half of the focaccia is dairy-free - it doesn't have the mozzarella or Parmesan cheeses.  The other half does have the cheeses.  In this way, everyone can eat the bread.

I served it with a homemade version of Papa John's pizza sauce.  Again, I used a base recipe and then modified it based on what I had on hand as well as the taste.

Everyone liked the bread.  The only suggestion was that Sophia said the tomatoes could be left off the next time it is made.  I'd agree...unless they are ones we grow here during the summer that are much more flavorful than the ones in the store. 

Using fresh basil, rosemary, and tomatoes from the garden would give this bread a completely different flavor.  Something to look forward to...having the vegetable, fruit, and herb gardens again this summer!

*~.:.~*~.:.~*~.:.~*~.:.~*~.:.~*
I find it inspiring to see what other are creating and or have created for their families or themelves. So, I invite you to put a link below to something you've been working on or just completed for yourself, your family, or that you gave as a gift. (Please don't link simply to your Etsy shop or show a product that you're selling. The focus should be on your creativity that is for your personal use or for a gift.)

It can be a:
- handiwork project - maybe something quilted, felted, embroidered...whatever your speciality
- recipe
- poem or short story
- homemade natural product - soap , bath salts, or laundry detergent
- item you made for your pets or livestock
- new bird feeder or recipe for suet
- tutorial
- photograph
- anything creative...it's up to you!

Share your Mid-Week Motivation with the world! Or...with others who will read this post. Put an image onto your blog, and write a little bit. When you're all finished, link back to this post (simply copy the address at the top of your screen and paste it into your blog post). Come back here to this post, and add your link to the photo list below!

“Infinitely more important than sharing one's material wealth
is sharing the wealth of ourselves ~
our time and energy,
our passion and commitment,
and, above all, our love.”
~ William E. Simon

Note: If you'd like to include the image of the purple and blue window star to show you're participating in Mid-Week Motivation, simply right-click on the image on the side of the blog and save the picture to your computer. You can insert it right into your posting.

Tuesday, February 1, 2011

Decorating for Valentine's Day with Natural Materials

Each year, the girls look forward to decorating the home for Valentine's Day.  Last year, I made a variety of window stars that I put on the windows.  After the holiday, I packed them away to use again this year. 

It was so easy this year to decorate the main window in the dining room.  Here's what it looks like:


As the girls and I looked through the bin of Valentine's Day decor, we came across the paper cuttings I did last year for each of them.  One chose red paper as the backing and the other chose pink.  We hung the paper cuttings with a couple more window stars in the living room.


Since I just put out the winter nature table scene on the dresser in the dining room about a week ago, the girls and I decided to keep it up.  So this will stay up for a little while longer (perhaps right after Valentine's Day it will be changed to another scene).

Winter Nature Table

Since we decided to keep the winter nature table where it was, Olivia suggested putting a Valentine's scene on the bookshelf.  The table is more craft focused rather than nature focused since the winter nature table has the nature elements (e.g., rocks, sticks, pinecone, walnut shell beeswax candles). 

Valentine's Day Items

The display on the bookcase has hand-embroidered gnomes made from wool felt and sheep wool stuffing from sheep who use to live here.  The elf clogs are hand-embroidered and made from wool felt as well.  I made a pair for each of the girls using their favorite colors.  The wet-on-wet watercolor lanterns are made from watercolor paper, kite paper, and tissue paper.  The girls made them a few years ago.  The two cards are handmade featuring origami designs made from Japanese paper. 

The picture is of Casey who died 3 years ago on the day before Valentine's Day.  An artist painted the picture in exchange for some of my work.  It's been a treasured picture...and one that has been the focal point of several displays.

I like to make a few new things each year, so this is a new window star I made.  It follows a base pattern that I use for another star, but I changed things up a bit to create a new pattern.  Here it is:


I also made a couple of miniature bears from a wool sweater that I felted in the washer/dryer.  The bears are holding a paper bunting with Valentine's Day theme paper.  The bears are available in my shop, but I'm going to make another set so the girls have something else to decorate with in future years. 

Bears (made with a felted sweater) holding a bunting

The other item I just started making are bendy dolls with wire, beads, and wool felt.  I use a length of wire and two different size beads to create a miniature human form.  The clothes are hand-embroidered onto the wire frame.  The hat needed to be hot-glued onto the bead head in order to stay...otherwise it just slips right off.

I'm doing some for my shop as well as some for home.  The girls like them because they can bend and be posed in different ways.  Here is the trio of dolls that I made this weekend:


There are still a couple of weeks until February and some more things the girls and I want to do before then that relate to the holiday....more crafts, recipes to try, and activities to do.  Next week, I'll post some more Valentine's Day ideas.

Family room window with winter-white stars