Showing posts with label card making. Show all posts

Wednesday, April 3, 2019

A to Z Challenge - Card Making (Flag-Fold Card)

During the month of April, I will be writing Monday through Saturday; and will exploring crafting, holidays, recipes, travel, and other items I've pinned on Pinterest. Each post will focus on a different letter of the alphabet. Today, I am focusing on the letter "C" and will be looking at my Card Making board.


One of the pins I found was for a tutorial for a flag-fold card on Beccy's Place. I have never made a flag-fold card before so having the tutorial with exact measurements helped. Instead of greeting card, I did a "Memories" card. It was a pre-printed cut-out that was included with the scrapbooking paper packet.


Each of the five "flags" on the inner folds would be great to write a memory on or attach a little snippet of a photo.


The front of the flags each have the decorative paper and the back side is plain.


With plenty of scrapbooking paper and cardstock from past projects, it was easy to find paper to use for the project without going out and buying sheets. This does not take a lot of paper or cardstock, and it is a great way to use up what you have on hand.

After doing one of the cards that I had pinned on my Card Making Pinterest board, it has encouraged me to go back and look at other cards I could make. 

With graduations coming up during the next couple of months as well as birthdays and holidays, there's always a need for cards. I might as well use what I have at home rather than purchasing cards with generic messages. In this way, people will know I took some extra time to create a card especially for them.

Sunday, February 22, 2015

15 Creative Goals in 2015

I've been thinking about what I want to learn and do in terms of my creative goals in 2015. Although almost two months have already passed, there's still ten months ahead to incorporate more creative time in my life.

During 2015, I want to:

1. Learn how to do fused glass.


2. Do glass blowing.
3. How to build a portable brick oven so I can create homemade pizzas and breads in it during the summer.
4. Finish all the WIP (works in progress) in the bin.
5. Go through all the fabric bins and donate what I no longer like or want.
6. Use the bag of felted wool to make a project (or two).
7. Learn 3 new crocheting stitches.
8. Make a pair of socks using the sock loom.


9. Learn to knit and make something useful.
10. Use some of Dad's clothes and make legacy gifts to give to Mom, Mary, Jim, and me.
11. Do two upcycled crafts that use jeans.
12. Make six handmade cards using inspiration from other DIY cards.
13. Make three homemade bath products.
14. Paint and install a barn quilt.


15. Make something for the next door neighbor's daughter who is expecting her first child this spring, and who has a baby shower in March. Did this on March 1st. I made two baby bassinets from diapers and a washcloth bouquet. 

Monday, December 16, 2013

Celebrating Las Posadas - Countdown to Christmas - Day 16

On the 16th day of the Countdown to Christmas, we celebrated Las Posadas.

Activities

While I helped my Mom with some Christmas shopping as well as doing some shopping on my own, Sophia prepared a delicious dinner.

She made guacamole dip...


seasoned meat for tacos or nachos (whichever a person preferred)...


and cut up tomatoes, green peppers, and onions...


She had shredded cheese and salsa to add to the toppings.

The cats were overly interested in the dinner. Lucy checked out Olivia's plate of food.


While Eenie checked out Sophia's tacos. Normally the cats don't sit on the table while we eat.


The girls wanted a picture with the cats sitting by them...so there they are...sitting with their feline friends.

*~*~*~*~*~*~*

Advent Reading

Luke 2:5-7 - He went to register with Mary, who was promised in marriage to him. She was pregnant, and while they were in Bethlehem, the time came for her to have her baby. She gave birth to her first son, wrapped him in cloths and laid him in a manger—there was no room for them to stay in the inn.

*~*~*~*~*~*~*

Christmas Joke

What’s red and white, and red and white, and red and white?

Santa's Sleigh Reindeer and Flight School
This is Santa in his sleigh with his fleet of reindeer. 
Olivia made this back in 2010.

(Santa rolling down a hill!)

*~*~*~*~*~*~*

Christmas Fact

We learned about how giving Christmas cards became popular:

The custom of sending Christmas cards was started in the United Kingdom in 1843 by Sir Henry Cole. He was a civil servant (a government worker) who was very interested in the new "Public Post Office" and wondered how it could be used more by ordinary people.

Christmas ATC Traded - Peeking in the Box
Christmas stamp.


Sir Henry had the idea of Christmas cards with his friend John Horsley, who was an artist. They designed the first card and sold them for 1 shilling each. (That is only about 8 cents today, but in those days it was worth much more.)

The card had three panels. The outer two panels showed people caring for the poor and in the center panel was a family having a large Christmas dinner. Some people didn't like the card because it showed a child being given a glass of wine.

As printing methods improved, Christmas cards became more popular and were produced in large numbers from about 1860. In 1870, the cost of sending a post card, and also Christmas cards, dropped to half a penny. This meant even more people were able to send cards.

Printed Card I Made
My first embossed Christmas card that I made in the 1980s
when I worked at an arts organization.


By the early 1900s, the custom had spread over Europe and had become especially popular in Germany.

The first cards usually had pictures of the Nativity scene on them. In late Victorian times, robins (an English bird) and snow-scenes became popular.

Christmas Cards appeared in the United States in the late 1840s, but were very expensive and most people couldn't afford them. It 1875, Louis Prang, a printer who was originally from Germany but who had worked on early cards in the United Kingdom, started mass producing cards so more people could afford to buy them. Mr Prang's first cards featured flowers, plants, and children.

In 1915, John C. Hall and two of his brothers created Hallmark Cards, who are still one of the biggest card makers today.

In the 1910s and 1920s, home made cards became popular. They were often unusual shapes and had things such as foil and ribbon on them. These were usually too delicate to send through the mail and were given by hand.

Handmade Christmas Postcards
A trio of handmade Christmas postcards that I made.

Nowadays, cards have all sorts of pictures on them: jokes, winter pictures, Santa Claus, or romantic scenes of life in past times.

Charities also make money from seals or stickers used to seal the envelopes. This custom started in Denmark in the early 1900s by a postal worker who thought it would be a good way for charities to raise money, as well as making the cards more decorative.

It was a great success: over four million were sold in the first year! Soon Sweden and Norway adopted the custom and then it spread all over Europe and to America.

Saturday, November 23, 2013

Miniature Thank You Cards - Art Every Day Month - Day 23

Today I started going through some "to do" bags I have in my closet. There are quite a few projects that I have in progress...just need to make some time to complete them.


So, first on the list were 11 sets of thank you cards. The cards were folded and the front decorative paper already glued on.


I just needed to cut the white pieces of paper, hand-stamp them, and then affix them onto the card using a three-dimensional foam piece between the white and decorative papers.


I'm going to start uploading them into my shop, Harvest Moon by Hand. It seems like around the holidays there is an increased need for thank you cards.


These little 3"x 3" cards that are blank on the inside make just the right size for a quick thank you note.


I'm happy to have all these sets of cards done. Now, I think I'll move onto embroidery.


Sunday, August 7, 2011

The Summer of Color Wrap-Up

Here it is...the final week of The Summer of Color challenge that is being hosted by Kristen at Twinkle Like a Star. This has been such a wonderful project, and helped motivate me to:

- do some projects that I've wanted to do for a long time,
- create new window star patterns,
- try existing window star patterns in different colors, and
- make a quilt.

Projects I've Wanted to Do

I did several embroidery projects during the weeks when the featured color was pink and green.

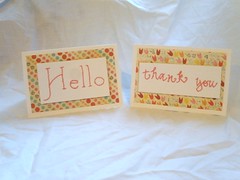
Embroidered Greeting Cards
Pink hand-embroidered greeting cards.

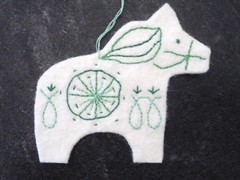
Embroidered Dala Horse
Green hand-embroidered Dala horse and tree.
They can be used as ornaments or tags.

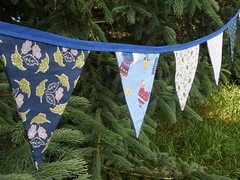
For the Blue Week, I did some sewing projects - a bunting and tablecloth.
Blue Bunting Close Up
Blue bunting.

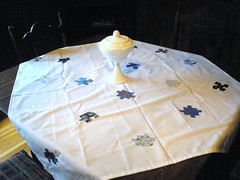
Puzzle Tablecloth
Tablecloth that I made by tracing puzzle pieces
onto pieces of fabric. Each are hand-cut and then ironed onto
the white fabric using an iron-on adhesive.

Create New Window Star Patterns as well as Use Existing Patterns to Make Window Stars in New Colors

For many of the weeks, I enjoyed making window stars in a variety of colors. It was fun to create new patterns and see what the new window star would turn out like.

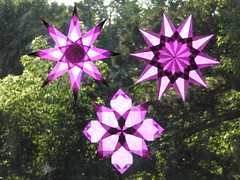
Trio of Purple Window Stars
Trio of purple window stars.
The pattern on the bottom is one I created.

Equally exciting for me was to see what window stars look like in different colors using patterns that I normally use.

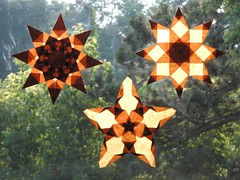
Trio of Brown Window Stars
Trio of brown window stars.

Two orange window stars.
I've made these patterns before, but never in orange.


The pattern on the left is one I've used before, and
the pattern on the right is a new one I created.

Two yellow window stars. The pattern on the left is one I created
and the one on the right is one I've made in different colors
but never in yellow until The Summer of Color challenge.

Creating a Quilt

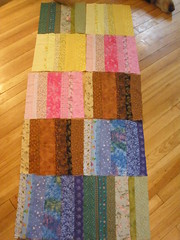
My on-going project during the summer was a quilt. Each week, after the color was assigned, I created two quilt blocks that were about 11 1/2" square. Each square included seven different patterns of fabric - to represent the seven days of the week.

My goal was to use only fabric, thread, and batting that I had on hand.  This wasn't a challenge when I was doing the squares - it seemed like I had plenty of fabric to choose from.

WIP - The Summer of Color Quilt
Five weeks' worth of quilt squares.


However, once I got to the backing and batting, it became a bit more difficult. I didn't have either the fabric or batting in the size I needed for the quilt. So, I had to piece both elements together to create the quilt.

The batting needed to be hand-sewn in order to attach each piece to one another (there were three pieces of batting used). For the quilt back, I used one of Sophia's floral-print sheets and cut about a six-inch section off the end.

By cutting that in length-wise and sewing the pieces together, I was able to create enough fabric to sew to the other piece...thereby creating a quilt backing.

Quilt squares bordered by 3" white fabric strips.
The white fabric strips are from
bed linens that were discarded from a hotel.
I washed the sheets and was able
to use the fabric to make the quilt.

What I like about the quilt is that it is made entirely from fabric, thread, and batting that I had on hand. I didn't have to purchase anything to make it!

The Summer of Color quilt that I made
during June-August 2011.

Lots of color will be welcome during the middle of winter
when the landscape is all white and
the temperature is well below zero.
Sophia, Olivia, and I will use this
soft, colorful quilt when
we homeschool and read together.

Thursday, February 10, 2011

Creative Reuse - Crafting Using Supplies on Hand and "Found" Objects

Over at Show Tell Share, there's a challenge for February:  STASH!  The challenge is to "...use materials from your overflowing stash of stuff. .... So go 'shop the house!' Create something beautiful out of what you have laying around!

"You may have to go buy just a little something, button, zipper, etc. to complete a project, but extra points it you can pull it of without buying anything.

"And you don't have to stop with one, see how much of your stash you can put to good use! You can make something completely from start to finish, or see how many of those half finished projects you can complete and show off! Then at the end of the month, you'll have so much extra room in your craft room/closet/bins."

This sounded like a great challenge to participate in - not only am I saving money by not buying new craft supplies, but I'm using what is on hand and creating space.  Below are some things I have made so far this month.

*~.:.~*~.:.~*~.:.~*~.:.~*~.:.~*~.:.~*~.:.~*~.:.~*

I had a couple of maps that I didn't need - one from Brazil and another from Spain.  The one from Brazil is written in Portuguese and was purchased there about a decade ago.  The other map is from a National Geographic magazine. What I like about the latter map is that there are short explanations about the significance of some of the cities or towns on the map. 

With the Brazilian map, I made folded flowers that I glued onto 5 inch by 7 inch greeting cards. 

Flower made from a Brazilian map and green copy paper

Open flower where a message can be written

The matching envelopes have a floral image from the map to tie the greeting card and evelope together.

Greeting cards and envelopes made from the Brazilian map

With the map of Spain, I made two type of miniature cards (they are 3 inches x 3 inches).  The cards themselves are made from sheets of 12 inch x 12 inch scrapbooking paper.  For some of the cards that had an interesting fact, I left the cards plain. 

Miniature greeting and thank you cards

With the cards that didn't have a fact, I placed a hand-stamped "thank you" flower in the center.  It is affixed to the card with a 3D double-sided foam piece.

*~.:.~*~.:.~*~.:.~*~.:.~*~.:.~*~.:.~*~.:.~*~.:.~*

I had quite a few vintage children's books on hands that the girls were done reading.  They had cleaned their bookshelves about a month ago and removed all the books they no longer wanted.  Before donating them to the local thrift shop, I pulled any vintage books that could be used in crafting. 

After removing the pages that had pictures, I traced an envelope template onto each page.  I cut each one out by hand; and then folded and glued it.  I pressed the envelopes under a couple of heavy books to flatten them.

Variety of handmade envelopes from vintage children's books

With some of the books, the pages are a bit small for standard-size envelopes, so I made gift bags with the pages.  Again, I use pages with pictures for the bags.  After removing the pages from the books, I pair pages together and then trim them so the edges match.  The edges are cut with pinking shears.  The edges are sewn on the sewing machine.

Handmade Bags with Vintage Children's Books
Gift bags made from vintage children's books

*~.:.~*~.:.~*~.:.~*~.:.~*~.:.~*~.:.~*~.:.~*~.:.~*

I have a lot of scrapbooking paper and notebooks that are taking up shelf space.  An idea to use both of these were to make letterettes.  I received a set of letterettes from someone on Swap-Bot awhile back.  I thought it was such a clever idea.  She used a heavier decorative paper (almost like a cardstock) for the exterior.  Since I didn't have patterned cardstock on hand, I used a lighter-weight decorative paper.

Letterettes

The patterned paper is 12 inches by 12 inches.  I cut the paper into two pieces - one that was 5 inches wide and the other was 7 inches wide.  The length is 12 inches.

The inside of each letterette has 5 sheets of notebook paper that were cut into smaller sizes:
- Smaller letterette:  4 7/10" x 7 3/4"
- Larger letterette: 6 7/10" x 5 7/10"

Letterettes - with one open to show where it is sewed

Once cut, they pages were folded in half and placed in the folded patterned paper.  I sewed on the sewing machine along the folded line in the notebook paper, making sure to reverse sew along each of the edges so the stitching wouldn't come out.  After trimming the thread, the letterettes are ready to use.
After writing a letter on the notebook pages, simply seal the letterette with a glue stick or decorative tape, put two labels on the outside - for the return and sending addresses - and it's ready to be mailed.   

*~.:.~*~.:.~*~.:.~*~.:.~*~.:.~*~.:.~*~.:.~*~.:.~*

I had a gift box that had a nice pattern on it, but I am now using fabric bags to wrap gifts.  So, instead of recycling it I used my tag punch and paper punch with a tiny hole to create tags.  Using a thicker embroidery floss, I cut and attached hangers so they can be used for gifts or for price tags for products. 

Tags made from a decorative box

*~.:.~*~.:.~*~.:.~*~.:.~*~.:.~*~.:.~*~.:.~*~.:.~*

I had a few pages from the vintage children's books leftover as well as some notebook paper.  So, I made some made stationery gluing a sheet of notebook paper on top of a page from the children's book.  I had debated about painting over the image that’s under the notebook paper, but I thought that it was nice to be able to see the design of that page of the children’s book as well as the image on the backside of the stationery.

Stationery with notebook paper and a page from a children's book

*~.:.~*~.:.~*~.:.~*~.:.~*~.:.~*~.:.~*~.:.~*~.:.~*

My next focus:  using the fabric and felt that I have on hand.  I have quite a few patterns that I've wanted to try that use these materials. So, during the next couple of weeks I'll start using sewing or embroidering using felt and fabric.  I'll do another post at the end of the month with what I've made.