It seems like each year the number of house plants grows. Partly this is a result of starting new plants from existing plants. I have two main areas where my plants are located - by the south-facing window in the kitchen and the east-facing window in the kitchen.
By far, the south-facing window has the most plants. This is the sunniest and warmest place in our home.
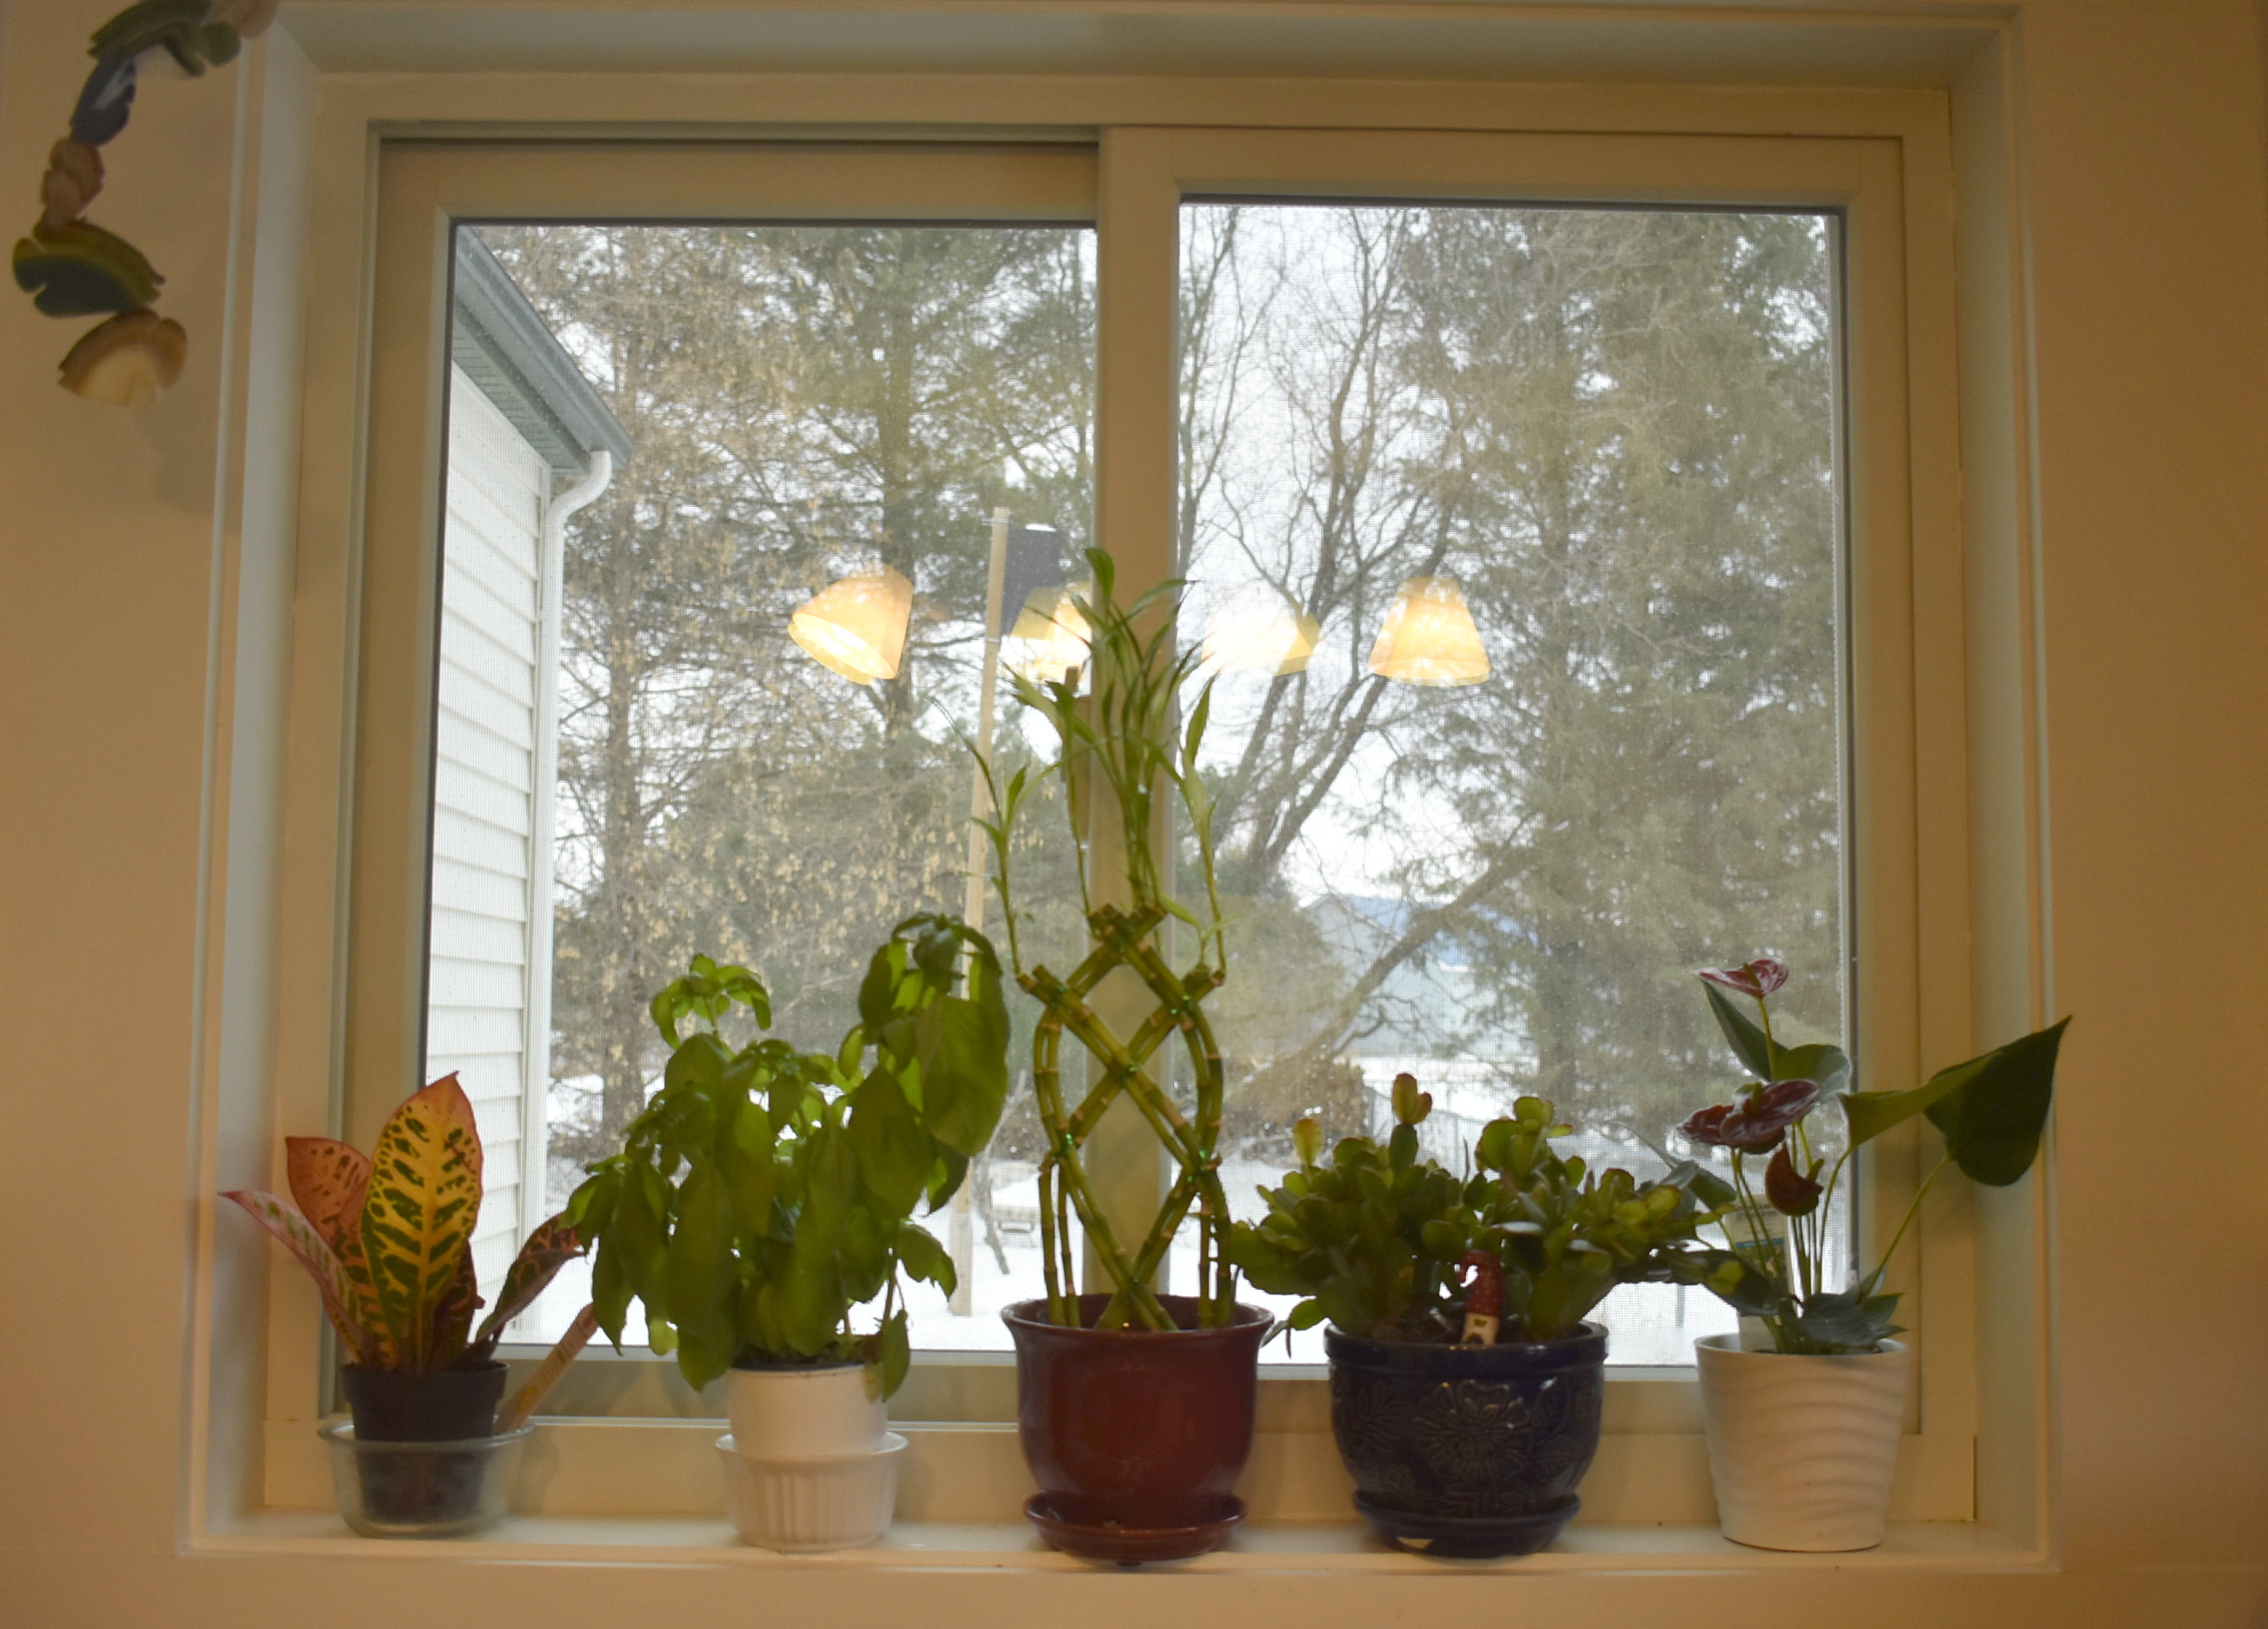
The east-facing window has five plants. Some could benefit from being in stronger light, but so far they are doing fine here.
The largest plant in our home is the hibiscus tree. It was a quad-grafted one that my daughter, Olivia, got from an Amish-run greenhouse in southeastern Minnesota in 2018. After several seasons, we weren't seeing anymore of the pink and orange blooms - just the red and yellow ones - which are still beautiful.
The hibiscus enjoys the warmth of the woodstove during the winter. In the summer and early-fall, it is an outside plant. Since it has been inside, it has sprouted two new plants near the base of the tree. I'm curious to see what color blooms they will produce.
Two of the most recent plants I purchased from Home Depot are on the dining room table (though not in these photos) on a Christmas table runner. The first is a fragrant Madagascar Jasmine which is a type of vine. It is blooming now and will do so again in the summer.
The other plant I recently purchased is a Kalanchoe. Its bright red flowers attracted my attention and I thought it looked nice with the jasmine. The Kalanchoe is a tropical, succulent plant native to Madagascar and tropical Africa.
Although this Philodendron Congo Rojo looks unassuming now, it produces showy flowers and interesting leaves. The name "rojo" comes from its new leaves which unfurl in a deep, shiny red. It's hard to see in my plant, but there are new red leaves forming under the green ones near the stems. As the leaves mature, they fade to the burgundy-green color they are below. (This is another Home Depot purchase a couple weeks ago.)
These two plants are Tradescantia Pallida "Purple Heart" Wandering Dude. The plant on the left was given to me by a friend who I met in my pottery class a few years ago. The cuttings (which grew into a plant) were from a plant that belonged to her mother.
The plant on the right was created from cuttings from the plant on the left. I had the older plant outside during the summer and it grew so many vines. I cut it back and put the cuttings in soil. After watering it, I didn't do much with it. Within weeks, little green leaves were starting to sprout. These plants are fast growers, so I'm regularly trimming them. I want to see if by regularly trimming them I can create "denser" plants.
I also have two aloe vera plants. The one on the left needs to be divided. This one continues to create shoots. This could easily be six smaller plants. I've had this plant for many years.
The aloe vera on the right was given to my daughter, Sophia, in her sophomore year of college. She's a senior now. She didn't want to have it in her dorm room, so she asked me to take care of it. I still haven't transplanted it from the plastic container it came in.
Now for a couple of sad plants. These are rosemary plants that I left in the mudroom a bit too long into the late-fall/winter. I brought them from the backyard to the mudroom. Then, I neglected them by not watering them or transplanting them. I just cut them back and put them in new pots with potting soil. So, we'll see if they come back to life this winter.
In addition to the rosemary, I have a basil plant. My brother bought it for me before Thanksgiving. I've used the leaves to make lasagna. There's nothing like fresh basil.
This plant is another plant that Sophia wanted me to take care of. It is a type of agave that she got when she was at a leadership camp in Patagonia, Arizona, in 2018. The goal was to plant agave seedlings to promote agave restoration.
One of the interesting things about agave plants is that the agave flowers are an essential food source for the Mexican long-tongued bat and the long-nosed bat. These bats make their way from Mexico to the United States where they give birth to their young before returning back to Mexico in the fall.
This is a little Bromeliad plant that was at Home Depot in early-December. I've seen larger versions, but wanted to start out with a little one.
I really like the flower on the Bromeliad plant.
My daughter, Olivia, said that we should keep a tiny succulent that was on one of her graduation bouquets (from May 2022). She took it and placed it in one of the Christmas Cactus plants that were outside for the summer. By the end of the summer, it had grown quite tall. I propped it up with small twigs as it was growing. She tried to grow it at college, but she has a north-facing window so light is minimal. This one needs stronger light and is doing well in the south-facing window in my kitchen.
Because Olivia likes plants, I found this Haworthia/Gasteria at Home Depot a couple of weeks ago that I'm going to give her for Christmas. I'm not sure of its specific type/species. The plant has such a curious texture to it with the raised white dots.
This is a type of Radiator Plant called Peperomia "Napoli Nights" and it was at Home Depot in early-December. I like the texture and coloring of the leaves. What I'm looking forward to seeing are the yellow flowers that are starting to come out. The plant sends up thin stems on which the yellow flowers grow. People say they resemble mouse tails.
My oldest plant is a Christmas Cactus that my dad gave me when he was in the middle stages of Alzheimer's and he was forgetting that he watered the plant. He was overwatering it which was making it die. I was able to bring it back to life, thankfully. At that point, he was no longer capable of caring for the Christmas Cactus. He had this plant probably since the mid-1970s. If I use the date that we moved into our new home in 1974, then it is 48 years old.

From that plant, I started two other plants - one for each of my daughters. They do not know the plants are for them. I want to give them one either when they move to their first home or when they get married - a gift - in essence - from my dad. Both are doing well in terms of blooming. The one on the left seems a bit more well-balanced in terms of height. The one on the right is the plant where the succulent (pictured above) was growing. So , there's a gap now where the succulent was until the fall. I need to do something for re-building this part of the plant.
This is a Zamioculcas Zamiifolia or ZZ plant that I got at WalMart in October. I was looking for some different types of plants than I had and this one had much darker leaves than any of my plants. I don't believe this one has any flowers.
Another plant that I have is a jade plant. Jade plants are native to the KwaZulu-Natal and Eastern Cape provinces of South Africa, and Mozambique. The plant, pictured below, started out small - probably no more than five inches tall. Sophia, Olivia, and I purchased it and several other plants to create a terrarium. Eventually, the plants outgrew the terrarium and each got its own planter. The jade plant did exceptionally well and has now grown into a small tree. It is 15 years old.
Several years ago, my jade tree started blooming. I had never seen it bloom before, so it was fun to see all the pink and white star-shaped flowers. This is typical of jade plants - that they need to be mature for them to flower.
I have another smaller jade plant that I started from parts that fell off the larger jade tree. To create new plants, all that I needed to do was stick a leaf or stem with leaves into the soil and water it. Jade will start growing into a plant.
In October, I bought this Anthurium Andraeanum from WalMart - also called a flamingo lily or painter's palette. This plant is native to Ecuador and Columbia. It can grow up to 16" tall so it will get much larger than it is now.
Several years ago, I got another type of Christmas Cactus from a local nursery - though it may be a Thanksgiving Cactus since its leaf shape is different from the other ones I have. It also has a red tint around all of the leaves. I'm not sure if that's okay or a sign that something is wrong with it. Yet...it looks healthy. So, I'm not sure.
In October, I got this bamboo plant from WalMart. I liked how the stems were formed into the shape. I'm hoping that it does well during the winter. I've never grown bamboo before.
This little plant that I recently got from WalMart is called a Codiaeum Variegatum "Petra Croton." It is an evergreen shrub native to the western Pacific Islands and southern Asia. I liked the various colors in the leaves. In the upcoming month, I want to transplant it into a pot.
The last houseplant I have is one I just got about a week ago from Home Depot. It's a Hoya Macrophylla and is also known as a wax plant because it has waxy leaves and flowers. The plants originate from New Guinea, New Zealand, and Australia.
This plant is a trailing vine and can grow five feet in length. The leaves grow between four to eight inches long and one and one-half to four inches wide. Blooms appear in the spring and summer and will have white or cream-color clusters of star-shaped flowers. The flowers release their scent at night when natural pollinators come out.
All these plants are easy to take care of - it's just time-consuming in terms of watering. When the majority of the plants are outdoors during the summer, it is much easier since the rain is usually sufficient to take care of them. When I transition them back inside, I do a lot of pruning of each plant since they seem to grow quite a bit in the three months they are outdoors.
In an ideal world, I would have plants in each room of the home. However, there isn't enough light in all of the rooms. I haven't gotten to the level of plant shelves and grow lights. However, maybe someday that could be a possibility. It would give me something fun to do with my time as I learn about different plants and how to grow them.