Sunday, March 27, 2011

Signs of Spring - UWIB Blog Hop

This is the second month that the Unique Women in Business team on Etsy has done a blog hop.  This month's theme is Spring. 


Some of my first thoughts when I think of the signs of spring in Minnesota are:


- the geese and other migratory birds returning


Girls Walking Towards Geese
Sophia and Olivia trying to get a
closer view of the geese


- sprouts of bright green grass emerging from the ground and freshly-plowed pastures


On a Walk in the Pasture
Olivia (and Sophia in the background)
on an early-spring walk in a near-by cornfield


- buds appearing on trees


Northern Magnolia Buds
Buds on the northern magnolia tree


- beautiful flowers


Yellow Tulips
Tulips in spring


- rainbows after nourishing spring rainfalls


Full Rainbow
Full rainbow in Duluth (Minnesota)


I enjoy seeing rainbows in the spring.  There's something that's so uplifting about them that represents the return of goodness and happiness (like the sun after the rain). 


As one of Harvest Moon by Hand's customers recently said, "...There is always something good in bad situations! Your rainbows remind me of that...after the storm a rainbow will appear!"

So, to celebrate spring, I made two rainbow window stars.  The points of each star are individually folded multiple times.  Then, each point is glued together to reveal a pattern.

Two Rainbow Window Stars


The rainbow mandala (on the left hand side) is folded 9 times per point.  With 16 points, it takes 144 folds to make the design.


Rainbow Mandala
Rainbow mandala


The rainbow star with floral center (on the right hand side in the picture above) has 19 folds per point.  With 8 points, that's 152 folds to make this star.

Spring Rainbow Star
Rainbow star with floral center

To see the different rainbow items that are available in Harvest Moon by Hand's shop, please click HERE.
There are many great blogs to visit on the UWIB Blog Hop.  To see how others have interpreted the spring theme, please take a look at the participating blogs below:

Rita Wetzel http://ritascreativenest.com/

Jenn Nolda http://brynnsbeautifulbows.blogspot.com/


Ann Rinkenberger http://harvestmoonbyhand.blogspot.com/ (You are here right now)


Robin Koehler http://www.nestlingsbyrobin.blogspot.com/


Linda Reynolds http://bellalindadesigns.net/


Audrey Fetterhoff http://audreygardenlady.blogspot.com/


Birgitte Hendricks http://sewdanish.blogspot.com/


Wendy Kelly http://blog.vintageday.com/


Janet Bocciardi http://www.honeyfromthebee.com/


Linda Stranger http://capecodjewel.blogspot.com/


Karen Terry-McDuffie http://jmjcreations.blogspot.com/


Judy Woodley http://wellspringcreations.blogspot.com/


Trudy Miller http://mommagoddesstreasures.blogspot.com/


Cory Trusty http://aquarianbath.blogspot.com/


Nancy Pace http://nancyswildwirejewelry.blogspot.com/


Lois Stifel http://foxygknits.com/


Jenn Brockman http://alexshares.com/


If you would like to check out UWIB's bog, please click HERE.


Rainbow Mandala
Rainbow mandala that I colored with
Prismacolor color pencils

A thought to leave you with from an unknown source...
May there always be work for your hands to do,
May your purse always carry a shilling or two,
May the sun always play on your window pane,
May a rainbow chase after each spot of rain,
May the hand of a friend always be near you,
May your heart be filled with gladness and cheer you.

Saturday, March 26, 2011

Applesauce Bars

I recently made Applesauce Bars and everyone who ate them has enjoyed them.  The recipe is from a local church cookbook and has been in the person's family for more than 100 years. 

The bars are a bit more dense (versus a light and fluffy texture that you get with cake-like bars).  As the frosting sets, it hardens a bit.  The bars are flavorful and simple to make. 

It's a nice recipe to try on a weekend afternoon, and would certainly fill a home with the wonderful scent of cinnamon, nutmeg, cloves, and vanilla.


Here is the recipe for Applesauce Bars:

Ingredients:

½ cup shortening (I used vegetable shortening)
1 cup sugar
1 cup applesauce
2 cups flour
1 teaspoon soda
½ teaspoon salt
½ teaspoon cloves
1 teaspoon cinnamon
1 teaspoon nutmeg
1 cup raisins
1 teaspoon vanilla

Ingredients for Frosting:

¼ cup butter (I used dairy-free butter)
½ cup brown sugar
2 tablespoons milk (I used dairy-free milk)
1 – 1 ½ cups powdered sugar

Directions:

Mix together shortening, sugar, and applesauce. Sift together flour, soda, salt, cloves, cinnamon, and nutmeg. Add to creamed mixture. Stir in raisins and vanilla. Mix well. Spread in greased 9”x13” pan. Bake at 350 degrees for 30 minutes.

For frosting, melt butter in saucepan over low heat. Add brown sugar and boil for two minutes, stirring constantly. Stir in milk; bring to a boil. Cool to lukewarm. Gradually beat in powdered sugar. Spread on cooled bars.

Friday, March 25, 2011

52 Books in 52 Weeks ---- Week 13 ---- A Special Mother

This week I took a departure from reading historical fiction and autobiographies as part of the 52 Books in 52 Weeks challenge to read a book that is relevant to what is currently happening in my life.  It is called A Special Mother - Getting Through the Early Days of  Child's Diagnosis of Learning Disabilities and Related Disorders


This book, written by Anne Ford, presents a guide for mothers whose child is diagnosed with a Learning Disability (LD). The book is written in a conversational tone and there are many sections that feel like the reader is joining a group of women (all of whom have a child with a LD).

The book begins by discussing mothers' intituition and their feelings that "something’s not quite right with my child.”  A Special Mother continues through the stages of denying that anything is seriously wrong, the eventual diagnosis, and advocacy.

For me, I could identify with many of the mothers who shared their experiences with knowing something wasn't quite right with her child, but not being able to pinpoint the cause.  Olivia, who was adopted as a ten-month old infant from China, was diagnosed with a host of medical problems and developmental delays when she had her initial evaluation at the University of Minnesota's International Clinic. (The referral said she was a healthy baby with no medical problems.)

By the age of three years old, at my request, she was evaluated by several teachers and therapists in the local school district who helped identified some special needs and a plan for reaching developmental, cognitive, and speech goals. 

For about two years, she worked with this team of professionals who provided guidance and therapy to help her reach her goals in combination with therapy and learning activities that they asked that I would do at home with Olivia.

Olivia Playing with Oodles of Ooze
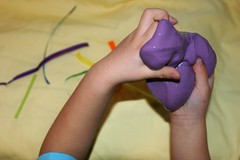
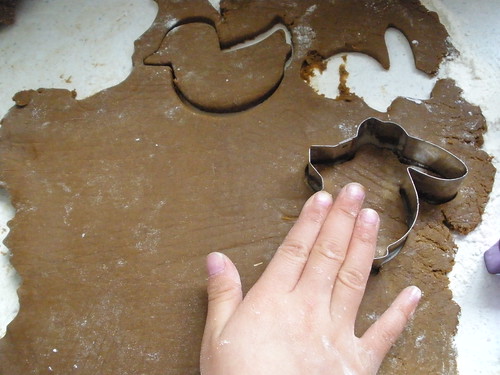
Olivia playing with Oodles of Ooze
that I made for her.  It was meant to
strengthen her hands and
get her comfortable with different textures.

Concurrently, Olivia was diagnosed with Sensory Processing Disorder (a.k.a. Sensory Integration Dysfunction) and went through an intense ten-day, full-day program at Special Children Center in Hudson, Wisconsin.  She had many follow-up sessions to help address on-going issues that were too great for the district to handle.

Olivia on Blackie
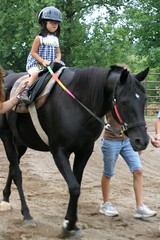
Olivia doing therapeutic horseback riding in 2007.
She was 4 years old in this picture.

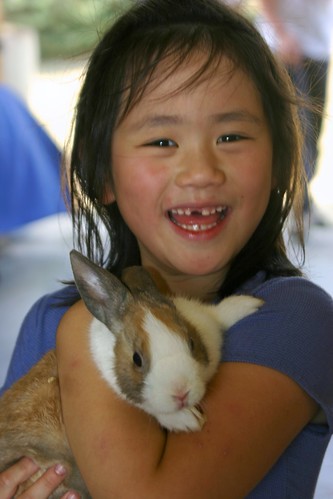
Olivia also began therapeutic horseback riding at age three through Courage Riders and later participated in River Valley Riders' program as well.  These two programs provided physical therapy, occupational therapy, cognitive therapy, speech therapy, and body/muscle strengthening...not to mention a love for horses and horseback riding. 

When she first began riding, she could barely sit up straight (she was hypotonic which basically means she had no muscle tone in her hips or upper arms/shoulder area) and couldn't put more than one word together. Her language was at a standstill for a long time, and most of it was being done through American Sign Language. 

Within the first six-week session of therapeutic horseback riding, she put her first two words together!  It was huge breakthrough.  Now, five years later she can sit straight up on a horse and can compose multi-word sentences.  In fact, she is almost always talking.  She even still remembers some of the ASL signs she used as a toddler and young child. 

Exercising While Riding
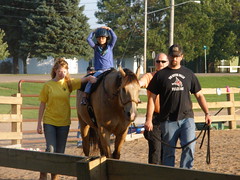
Olivia exercising while horseback riding

For the past five years (from age 3-8 years old), Olivia has been seeing an opthamologist on a quarterly basis since she is legally blind in both eyes (without glasses).  Her left eye is substantially worse than her right eye, so it was recommended that she wear a patch on her right eye so that her brain would be forced to use her left eye.  In this way, it would strengthen her vision and prevent a complete loss of vision in her weaker eye. 

She also was receiving nightly medicine in her eyes so her lashes wouldn't scratch her corneas.  About eight months ago, her lashes began moving away from her corneas and no longer were scratching them.  This medicine has been stopped which has been nice.

Olivia Sewing a Wool Felt Pencil Case
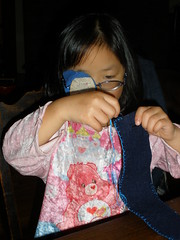
I had Olivia work on a variety of projects while she wore
her patch so it would even further help use the eye.
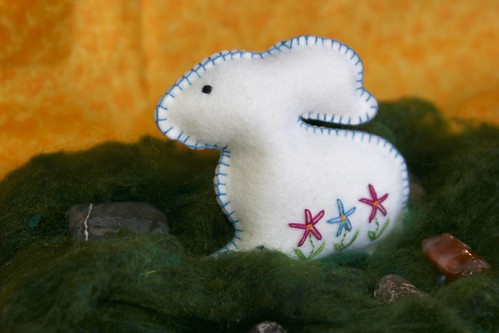
Here she is doing embroidery and
making a wool felt pencil case


Which brings her to second grade where I was noticing persistent challenges with speech/communication issues.  So, in Fall 2010, I approached the school district and requested an evaluation of her speech skills.  She qualified for services and has been going to speech therapy once a week since November 2010. 

Each week, her speech therapist (Laurie) gives Olivia several books to read at home.  She started at a very basic level since I had intentionally waited to have her begin reading. (I was following the Waldorf philosophy in terms of reading as I had done with my older daughter, Sophia who waited until the end of first grade/beginning of 2nd grade to read. She is now in 4th grade and reads at the late-5th grade level and has a comprehension level of an early-7th grader.)

Homeschooling Outside
Olivia trying her best with Explore the Code -
part of her reading/language arts lessons

At this point, I wasn't noticing anything much different from Sophia's start in reading.  Reading was difficult for both of them, but they forged ahead with their reading assignments.  However, within a few weeks, Olivia's ability to recall simple words that she read in previous weeks was not strong.  She would get highly frustrated with reading - almost to the point of tears.  This was very unlike Sophia's reading experience.  I expressed concern to Laurie.

Laurie and I agreed to wait a bit longer to see if reading became any easier for Olivia.  It did not.  At that time, I requested testing for both reading and math (since she must use manipulatives in order to arrive at the right answer). 

I met with a group of eight women who made up the special education team/school administration.  I had to make a presentation about Olivia's skills, concerns I had, and provide samples of her work. 

Olivia Doing Math with Shells
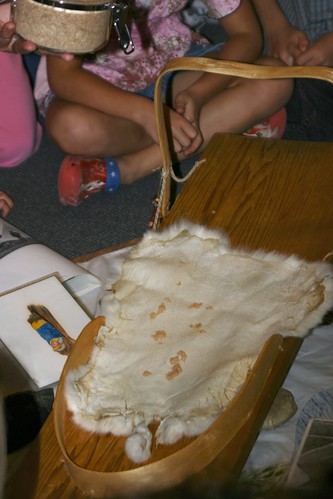
Olivia doing math with manipulatives.
She's using shells on this day, but also uses sticks,
rocks, and other natural items.

After reviewing the materials and listening to my concerns, the team decided to move forward with testing while doing concurrent at-home interventions and testing for six weeks.  Although they didn't anticipate the interventions/testing to improve during the six weeks, it is a necessary step in the paperwork they need to file with the state.

Olivia now has gone through a battery of tests by a special education teacher, an occupational therapist, speech therapist, and psychologist.  I've completed quite a few questionnaires and checklists that provide a different view of Olivia (from both a parent and teacher perspective). 

At this stage, it looks like she will qualify to receive services under the "learning disability" label.  I'll know more specifically what her challenges are next week, but at this stage I do know that one thing she is definitely struggling with is short-term auditory memory and a bit of perceptual reasoning.  The tests that the different professionals did all will reveal more specific problems and areas with which she will need assistance.

So, going back to the book I read this week, A Special Mother, it was with interest that I read about the evaluation/assessment process, the written report, evalutation meeting, and IEP (Individualized Education Program).  The latter three items are forthcoming during the first two weeks of April, so it was valuable to get an overview of what to expect, read about a child's educational rights, and see the wealth of resources available for parents of children with LD, autism, and other developmental learning disorders. 

Even though I've been through the process when Olivia was much younger, it is a bit different now that she's moved from the "developmental delays" label and into the "learning disabilities" label.  The former, to me, is more transitory and something that can be worked through whereas the latter is, as it notes in A Special Mother, "...a neurological disorder.

"In other words, it results from a difference in the way a person's brain is 'wired.' A learning disability means that a person of at least average intelligence will have difficulty acquiring basic academic skills that are essential for success at school and for coping with life in general."

With more than three million children in the United States having been diagnosed with a learning disability, having books and resources for parents is invaluable.  It's even more meaningful when the book was written by a parent whose child has a LD.  In Anne Ford's case, her daughter Allegra has severe learning disabilities; and it provided the motivation to become an advocate for children with LD.

Reading about the experiences of Anne - as well as many other mothers profiled in the book - helps mothers realize that they are not alone...and that they can help their child to thrive.  I would highly recommend this book.

Thursday, March 24, 2011

30 Days to a Simpler Life - Week 1

Day 1: Today, gather up a bagful of things you no longer love and use. First, find a shopping bag, trash bag, or cardboard box. Next, fill it with giveaways or throwaways from around your house. Gather unwanted stuff from anywhere in your home or garage. Look under sinks, in closets, into drawers, and under the bed. No space is off limits.

Finally, put the stuff into your car's trunk to be recycled. This task could take 5 minutes to an hour, depending on how decisive you are. Fill as many bags as you can in one hour. (30 Days to a Simpler Life, page 11)

I focused on the cupboard under one of the sinks in the bathroom as well as the top of the bathroom counter for this challenge. 

Above/After:  Cupboard under the bathroom sink after I organized it.
Below/Before:  Piles of products and items I didn't use. 

There were no items to donate with this challege.  The half of a garbage bag was filled with garbage.

Day 2: Today, dejunk one drawer. If you are like most people, messy drawers abound in your kitchen, bedroom, and bathroom. Do the three steps of sorting, recycling, and dealing with ambivalence that are outlined below in "The Mechanics of Simplifying." These simple steps will help you simplify and organize every area of your life. (30 Days to a Simpler Life, p. 15)

Helped the girls clean their underwear/sock drawers.  We took out all clothing they no longer wore or had an excessive amount of.  Anything in good shape was donated to Family Pathways (1/2 of a trash bag).  Once this step was done, I showed them how to group their clothing by type and fold it.  The drawers looked so much better. 

It was interesting because a couple of days after helping the girls with one drawer, I went into their room and noticed that Sophia had organized all of her drawers.  Olivia is continuing to clean and organize her room. 

Day 3: Create a checklist of questions that will help you decide what to buy and what to forgo. At the very top of the list, write down your major life goals in sound bites.  For example, you might write "get fit", "travel more", or "study wildflowers."  Put your list in your wallet so you can consult it when you go shopping.  When it comes time to purchase something, determine whether your goals and the purchase are harmonious.

My major life goals: 
- raise two daughters who are compassionate, educated, and who want to make a difference in the world;
- be of service to others (people and animals) in need;
- travel (see each of the 50 states and visit all the continents);
- make some sort of impact or difference in the world;
- continue learning about, appreciating, and helping wildlife/nature; and
- continue making and creating crafts/art on as frequent basis as possible (daily, if possible), and share those skills or knowledge with others who are interested.

These are the goals that come to mind at this point in my life.  Of course, I may modify them as I get older and my life changes. 

There were several suggested questions in the book to ask before making a purchase:

Will it enhance my goals?
Will it create more work?
Do I need it?
Is it truly a bargain?
Do I think it will make my life easier?
Do I want it because it's trendy?
Will it bring my family together or tear us apart?
Do I want it because it will make me feel better?
Will I have trouble getting rid of it in the future?


Day 4: Today is a great day to edit your sheets and pillowcases. First, take all of your sheets out of your linen closet and put them in three piles: the Recycle Pile, the Ambivalent Pile, and the Love and Use Pile. Second, put the Recyclables in your car's trunk. Third, put the Ambivalent Pile into a lidded box or a bag in another closet so you can practice living without these linens. Finally, return the sheets and pillowcases you use to the linen closet. (30 Days to a Simpler Life, p. 27)

When I cleaned the girls' closet earlier during the fall, I went through all the sheets and pillowcases.  I ended up donating a couple bags worth of bedding.  At this point, there is one set of sheets/pillowcases for the king bed; one set for the queen bed; and 4 sets for the two twin beds.  There isn't much excess here, so I hesitate to further donate any sheets or pillowcases.  I think having at least one spare set for each of the girls' beds is a good idea. 

Day 5: Organize your closet.

Cleaned my closet and wardrobe. In the process, I donated four bags of clothing and threw away one bag of clothes that were not suitable for re-sale. After eliminating these items, I folded and organized items in each clothing bin and thoroughly cleaned the closet. Lots of extra room which is nice.

Before (above): Clothes in bins.
After (below): Fewer clothes that are folded and organized.

Day 6:  "Freeze your wardrobe", says Allison, an artist living in Boston. At first, we thought she was suggesting we put our clothes in cold storage. A shuddering thought! But she meant, "Don't buy any new clothes for a specified time period---freeze your wardrobe in its current state (and continue to cull out the clothes you rarely wear). When you feel compelled to buy something new, write it down on a list." (30 Days to a Simpler Life, p. 44)


Hanging clothes in my wardrobe after Day 5.
Folded clothes are in the bins (see above). 
 
I like this idea because - despite having a very limited wardrobe - it makes me take a closer look at what I truly need versus what I simply want.  With the transition from winter to spring/summer, my wardrobe becomes even more limited because I don't wear many of the long-sleeve sweaters and sweatshirts (see picture above).  Ideally, this spring/summer a few new items can be added based on what is missing at this point. 
 
Day 7: Clear your bathroom counter of everything. Then add no more than three items. Good choices are a water glass, a soap dish, and a scented candle.

Next, declutter your bathroom cabinets and drawers. Toss any product in a jar, tube, or bottle that you have not used for six months. Include prescription and over-the-counter drugs, dried up hand cream, and perfume bottles that are so old the insides are dark brown. Bathrooms need not be a haven for half-used, nearly empty, never-to-be-opened containers. (30 Days to a Simpler Life, p. 45)

I still have some work on the linen closet which has the majority of prescriptions and over-the-counter medicines.  I will do this another time when I'm feeling well (I've been sick for over half the week).  This is what I was able to accomplish this morning with the bathroom counter:

Before:  There were ten items and
a platter filled with a variety of things on the counter.

After:  The "simpler" version of the bathroom counter with
a soap/lotion holder, platter from Brazil, and
soap dish with a new bar of soap.

If you'd like to do the 30 Day to a Simpler Life challenge, head over to Enchanted Schoolhouse.  The daily challenges are presented each day with inspiring pictures of Fairy Tale Mama's own journey through the 30 days of tasks.

Wednesday, March 23, 2011

Preparedness Challenge - Weeks 1 and 2

The Homestead Revival is having an interesting weekly blog hop called the Preparedness Challenge.  With the recent disaster in Japan, it is a timely challenge to think about what would happen if a natural disaster happened in your own area.

After a major disaster, the usual services we take for granted, such as running water, refrigeration, and telephones, may be unavailable. Experts recommend that you should be prepared to be self-sufficient for at least three days.

Spring in Minnesota marks the start of tornado season.  During the past couple of years, there have been some major storms and tornadoes that we've been through or to which we've been very close. 

Olivia Montague and Cats in Basement During Hail Storm and Nearby Tornado
In the basement during the 2008 tornado.
The house had some damage and needed a new roof and siding.
About 10 minutes south of here, over 50 homes were destroyed
and a child died...many more people were injured.


So, this week, for the Preparedness Challenge, I looked at last week's participants and one of them, Falling Like Rain, had a list of items for an emergency kit.  I thought this would be a good starting point and give me something to assemble over the next month. 

I've modified it to fit our needs, and marked the items with an * for what I already have on hand. Although I may have some of the items on the list (e.g., food, first aid kit) they aren't yet set aside specifically for the emergency kit, so until that is done, I won't mark the item on the list with a *.

At-Home Emergency Kit

A large, watertight container to hold everything (it's recommended to store the kit in an easily accessible location. One idea was to put everything in a large, plastic garbage can with a lid and wheels so it can be moved easily)

Canned fruit* (canned peaches and pears in jars from Summer 2010)
Peanut Butter
Jam* (homemade jam in jars)
Low-salt crackers
Canned soup
Canned meat
Tunafish
Canned juice
Non-fat dried milk
Cookies
Cereal
Nuts
Dried Fruit
Juices
Hard Candy
Chocolate
Gatorade
Water
Allergy medicine
Copies of important documents
Paper plates
Disposable cups
Disposable silverware
Napkins/Paper Towels
Toilet Paper
First Aid Kit (see section below for more information about contents in a First Aid Kit)
Sun Screen
Manual Can Opener
Clothes and Rain Gear for each person
Heavy Work Gloves
Disposable camera (for recording damage)
Unscented liquid household bleach
Eyedropper
Hand Sanitizer
Soap*
Feminine Hygiene Products
Plastic Sheeting
Duct Tape
Utility Knife
Sleeping Bags
Heavy Duty Plastic Bags
Plastic Bucket
Crowbar
Bungee Cords
Tarp/Rope
Flashlights/Batteries
Battery Operated Radio/Batteries
Phone that plugs directly into the outlet (not cordless)
Dust Masks
Permanent marker, paper and tape (to leave a note if you decide to evacuate)
Wet Wipes
Disinfectant (spray, wipes)
Items for pets and horses/livestock (see section below for information about pets)

Notes regarding food: 

- Mark a rotation date on any food container that does not already have an expiration date on the package.

- Most canned foods can safely be stored for at least 18 months. Low acid foods like meat products, fruits or vegetables will normally last at least 2 years. Use dry products, like boxed cereal, crackers, cookies, dried milk or dried fruit within six months.

- After a power outage, refrigerated food will stay cold longer if you keep the door closed. Food should generally be consumed within 4 hours. Food in the freezer will normally remain safe for 2 days.

Go-Bags (one per person)

Backpack to hold it all
Flashlight and Glo-Stick/Batteries
Whistle
Dust Masks
Pocket Knife
Change of clothes/hat/rain gear
Local Map
Water/Food (see above)
Permanent marker, paper, tape
Photos of family members (in case you are separated)
Lists - emergency point of contact numbers
Identification and list of any allergies
Copy of health insurance cards
Medication
Small First Aid Kit
Small Sewing Kit
Toothbrush and Paste
Extra Keys (house, car)
Small books, games or puzzles
Hand towel
Wet Wipes
Mylar Blanket
Sun Screen
Camping Utensils (spoon, fork, knife)

This week for the Preparedness Challenge, I also read about water.  There have been many times over the years when we have been without water - due to the electricity being out (after a storm) or the time that my brother and I accidently hit the water line when trying to install a water line from the outdoor well to the barn. 

Going without water for a week was a huge challenge, but thankfully a neighbor was gracious enough to allow me to get containers of water and take a shower as needed. 

Sophia Drinking Tap Water
Sophia drinking water from a disposable cup.

Here's some information about water that I thought is important.  It's from the 72 Hours website.

In a disaster, water supplies may be cut off or contaminated. Store enough water for everyone in your family to last for at least 3 days.


Store one gallon of water per person, per day. Three gallons per person per day will give you enough to drink and for limited cooking and personal hygiene. Remember to plan for pets (and horses/livestock, in our case).


If you store tap water:


Tap water from a municipal water system can be safely stored without additional treatment.


Store water in food grade plastic containers, such as clean 2-liter soft drink bottles. Heavy duty, reusable plastic water containers are also available at sporting goods stores. Empty milk bottles are not recommended because their lids do not seal well and bottles may develop leaks.


Label and store in a cool, dark place.


Replace water at least once every six months.


If you buy commercially bottled “spring” or “drinking” water:


Keep water in its original container, and don’t re-store a bottle once it’s been opened.


Store in a cool, dark place.


If bottles are not marked with the manufacturer’s expiration date, label with the date and replace bottles at least once per year.


Treating Water after Disaster:


If you run out of stored drinking water, strain and treat water from your water heater or the toilet reservoir tank (except if you use toilet tank cleaners). Swimming pool or spa water should not be consumed but you can use it for flushing toilets or washing.


Treatment Process:


Strain any large particles of dirt by pouring the water through layers of paper towels or clean cloth. Next, purify the water one of two ways:


Boil – bring to a rolling boil and maintain for 3-5 minutes. After the water cools, pour it back and forth between two clean containers to add oxygen back; this will improve its taste.


Disinfect – If the water is clear, add 8 drops (1/8 teaspoon) of bleach per gallon of water. If it is cloudy, add 16 drops (1/4 teaspoon) per gallon. Make sure you are using regular bleach— 5.25% percent sodium hypochlorite— rather than the “ultra” or “color safe” bleaches. Shake or stir, then let stand 30 minutes. A slight chlorine taste and smell is normal.

Items for a First Aid Kit

Two pairs of disposable gloves
Sterile dressings to stop bleeding
Cleansing agent/soap and antibiotic towelettes to disinfect
Antibiotic ointment to prevent infection
Burn ointment
Adhesive bandages in a variety of sizes
Eye wash solution to flush the eyes or as general decontaminant
Scissors
Over-the-counter medicines such as Aspirin or other pain reliever, laxative, anti-diarrhea medication
Prescription medications you take every day or frequently (e.g., asthma inhaler)
Prescribed medical supplies (e.g., nebulizer with albuterol sulfate).  Need to figure out how to use this when there's no electricity since the nebulizer relies on electricity.

Plan for Pets in an Emergency Disaster

These ideas are from the 72 Hours website as well:

Keep a collar, current license, and up-to date ID tags on your pet at all times. Consider having your pet micro-chipped (both the dogs are micro-chipped, but the cats are not at this time).


Make sure your pet is comfortable being in a crate, box, cage, or carrier for transport.


Keep an updated list of trusted neighbors who could assist your animals in case of an emergency.


Make a Go-bag for each pet. Include:

Sturdy leashes and pet carriers. A pillowcase is a good option for transporting cats and other small animals (though each of the cats has her/his own transportation bin, in our case). Muzzles for dogs. Food, potable water, and medicine for at least one week.


Non-spill bowls, manual can opener, and plastic lid


Plastic bags, litter box, and litter


Recent photo of each pet


Names and phone numbers of your emergency contact, emergency veterinary hospitals, and animal shelters


Copy of your pet’s vaccination history and any medical problems


Portable fencing or baby gates


Remember that animals react differently under stress. Keep dogs securely leashed and transport cats in carriers or pillowcases.


If your pet is lost, contact the nearest animal shelter to report your pet missing. When it is safe, return to your neighborhood to search and distribute “Lost Pet” posters; include a current picture of your pet.

In the case of livestock/horses, it's important to have enough feed and/or alfalfa on hand.  Extra bedding (straw or wood chips) should be stored in your barn. 

With regards to water, after experiencing multiple power outages and no water for extended periods of time, I have always kept the stocktanks, heated water buckets, or waterers full.  Especially if I hear about a major storm approaching, I make sure all the tanks are full. In that way, there is a good supply of water right on hand.

Having one Go-Bag per livestock species would be sufficient (e.g., a pack for horses, sheep, chickens). 

Tuesday, March 22, 2011

52 Weeks of Giving - Week 13 - Donate Food to a Food Shelf

The girls are members of a 4-H club that has an active community service program.  At the last meeting, the project was to bring food to donate to the local food shelf, Family Pathways.  Collectively, the children donated 93 pounds of food to the food shelf.

Sophia and Olivia bringing their donations
for the 4-H food drive.

Sophia and Olivia each brought four cans of food to the meeting for the food shelf collection.  As we chose items from our cupboard, it was interesting to listen to their first reaction.  Sophia said, "I like tuna fish.  Why are we giving it away?"  Olivia added, "I like macaroni and cheese.  We should keep this."

When I explained that that each of those items could make a meal for a family who may be hungrier than we are, it made some sense.  "That tuna fish could be combined with noodles and Miracle Whip, and a family could enjoy lunch together.  And that macaroni and cheese...that could give some children food for a couple of meals." 

They understood then, and were more than happy to give food that they knew that other children would enjoy eating.  If they would eat it...then certainly another family might enjoy the food as well.

Monday, March 21, 2011

Outdoor Hour Challenge #44 Mammals: Rabbits and Hares

This week for the Outdoor Hour Challenge we're doing #44 Mammals: Rabbits and Hares.  The Handbook of Nature Study website is a wonderful resource, and the girls and I have been enjoying incorporating more nature walks and study into the weekly homeschooling schedule.

Two Felt Rabbits Hopping Away
Two hand-embroidered cottontails hopping away.

For this post, typeface in bold is from the Handbook of Nature Study website; typeface in italics is from the book Handbook of Nature Study by Anna Botsford Comstock; and plain typeface reflects my own thoughts and words.

1. Read pages 214-219 in the Handbook of Nature Study.  In this case, I would actually mark sections to read to your child about rabbits as a way to introduce them to an animal they probably haven’t seen in the wild. You do not need to read the whole section on rabbits but only as much as you think they will be interested in hearing. If you are using The Burgess Book of Animals, you may wish to skip reading from the Handbook of Nature Study to them altogether.

Although few of us will have access to a real rabbit of any sort to study up close, children will enjoy reading about the rabbit and then remembering some facts about rabbits for any future opportunities that may arise. Be creative and see if you can visit a pet shop that has rabbits that you can observe or let others know that you are studying rabbits and they may know someone who owns a rabbit that you can study with your children.

Below are some interesting facts about rabbits that are in the book Handbook of Nature Study:

The cotton-tail thrives amid civilization; its color protects it from sight; its long ears give it warning of the approach of danger; and its long legs enable it to run by swift, long leaps.

The cotton-tails are night wanderers and usually remain hidden during the day. 

In summer, they feed on clover or grass...herbs...sweet apples and fresh cabbage.  In winter, the long, ganwing teeth of the cotton-tail are sometimes used to the damage of fruit trees...since the rabbits are obliged to feed upon bark in order to keep alive.

Rabbit-Eaten Bark
Branches from an apple tree that the rabbits
ate during the winter.  Rabbit pellets are on the snow as well.

If [the ears] are set back to back and directed backward, they indicate placidity, but...is always on guard; if lifted straight up they signify attention and anxiety; if one is bent forward and the other backward the meaning is: "Now just where did that sound come from?"

The rabbit has an upper and lower pair of incisors like other rodents, but on the upper jaw there is a short incisor behind each of the large teeth; these are of no use now but are inherited from some ancestor which found them useful.

The strong hind legs...enable it to make...jumps, of eight feet or more.

There are five toes on the front feet, and four on the hind feet; the hair on the bottom of the feet is a protection, much needed by an animals which sits for long periods upon the snow.

Rabbit Tracks in the Woods
Rabbit tracks in the snow.

The general color of the rabbit fits in with natural surroundings.

Rabbit Fur
Fur in the snow from a rabbit.

Young rabbits are blind at first, but when about three weeks old are sufficiently grown to run quite rapidly.

Fox, mink, weasel, hawk, owl, snake and occasionally red squirrel all relish the young cotton-tail if they can get it. 

Eagle Eating a Meal
An eagle at the National Eagle Center in Wabasha
being fed rabbit meat during a presentation.

2. Supplemental reading in The Burgess Animal Book for Children: Read Stories 1-3. After you read each chapter, stop and pause for a little discussion about the animals in each story. See if your child can narrate back to you a few facts about each animal. If narration is new to your child, you may need to prompt them at first but it does get easier as you practice. Use the illustrations if you need to get them started.

“The purpose of this book is to acquaint the reader with the larger groups-orders, families, and divisions of the latter, so that typical representatives may readily be recognized and their habits understood.” (The Burgess Animal Book, Preface)

I read the following stories to the girls from The Burgess Animal Book:
- Jenny Wren Give Peter Rabbit an Idea
- Peter and Jumper Go to School
- More of Peter's Long-Legged Cousins

We all enjoyed learning more about the marsh and swamp rabbits - both of which spend about half their time swimming.  The rabbits that are commonly seen around here (in the northern United States) do not swim.  The rabbits that like to swim are found in the southern part of the United States, according to The Burgess Animal Book.

270/365 swimming Marsh Rabbit!
Marsh rabbit swimming in Florida.


3. Spend 10-15 minutes outdoors on a nature walk. Ask your children where they think that they might see a mammal. If you have snow or mud, look for animal tracks of any kind. Look for any other signs of animals as you walk. Look for gnawing marks on trees and plants. Look for scat or cones or seeds left from a meal.

Don’t forget that you can also observe other mammals if you have the opportunity. Cats, dogs, squirrels, and horses may be available. You can draw attention to the similarities and differences between a rabbit and these other mammals. For example: How are a cat’s and a rabbit’s ears different? Why do you think they are different? How are a cat and a rabbit alike? (both have fur, both have four legs, etc.)

Yesterday, it felt like spring with all the snow melted on the property, the pond at a water level that I haven't seen in years, and many parts of the pastures and backyard flooded.  Signs of spring - bright green grass and buds on some of the trees - were already emerging.  It rained for most of the day yesterday, turned to sleet, and then overnight began snowing.  This is what today looked like:

Pond in the northwest pasture and six inches of new snow.

Over six inches of snow fell.  Under that is crunchy ice.  Not many people are out and about today.  It's been very quiet.

Horses behind the barn ready for some corn.
The snow is plastered against the barn.


Hoss eating some alfalfa in the morning. 
The snow is still coming down with no sign of stopping.

After we fed the horses, we went on a short nature walk to look for any type of tracks, particularly ones made from rabbits which have been commonly seen all winter.  We explored part of the east pasture first.  No rabbit tracks.

Sophia by the pine trees in the backyard.

We climbed over the fence into the backyard and walked near the big pine trees.  No tracks near or underneath them. 

Pine cones and needles covered with snow.

We went to the gate that leads from the backyard to front yard.  We all liked the pattern the snow left on the gate:


Snow on the gate.

We walked around the front yard, and found no rabbit tracks in the yard or under the pine trees in the front yard where typically there are many to be found. 

Olivia jumping between sets of dog tracks.

There were dog tracks so I had the girls jump between the sets of tracks to see if they could jump as far as the space between each set.  It was difficult for Olivia, but Sophia could easily make the jump (she's quite a bit taller than Olivia).

Sophia jumping between sets of dog tracks
with Gretel following closely behind her.

We even checked the brush pile in the middle of the yard where the rabbits hide and eat the apple tree branches.  No indication that rabbits have been active.

Close-up of Rabbit Marks
Branch of an apple tree in the brush pile
that was eaten by a rabbit.


The absence of tracks was just as an important lesson today as seeing evidence of rabbits that we normally do.  It showed us that during winter/early-spring storms the rabbits take shelter. 

We noticed on our walk that the birds have
been eating a lot of the berries.  Not many are left.

4. For your nature journal this week, try sketching two different kinds of rabbits. Use The Burgess Animal Book as a reference or you can Google Cottontail rabbit, Northern hare, Swamp rabbit, Snowshoe rabbit, Jack rabbit.

Olivia chose to draw a cottontail rabbit while Sophia drew a black-tailed jack rabbit.  In Minnesota, we would see a cottontail rabbit, but not a black-tailed jack rabbit (they are found in South Dakota to Washington and south from there to Mexico). 

Olivia's nature journal entry about rabbits.

Sophia liked the black-tailed jack rabbit because it is the only rabbit that has black on its tail and tips of its ears.


Other rabbit-related activities we've done in the past:

Beeswax Bunnies
We made beeswax impressions.  This is one of our favorite designs.

Making Easter Cookies
Making gingerbread cookies for Easter
with rabbit and chick shapes.


Girls Ready for Easter Bunny Visit
Many years ago, the girls set up a place for the Easter Bunny
and made egg collectors with milk jugs and cottonballs.


Sophia's Finished Bunny Egg
The girls made rabbits from a half an egg, carrots slices, and green onion slices.
They used whole cloves for the eyes.


Felt Bunny
This is a hand-embroidered rabbit
I made for the nature table.


Moss on Rabbit Hide
In 2007, the girls learned about Dakota Indians and
how they use to put moss on rabbit hides for babies' diapers.
This was part of Homeschool Day at the Minnesota History Center.

Dreaming of owning a rabbit

It was about 95 degrees this day in August 2007
with a heat index of like 295 degrees.
It was insanely hot. Sophia is determined to have pet rabbits.