Friday, December 31, 2010

Flashback Friday


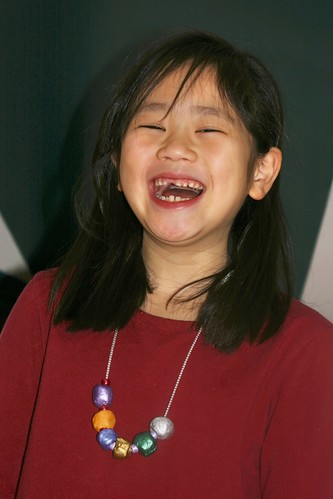
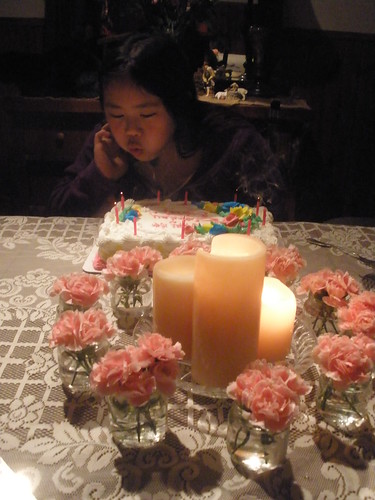
About a year ago, I made a quilt for my Dad who has Alzheimer's Disease.  It had a variety of images on it - photographs that he and I picked out that were meaningful for him. 

Finished Sensory and Memory Quilt (for my Dad's Christmas Gift)

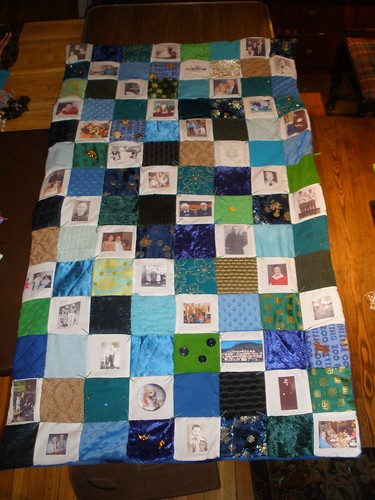
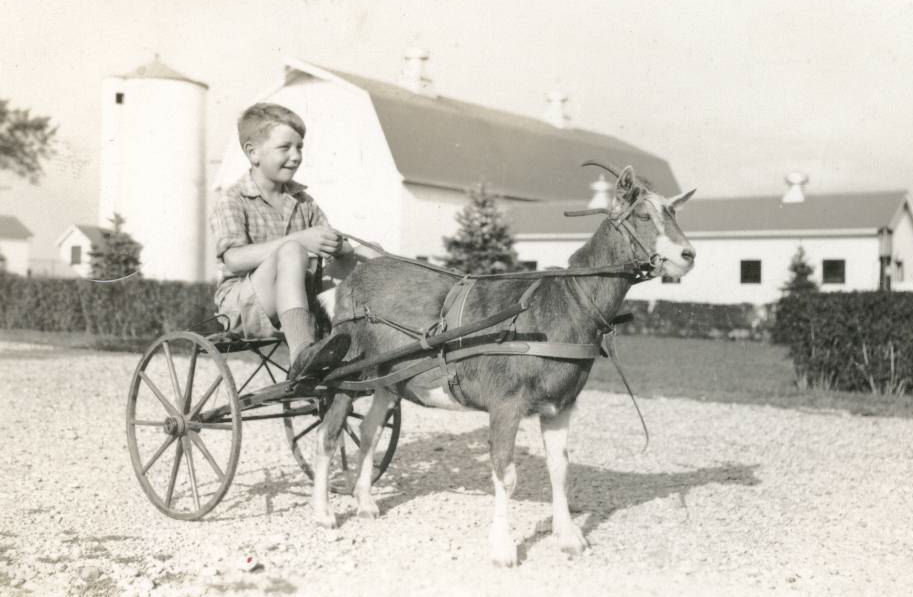
The black and white picture at the top of this post is one of the photographs that he picked out.  He's riding a cart attached to his goat at one of the farms where he grew up. 

I can only imagine how much fun that would have been for a child to be riding around in the country with not a care in the world.  Through the years, my dad shared many memories of times that were spent at farms.  It seemed like these some of the best memories that helped sustain him...even as an adult.

Memory is a way of holding onto the things you love,
the things you are,
the things you never want to lose.
~From the television show "The Wonder Years"

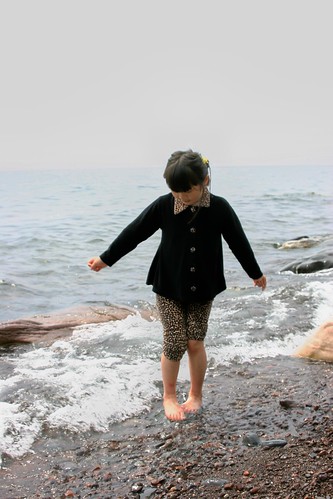
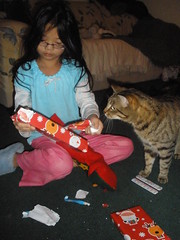
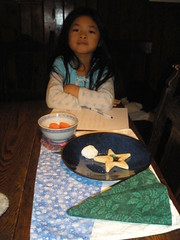
Now, as an adult, I live on a small hobby farm.  Many years ago, I had sheep, chickens, horse, and turkeys.  When Sophia and Olivia were adopted, the animals were here. 


Sophia watching the sheep in the pasture.

However, circumstances changed and a farm auction was the end of the livestock.  They went to new homes.  It was a difficult and painful day.

Thankfully, in 2008, a miniature horse and pony came to live at the farm.  The girls are thrilled to have "outdoor animals" again. 

Horses Getting to Know One Another
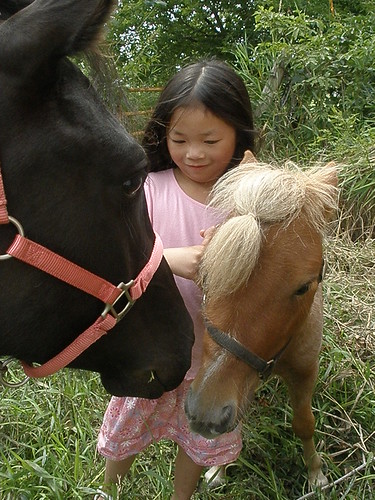
Olivia introducing Bailey and Hoss to one another. 
They were adopted from the Minnesota Hooved Animal Rescue Foundation
and did not know each other prior to living here. 

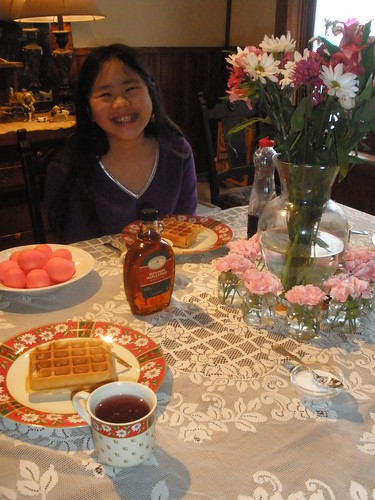
I'm hoping that the experiences Sophia and Olivia are having now will be pleasant memories when they are adults...and sustain them on days that easy as well as those that are more challenging.

And even if you were in some prison,
the walls of which let none of the sounds of the world come to your senses -
would you not then still have your childhood,
that precious, kingly possession,
that treasure-house of memories?
~Rainer Maria Rilke

Thursday, December 30, 2010

Celebrating a Milestone Birthday

Sophia turned ten years old today.  It's hard to believe that a child I once held is now almost as tall as me.

Sophia at the orphanage prior to being adopted.
She's less than a year old in this picture.

Sophia has an outgoing, engaging personality. 

Nez Perce - Beaded Necklace
Sophia is full of laughter...
seeing her with a smile and laughing is typical.

She's a fun child to be around...and has a generous, caring spirit.  She's open to trying new things...and has a good attitude about it in the process. 

Sophia as a scarecrow. 
Yes, she's tied to the wooden cross
in the middle of a cornfield.

We've enjoyed many trips together during the past ten years - Hawaii (twice), China, Japan, Pella (IA), Pennsylvania, Oregon, Florida, California, Kansas, and many trips to Grand Marais. 

Testing the Cold Lake Superior Water
Sophia wanting to feel the cold water of Lake Superior
at our favorite beach in Grand Marais - Cutface Creek.

She's tried many new activities through the year - including dancing, ice skating, swimming, and horseback riding. 

Sophia during the performance
Dancing during the recital at Cinderella dance camp with
the Minnesota Dance Theater.

She has a love for animals and her family.  This picture was taken on January 1, 2008.  Sophia and Olivia decided together that they wanted to wear their Chinese dresses when we went out to dinner at a Chinese restaurant - a long-standing family tradition for New Year's Day.

Casey, Sophia, and Olivia on 1-1
Casey, Sophia, and Olivia

As I look at pictures of Sophia through the years, I feel incredibly blessed to have her as my daughter.  She has brought so much joy to my life...and filled it with so many wonderful memories. 

To celebrate Sophia's milestone birthday on December 30th, we had a special breakfast (waffles - her favorite breakfast),

Birthday Breakfast
Sophia at breakfast with a bouquet of flowers in her favorite colors
and a circle of pink carnations - one jar for each year of life.

we went to see "Voyage of the Dawn Treader" (a movie she has wanted to see since the previews began in November), ate at her favorite Chinese restaurant, enjoyed a purchased birthday cake (versus a homemade one which I normally do),

Blowing Out the Candles
Sophia blowing out the candles on her birthday cake.

and opened presents (one for each year).  It was a nice birthday for us all...and one that I hope she remembers fondly when she's older.

Red Eggs and 10 Jars of Carnations
10 jars of pink carnations surrounding a bowl of 10 eggs.

Saturday, December 25, 2010

Countdown to Christmas - Day 25 (Celebrate Christmas!)

Olivia woke up by 6:00 a.m., eager to open her Christmas stocking that was filled by Santa. Lucy, the cat, was interested as well in what Olivia received.

After stockings were opened, we had a simple breakfast of homemade cinnamon rolls or cinnamon-raisin rolls that I made on Christmas Eve.

The cinnamon rolls are made from a recipe that was created my mom's mother who was a baker. Thankfully, one day she agreed to measure the ingredients for her rolls. I wrote the recipe down as she made the rolls. It is a recipe that we've enjoyed many years now.

After breakfast, the girls checked out again the table where they left the letters to Santa.  This year was particularly interesting for them because Sophia had a tooth pulled this week, and she put her tooth out for the tooth fairy right next to the plate of cookies and water for Santa.  Clearly, the tooth fairy and Santa had fun seeing each other because the table was covered with confetti and fairy dust:

The aftermath of Santa's and the Tooth Fairy's party.

The girls each opened one present from Santa before heading to my mom and dad's home where we celebrated with my family. This is my mom and dad at Christmas dinner:


We came back home in the afternoon, rested a bit, had a light dinner, and then opened presents under the Christmas tree.

Sophia taking a break from opening gifts.

There was lots of laughter and happiness today. Hearing "This has been the best Christmas ever!" made me very happy. I think doing daily activities leading up to Christmas helped make this year extra special, and create lasting memories for us all.

Friday, December 24, 2010

{this moment...}


{this moment} - A Friday ritual (inspired by soulemama). A single photo - no words - capturing a moment from the week. A simple, special, extraordinary moment. A moment I want to pause, savor, and remember. If you're inspired to do the same, leave a link to your 'moment' in the comments.

Wishing everyone a lovely weekend!

*** *** ***

Countdown to Christmas - Day 24 (Christmas Eve Traditions)

Christmas Eve is filled with annual traditions and routines that the girls look forward to doing.

In the late-afternoon, the girls sang in the church choir. The music during the service was beautiful. Afterwards, we drove around a bit and enjoyed seeing Christmas lights.

After feeding the horses and dogs, we ate dinner and had a peppermint ice cream dessert.

Here's the recipe for Peppermint Angel Roll:

1 package (16 ounces) angel food cake mix
1 tablespoon confectioners' sugar
1/2 gallon peppermint ice cream, softened
1 jar (11 3/4 ounces) hot fudge ice cream topping, warmed
Miniature candy canes and additional confectioners' sugar, optional

Prepare cake batter according to package directions. Line a greased 15" x 10" x 1" baking pan with waxed paper and grease the paper.  Spread batter evenly into pan.  Bake at 350 degrees for 15-20 minutes or until cake springs back when lightly touched.

Cool for 5 minutes.  Turn cake onto a kitchen towel dusted with confectioners' sugar.  Gently peel off waxed paper.  Roll up cake in the towel jelly-roll style, starting with a short side.  Cool completely on a wire rack.

Unroll cake and spread ice cream over cake to within 1/2 inch of edges.  Roll up again.  Cover and freeze until firm. 

To serve the dessert, I cut slices and put some hot fudge on top. The recipe called for crushed peppermint sticks sprinkled on top, but I figured that was more than enough sugar...and I needed the girls to fall asleep early.

Peppermint Ice Cream/Cake Dessert

After dinner, we checked Santa's progress on the computer. He was in the Canary Islands, and was fast approaching the United States. The girls stepped up their pace and wrote a letter to Santa:

Sophia's Letter to Santa

The girls put cookies and water on the table along with their letters.  They don't put milk or juice out because they "could spoil and then Santa would get sick...and that wouldn't be good" as they remind me each year.

They cut up carrots and put them on the mudroom roof for Santa's reindeer.  They wanted to throw the carrots out on the mudroom roof. I highly discouraged them from doing this because they "might get buried in all that snow....perhaps it might be easier if they were in the bowls so the reindeer can find the carrots." Thankfully, they agreed.
Carrots on the roof for Santa's reindeer.

Before going to bed, they each opened one present that was under the Christmas tree.

Sophia opening a gift from an uncle and aunt.

The girls went to bed by 8:30...and were asleep by 9:00.  Santa visited around 1:00 a.m.

Thursday, December 23, 2010

Countdown to Christmas - Day 23 (Help My Parents)


Mint Truffle Brownies
Originally uploaded by Pictures by Ann
Today I took a break from preparing for Christmas with Sophia and Olivia, and spent the day helping my parents. My father has Alzheimer's Disease and my mom has multiple health issues - the most challenging of which is mobility and vision problems. Needless to say, they needed some help with last-minute holiday preparations.

In addition to picking up meat for Christmas dinner, doing their grocery shopping, and helping do some work around their home; I took my dad to his quarterly medical appointment at the Senior Care Clinic at Hennepin County Medical Center. He has seen his doctor there since May 2009 when he was diagnosed with A.D.

This appointment, though, was very different from the past ones. My dad had substantial tangential thoughts, was unable to directly answer most questions, and struggled to find the words for many basic nouns (e.g., garage, gloves).

It was painful to watch...and quite sobering when the doctor said that the time has come to stop driving. This is a major challenge since my mom is unable to drive.

His doctor also recommended that he begin an adult day program 2-3 times per week. This is something that I'll need to help him see the benefit of doing.

Despite the depressing news, my dad and I enjoyed lunch together before the appointment. There were moments where his mind was completely clear and it was like having my father "back" for some time...and other moments where it was hard to hold back the tears as he needed guidance about how to eat a hamburger...and I had to help feed him.

When we came back from the appointment, I had to share the news with my mom. It was one of the more difficult things I had to do. The timing could not be worse...just a couple days before Christmas.

On a more positive note, I brought some treats for my parents to enjoy on Christmas (or before...if they wanted to sample some). Here's one of the favorite treats from the dozen or so bags of desserts I brought them:

Mint Capped Brownie Cookie Cups
(Hershey's)

(Note: I baked these in a couple of smaller dishes and put the Mint Truffle Kisses in rows/columns so each piece had one Kiss on it.)

48 Mint Truffle Hershey Kisses
2/3 cup butter, softened (I used dairy-free butter)
1 1/4 cups granulated sugar
1 tablespoon water
1 teaspoon Watkins vanilla extract
2 eggs
1 1/2 cups flour
1/2 cup Hershey's cocoa
1/2 teaspoon salt
1/4 teaspoon baking soda
powdered sugar


1. Preheat oven to 350 degrees. Line 48 small muffin cups (1 3/4 in diameter) with paper or foil baking cups. Remove wrappers from chocolates.

2. Beat butter, sugar, water and vanilla in large bowl on medium speed of mixer until well blended. Add eggs; beat well.

3. Stir together flour, cocoa, salt and baking soda. Gradually add to sugar mixture, beating on low speed just until blended. If necessary, refrigerate dough until firm enough to handle. Shape dough into 1 inch balls; place in prepared muffin cups.

4. Bake 11 t o13 minutes or until cookie surface is set. Cookies will appear soft and moist. Do not overbake. Cool about 5 minutes on wire rack. Press chocolate kiss into surface of each cookie cup. Cool completely in pan on wire rack. Sprinkle each cookie with powdered sugar (I didn't do this). Makes 4 dozen cookies.

Wednesday, December 22, 2010

Countdown to Christmas - Day 22 (Give Treats to Mailman)

Today's activity was to put handmade cards and a plate of cookies in the mailbox for Dave (the mailman).

The girls picked out some cookies and candies they made and put them on a plate. Each had made Christmas cards, so they picked out one each and included that with the gift to Dave.

He wrote the girls a note thanking them for the cookies, and said they looked delicious. They were so happy to do this and to know that Dave liked their gift!

Tuesday, December 21, 2010

Countdown to Christmas - Day 21 (Winter Solstice)


Spanish Meal
Originally uploaded by Pictures by Ann
Today marks the Winter Solstice - the day of the year with the shortest amount of sunlight. One of ways we celebrated the Winter Solstice today was to have a "Gifts of Darkness Night" where we enjoyed dinner by candlelight.

There are now four candles lit on the Advent Star that sits in the middle of the girls' table. The star is surrounded by pieces from the Christmas tree.

Nestled in the wreath are gems and rocks (that were added during the first week), a figurine with stars on it (to represent light - in the past we also added plant elements like pinecones and acorns during the second week), and tiny ceramic and wooden animals (added during the third week). We haven't yet added figures for the fourth week (to represent people/human life).

Tonight's meal includes Pollo a la Miel (Lemon Chicken with Honey) and Huevos Rellenos de Atun (Tuna-Stuffed Eggs).

The recipes are from a Spanish coookbook that I chose so the girls could get a taste of Spain. As part of homeschooling, I'm doing an "Around the World" geography unit study. Going in alphabetical order, the girls are now on Spain (they have learned about a country for each of the letters from A to R so far).

The Winter Solstice is celebrated many different ways around the world. For more information about how different countries and cultures celebrate the Winter Solstice, click HERE.

Monday, December 20, 2010

Countdown to Christmas - Day 20 (Make Christmas Treats)

We continue to make more cookies and try recipes that we've wanted to make. This is a good time of year to try new recipes because we can share the cookies with others, and keep some to enjoy for ourselves.

Today, Sophia, Olivia, and I made two different cookies, but each used the same dough. Sophia made the Stained Glass Cookies and Olivia made Snowball Surprises. The recipes came from Cooking with Kids magazine (Holiday 2004 edition).

Butter Cookie Dough
(Makes 12-18 cookies, depending on size)

2 cups all-purpose flour
1 teaspoon baking powder
1 teaspoon salt
2/3 cup unsalted butter, at room temperature (I used dairy-free butter)
1/2 cup sugar
1 egg
1 tablespoon milk
1 teaspoon vanilla extract

Directions:

Place the flour, baking powder, and salt together into a bowl. Set aside. Put the butter and sugar in another bowl. Using an electric mixer, beat at medium speed until creamy, about 3 minutes.

Add egg, milk, and vanilla and beat one minute more. Reduce speed to low and add flour mixture, beating until smooth. Turn off mixer.

Shape the dough into a ball. Wrap in plastic and refrigerate at least one hour or up to three days. Freeze up to three months.

Stained Glass Cookies

Roll out dough to 1/8-inch thickness on a floured surface. Cut out cookies with cutters. Using a smaller cookie cutter, cut out the middle of each cookie. Place cookies on a parchment-lined baking sheet.

Place 3/4 cup assorted color LIfesavers or Jolly Rancher candies in a resealable plastic freezer bag. Crush with a rolling pin.

(Side note here: Sophia divided the Jolly Rancher candies by color/flavor and put them into small baggies. She used a hammer to crush them.)

Sprinkle the crushed candies into the cutout of each cookie. Bake at 375 degrees for 7-9 minutes or until lightly browned. Cool completely on parchment. Remove with spatula.

Here's what the finished cookies looked like (they are translucent, like stained glass, in the center):

Stained Glass Cookies

While Sophia was making the Stained Glass Cookies, Olivia was making the Snowball Surprises.

Here's the recipe for Snowball Surprises:

Surround each of 18 unwrapped Hershey's Kisses or large chocolate chunks with 1 tablespoon of the dough. (Note: Olivia used Hershey's Mint Truffle Kisses.)

Gently pinch to close at the top. Roll each ball in a bowl filled with 1 cup shredded sweetened coconut to coat entire surface of ball.

Place snowballs on greased or parchment-lined baking sheet. Bake at 375 degrees for 10-12 minutes, or until coconut just begins to brown. Cool for a few minutes, then transfer to a wire rack to cool completely.

Here's a picture of Olivia's cookies - with and without coconut (since she doesn't like coconut):
Snowball Surprise Cookies - With and Without Coconut

Sunday, December 19, 2010

Countdown to Christmas - Day 19 (Santa Watch + Gifts in a Jar)


Bunny on Santa Watch
Originally uploaded by Pictures by Ann
One idea I read about many years ago (and finally got around to doing this year) was to let children put their favorite stuffed animals or dolls be part of the Christmas celebration.

This year, I had the girls put some favorite stuffed animals and dolls by the Christmas tree. Olivia chose a rabbit that she dressed in doll clothes and put on a blanket. Sophia chose three dolls with accompanying pets who also sat on a blanket.

The girls are wondering if Santa will do anything special for the dolls and animals.

Note after Christmas:

Santa did, indeed, give a little gift to each doll or animal that was placed by the tree. Since Sophia put three dolls out, each one received a tiny gift - a necklace, keychain, and crocheted heart.

Olivia's bunny received a coin purse with a tiny fairy tea set and a crocheted heart.

Here's a picture of the dolls on Christmas day:


Sophia, Olivia, and I also made some gifts in a jar.  Sophia and I made lemon coconut cookie mix in a jar; and Olivia and I made brownie mix in a jar.  These were given to my mom (the girls' grandmother) with the instructions printed in 20 point type (since she has vision challenges).  The instructions were glued onto decorative paper and attached to the jar ring with a ribbon.  The lid was covered with matching decorative paper.

Saturday, December 18, 2010

Countdown to Christmas - Day 18 (Gingerbread Display)

Every year, the girls decorate a gingerbread house and tree. This year, I saw a package with a gingerbread house, tree, Santa's sleigh, reindeer, and flight school.

Sophia and Olivia have said they wanted to make a house rather than getting one pre-assembled. After this year, they are reconsidering that idea.

It was a challenge, to say the least, to get the parts of the house together and sticking to one another. Perhaps the trick is to let the icing and pieces harden before decorating them (which we didn't do).

Regardless, the girls forged ahead and had fun making their gingerbread creations. Sophia's idea this year was to use powdered sugar on the roof to look like snow. The snow on the ground is coconut.

Olivia make Santa's sleigh and reindeer as well as the reindeer's flight school. In the past, she's made a cookie tree so this was a lot more pieces to decorate which was fun for her.

Olivia with Santa in his sleigh being pulled by 4 reindeer. 
The Reindeer Flight School is to the right.

Friday, December 17, 2010

{this moment...}


{this moment} - A Friday ritual (inspired by soulemama). A single photo - no words - capturing a moment from the week. A simple, special, extraordinary moment. A moment I want to pause, savor, and remember. If you're inspired to do the same, leave a link to your 'moment' in the comments.


Wishing everyone a lovely weekend!

*** *** ***

Countdown to Christmas - Day 17 (Make Cookies)

The girls and I made two batches of cookies today. I've had the recipe for Chocolate Waffle Cookies for four years. This year we finally made them. They were amazing!

The chocolate cookies are dairy-free (so Sophia could enjoy them), and made on a waffle iron. It takes only about a minute and a half for them to bake. They have a rich, chocolate frosting and sprinkles on top. Here's the recipe:

Chocolate Waffle Cookies
(from Taste of Home magazine)

Ingredients

1/4 cup butter, cubed (I used dairy-free butter)
2 ounces unsweetened chocolate
2 eggs
1 teaspoon Watkins vanilla extract
1 cup all-purpose flour
3/4 cup sugar

FROSTING:

2 tablespoons butter (I used dairy-free butter)
1 ounce unsweetened chocolate
1 teaspoon Watkins vanilla extract
1-1/2 cups confectioners' sugar
7-1/2 teaspoons hot water
Edible glitter and jimmies, optional

Directions

In a microwave, melt butter and chocolate; stir until smooth. Transfer to a large bowl and cool completely. Beat in eggs and vanilla.

Combine flour and sugar; gradually add to egg mixture.

Drop by tablespoonfuls 1 inch apart onto a preheated waffle iron. Bake for 1 minute or until set. Remove to a wire rack to cool completely.

For frosting, in a microwave, melt butter and chocolate; stir until smooth. Transfer to a small bowl. Beat in vanilla. Gradually add confectioners' sugar alternately with water, beating until smooth.

Frost waffle cookies to within 1/4 in. of edges. Decorate with glitter and jimmies if desired. Let stand until frosting is set.

Yield: about 2-1/2 dozen.

The other recipe we made was for Santa Hats. They're actually meringue cookie that are supposed to be in the shape of Santa hats. The idea came from Family Fun magazine (Dec/Jan 2008 issue).

I've made Santa Hats in 2008 and 2009, but this is the first year that I let the girls try to make the Santa hat shapes. After a couple tries, they ended up making different shapes and then decorating them with colored sprinkles.


Sophia and Olivia's "Santa Hat" Meringue Cookies

They had a lot of fun doing this, and it continued an annual tradition of making these cookies. The process - the enjoyment of baking cookies - is what's important...not what the final product looks like.

For reference, this is what the Santa Hats looked like in Family Fun:


Who knows...perhaps next year the girls' creations will look more like hats.
Here's the recipe for Santa Hats from Family Fun:

Ingredients:

2 egg whites, at room temperature

1/2 teaspoon cream of tartar
1/4 teaspoon Watkins vanilla extract
1/2 cup sugar
Red colored sugar

Instructions

Heat the oven to 200º F. With an electric mixer, beat the egg whites until soft peaks start to form. Beating all the while, add the cream of tartar and vanilla extract, then slowly add the 1/2 cup of sugar. Continue to beat until the peaks stiffen.

Spoon the meringue into a quart-size plastic bag. Snip off a corner and pipe 2 dozen 1 1/2-inch-tall Santa hat triangles onto a parchment-lined baking sheet (you should have about 1/4 of the meringue left).

Sprinkle the triangles with the red sugar, then use the remaining meringue to give each one a pom-pom and trim. Bake the hats until they're hard but not browned, about 1 hour and 20 minutes. Turn off the oven and leave the hats in it for an hour to crisp before removing.

Thursday, December 16, 2010

Countdown to Christmas - Day 16 (Celebrate Las Posadas)


Las Posadas Meal
Originally uploaded by Pictures by Ann
Each year we have a meal to celebrate Las Posadas, and read a couple story about it.

Since I was helping my parents for the day, I didn't have time to make a more elaborate meal. So, we just had tacos and chips with salsa. Perhaps next year we can make a wider variety of items.

After dinner, I read "The Night of Las Posadas" by Tomie DePaola and the first chapter of "Josephina's Surprise" by Valerie Tripp. I've read the books to the girls before, but it's nice to hear the same stories year after year on special days.

Wednesday, December 15, 2010

Countdown to Christmas - Day 15 (Indoor Picnic by Candlelight)

Today's activity was to have a picnic by the Christmas tree by candlelight. The quality of the picture to the right isn't great, but the lighting was only the lights on the tree as well as the Advent candles.

The girls set up a checkered tablecloth on the floor by the tree, and put the Advent candle on it.

We enjoyed pizza together...a simple meal, but one that they enjoy.

Tuesday, December 14, 2010

Countdown to Christmas - Day 14 (Beeswax Ornaments)


3 Beeswax Ornaments
Originally uploaded by Pictures by Ann
These are three of the eight ornaments that Sophia and I made. It takes about a pound of wax to make eight ornaments. In the window, the sunlight reveals the pattern.

I have wanted to make these ornaments for several months now after purchasing the beeswax and molds.  The ceramic molds were originally for cookies, but the designs lend themselves well to ornaments.

The first step was to melt the wax.  Sophia emptied a huge can of black beans and washed out the container.  I put the wax into the can and then into a heavy pot with a few inches of water.

One pound of wax melting on the stove.

The next step, once the wax was melted, was to pour it into molds.  Initially, we poured the wax directly onto the mold.  It ended up sticking.  One of the ornaments came off easily, but the rest stuck.  After getting the wax off, I put some vegetable oil onto the molds.  We re-melted the wax and tried again.

This time, there was too much oil and the ornaments looked greasy.  Removed all the beeswax and re-melted it.  Wiped off some of the oil so there was barely any there.

Third time...re-poured the wax in the molds and put little holes where the ribbon would go through.

Pouring the melted beeswax into a mold.

The beeswax hardens quite quickly.  For the initial ornaments, Sophia and I made holes with toothpicks through the wax so a ribbon would go through them.  For the last batch, I put the ribbon in the back of the hardening wax.

Three different stages of wax pouring and hardening.

If we had trouble taking any of the ornaments out of the molds, we put them in the freezer for a few minutes.  Then they would come out easily. 

After drying them for a couple of days at room temperature, I took a paring knife and cleaned up the edges as well as put a ribbon through the holes for hanging them. 

Sophia and I enjoyed making these ornaments together, and look forward to making more of them.

Monday, December 13, 2010

Countdown to Christmas - Day 13 (Make Felt Ornaments)


WIP - Felt Ornaments
Originally uploaded by Pictures by Ann
Today's activity as we move toward Christmas, is making ornaments. I cut pieces from wool felt for five ornaments.

The top two are blue and purple ornaments with a white decorative top (there's an image of two birds, 2 hearts, and circles). The pattern came from "Living Crafts" magazine. There's a pattern for a rather large version of the ornament (a five-sided star that could be used as a tree-topper). However, I didn't have a piece of wool felt that large, so I chose to do smaller ornaments instead.

The green ornament will be a tree. The red and white ornaments are going to be miniature clothes (a dress and shirt) that will be hung on little hangers on the tree.

The girls will each pick one (or more) of the ornaments to make. I'll make the rest of the ornaments.

Since they had classes and piano lessons at the homeschool co-op today, this project will continue tomorrow.

Sunday, December 12, 2010

Countdown to Christmas - Day 12 (St. Lucia Day)


St. Lucia Day
Originally uploaded by Pictures by Ann
For the past several years, we've celebrated St. Lucia Day. I had not heard of St. Lucia Day until the girls began singing in the church choir. They learned a couple of songs that they sing each year at the service closest to St. Lucia Day (December 13th). This year, the Sunday closest to that was the 12th.

Unfortunately, this year the girls couldn't sing because of huge snowstorm. The driveway had drifts that went higher than the tires of the SUV. It wasn't until 4:30 in the afternoon that the driveway was plowed.

Despite not being able to sing, we celebrated in a small way at home by making Lucia buns and Swedish meatballs. The girls tried on the white dress and wreath of "candles" as well as the Starboy hat. It's fun to see each year how much the girls have grown and how the dress and hat compares to the previous year.

St. Lucia Day is generally associated with Sweden, but many other countries celebrate this day as well. In traditional celebrations, Saint Lucy comes as a young woman with lights and sweets. It is one of the few saint days observed in Scandinavia. In some forms, a procession is headed by one girl wearing a crown of candles (or lights), while others in the procession hold only a single candle each.

The cone-shaped hat decorated with golden stars would typically be worn by boys in a traditional celebration. They would be called stjärngossar (star boys).

A traditional kind of bun, Lussekatt ("St. Lucia Bun"), is made with saffron and eaten on this day. A substitue to saffron (which we used) is cardamom and a few drops of yellow food coloring.

St. Lucia was a young Christian girl who was martyred, killed for her faith, in 304 AD. The most common story told about St. Lucia is that she would secretly bring food to the persecuted Christians in Rome, who lived in hiding in the catacombs under the city. She would wear candles on her head so she had both her hands free to carry things. Lucy means 'light' so this is a very appropriate name.
The girls eating Swedish meatballs and Lucia buns on St. Lucia Day.

Saturday, December 11, 2010

Countdown to Christmas - Day 11 (Game Day)


Game Day - Uno Stacker
Originally uploaded by Pictures by Ann
Today was the perfect day to have Game Day! With a huge winter storm outside that dumped over 1 1/2 feet of snow and the wind howling, the girls and I played three games, had a fire in wood stove, and enjoyed some popcorn.

For Game Day, we each picked one game to play. Uno Stacker was my choice since we never played it and it was a game we could play together. Basically, you build a tower of blocks based on what number/color the dice shows when you roll it.

Sometimes you roll it and it tells you to remove a block. That's when it starts getting interesting because your goal is to keep the tower of blocks standing. You don't want to be the person who pulls out the block that makes the tower tumble.

Olivia picked Connect 4. We played three rounds of the game which she enjoyed. I remember playing this game growing up, so it's fun to be able to play it again as an adult with my daughter.

 Olivia ready to play Connect 4.

 Sophia picked Life. She now can be the "banker" for this game which gives her opportunities to practice math in a fun way. She's learning about place values in the hundred-thousand and ten-thousand range, so playing Life is a great way to get experience adding and subtracting at that level.

Sophia and I played Life on Game Day.

Throughout the day, we checked on the horses, shoveled the snow, and filled the bird feeders. The girls made forts in the big drifts of snow.

Sophia and Olivia in one of the snow drifts.  This one completely covered Sophia's thighs.  Olivia got stuck and couldn't move forward.

Montague waited patiently for me until I was ready to go.  Then he joined Gretel and the girls near the barn.