
Making your own catnip toys is a great way to be resourceful by using leftover felt scraps as well as use extra catnip. It also is keeps cats healthy and active since they run and play with the toys. Healthy cats mean less trips to the veterinarian...another cost savings!
Here's how to make homemade catnip toys:
STEP ONE: GROW AND HARVEST CATNIP
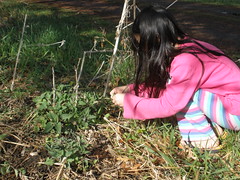
Olivia picking some catnip early in the season.
The catnip plant is now at least 1.5' tall.
From one small plant purchased at a garden center many years ago, this has paid for itself many times over. Each year, the plant comes up and does well on its own.
This year, there were two other catnip plants that came up in different areas of the garden, so we transplanted them. Initially, they were wilted and didn't look like they would make it. Within a week, they were doing quite well.
Sometimes we pick the leaves off, and other times (if the catnip has grown a lot), we will cut it back by taking down the several inches of leaves and stems.
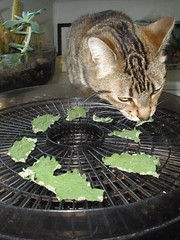
STEP TWO: DRY THE CATNIP LEAVES

Sophia placing the catnip leaves
on a dehydrator tray.
We have a basic five-tray dehydrator that we use to dry catnip. Simply place the the leave around each tray in a single layer and with a bit of room around each leaf. Catnip dries quickly - usually in less than a day.
Lucy taking a dried catnip leaf
before it can be used in a toy.
Remove the dried leaves and place in an air-tight container. Make sure the leaves are completely dry or else they won't last. Keep them whole at this point. Don't crush them.
STEP THREE: SEW THE TOY - LEAVING OPEN A SMALL HOLE
There are free patterns on the internet that you can use to make cat toys. Sophia used the bird pattern HERE. She also used a children's craft book that has patterns in it for small toys.
Rather than purchasing anything new, she used scraps of felt that were on hand. Felted wool sweaters also work well for cat toys.
Follow the directions for making the toy, making sure to leave a small opening for the catnip and stuffing.

Placing crushed catnip leaves
into the toy.
Crush a few catnip leaves, and then place them into the toy.
STEP FOUR: FINISH SEWING THE TOY
Add some wool stuffing, and then finish stitching the cat toy.
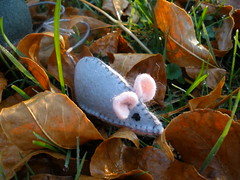
Cat toy in the shape of a mouse.
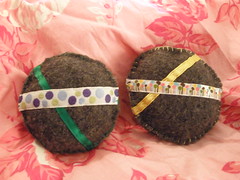
Cat toys made from a felted wool sweater
and ribbon.
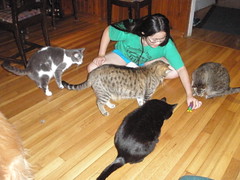
STEP FIVE: WATCH THE CATS PLAY WITH THE CATNIP TOY
The cats were around Sophia while she made the toys for them. Needles to say, when she was done and they had a chance to play with the toys, they were so happy.
Sophia showing the cats the embroidered
catnip bird she made for them.
They batted the toys around, picked them up and carried them, and tossed them in the air. They were entertained with the toys and we were entertained watching them.


2 comments:
A great project, even for those of us who do not sew well.
I am sure the cats appreciate it.
Cute little toys -especially the mouse! I had to go and google catnip (never had cats - didn't know anything about it!) But now I know - very interesting stuff!!
Thanks for linking to a Round Tuit!
Hope you have a great week!
Jill @ Creating my way to Success
http://www.jembellish.blogspot.com/
Post a Comment