Tuesday, July 5, 2011

Measuring the Statue of Liberty & Learning about the Flag - Government Week - Smart Summer Challenge

Starting in September, the girls will begin a multi-year unit study about the United States.  I purchased the curriculum Cantering the Country which addresses not only geography, but a variety of other subjects (e.g., science, art, history, current events, home economics). 

During the summer, we're participating in the Smart Summer Challenge and the second week focuses on government.  Doing a week-long government study is a wonderful preview of what we will be doing in a couple of months. 

This week, we're going to explore the national government and some key national symbols since we will be exploring each of the states in greater detail beginning in September. 

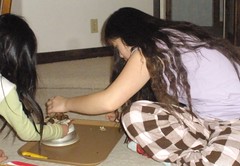
Sunday - Today the girls learned about the American flag.  They did a worksheet called "Math Flags" which challenged them to describe the flag using numbers, shapes, patterns, and one other way related to math.

Olivia and Sophia coloring a picture of the American flag.

Monday - In addition to celebrating the Fourth of July, we learned about the Statute of Liberty.  The Statue of Liberty was presented by France to the people of the United States in 1886.  It was given as a gift to symbolize freedom in France, America, and around the world.  It became a national monument in 1924. 

The girls measured different parts of the Statue of Liberty and found out:

One arm is 42 feet long - wider than the width of our home (from the dining room, through the living room, and into the family room). The Statue of Liberty's arm would start at a one window and stick out about four feet on the other side of the house.

The nose is 4 feet 6 inches - taller than Olivia.

Sophia's hand goes up to 4 feet 6 inches
on the tape measure -
making the Statue of Libery's nose taller than Olivia.

The mouth is 3 feet wide - about the length of Montague when he's laying down on the floor.

Montague letting the girls measure him from head to toe.
He's almost as long as the Statue of Liberty's mouth.

The index finger is 8 feet long - that's a very big finger compared to their own.

The girls holding up their index fingers in comparison to
how big the Statue of Liberty's index finger is at 8 feet long.

The eyes are 2 feet 6 inches across - significantly larger than Olivia's eye...who (by this time) was done with the measuring activity and ready to move on to something else.

Olivia pointing to her eye.
Quite small compared to
the Statue of Liberty's 2 foot 6 inch eye!

So...we talked about how the Statue of Liberty wasn't always green.  She use to be copper.  Gradually, the statue changed color over time.

To demonstrate this, Sophia and Olivia each chose two pennies - one shiny one and the other a dull one.

Picking two pennies each from the coin pile.

Each had their own bowl filled with water and some vinegar, paper napkin, and two pennies.  I had them fold the napkin in a square, place it in the bowl, and soak it with vinegar.


I asked them what they thought would happen to the pennies if they put them on the paper towel.  Sophia thought "they will get shiny and the vinegar will clean them" and Olivia thought her pennies "will get clean."  They put the penny on the vinegar-soaked paper towel.

The pennies sat overnight, and then the girls lifted their pennies the following morning.  The facedown side of each penny had parts that turned a blue-green - just like the Statue of Liberty.

Olivia and Sophia turning the pennies over
to look at the reaction the pennies had with the vinegar.

The vinegar reacted with the copper in the pennies, causing them to turn green.

Parts of the penny are blue-green in color now.

A similar change caused the Statue of Liberty to change color over time.  In this case, weather and pollution caused the statue to turn green.

Monday, July 4, 2011

M is for Math - ABCs of Homeschooling

On 5 Kids and a Dog, there's a series called the ABCs of Homeschooling.  This week's letter is "M." 
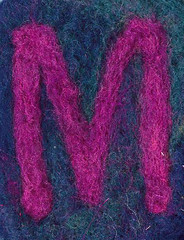
Alphabet ATC or ACEO Available - Needlefelted Letter M...is for Math.

I remember sitting in a college calculus class and one of the students asked, "When are we ever going to use this in real life?"

The professor gave an answer that I wished some of my junior high and high school math teachers would have said when I was learning algebra and trigonometry, "Chances are, you're never going to use this in your daily life. This level of math isn't so much about using it in 'real life.'  It is more about being persistent and disciplined, and finding the answer to a problem." 

Math comes down to simple problem solving; and training one's brain to be able to think through a variety of situations and get to the right answer or come to a conclusion. Math, to me, means essentially fostering a sense of determination and commitment to finish something you've started.

Because math goes beyond just learning numbers, functions, and concepts, I try to give Sophia and Olivia opportunities to learn math through a variety of methods: traditional/book learning, singing, learning tools, games, and real-life application.

TRADITIONAL/BOOK LEARNING

The girls learn core math concepts and facts by using their math books.  I use Rod & Staff books since both girls say they like them.  At the last homeschool conference I attended, I looked at a variety of math books. Some had a lot of color and impressive graphic design; some used the computer; and others used DVDs to teach math.  After looking at the variety of resources, I decided to stick with Rod & Staff.

Rod & Staff isn't fancy - the text and images are all in black and white.  However, the majority of examples they use all tie into agriculture, farm animals, and cooking/baking - all things that are quite applicable to the girls' life right now.

Sophia's Math Book
Sophia's fourth grade math book. 

There seems to be a lot of repetition with some of the fundamental concepts and facts (e.g., addition and subtraction facts, skip counting by 2s/5s/10s, multiplication and division facts). However, knowing these facts by memory is critical to forthcoming math skills, so I think that's valuable.

That being said, once the girls have "mastered" a skill, I don't make them continue doing pages of the same thing. They can move onto the next skill. That's one of the benefits of homeschooling - adapting the lessons to the each child's skills and knowledge.

Olivia Doing Math with Shells
Olivia likes to use manipulatives to help her visualize
some of the math problems she's doing.
For this lesson, she chose to use shells.

SINGING

The girls both enjoying singing and seem to retain information much better when they learn it by listening to and singing songs. 

Some of the CDs that the girls use for math.

Some of the CDs for math that they use include:

- Shiller Math Songs - this was a CD that Olivia used a couple of years ago when using the Shiller math curriculum.  There are a variety of songs that had her moving about while listening to instructions on the CD.

- Addition Songs by Kathy Troxel - this CD comes with a songbook/workbook, and has helped Olivia learn counting from 1 to 20 as well as all the addition facts from 1+1 to 9+9. There are sing-along songs as well as echo-style songs for self-testing.

- Multiplication Songs by Kathy Troxel - this CD also comes with a songbook/workbook, and has helped Sophia learn all the multiplication tables 2 through 12.  There are sing-along songs as well as echo-style songs for self-testing.

-  One Hundred Sheep by Roger Nichols - There are nine songs on this CD that teach counting by 2s, 3s, 4s, 5s, etc. This skill is known as "skip counting" and is used in every math process from multiplication to algebra.  The songs use stories from the Gospels as a basis for the lyrics.  Both the girls use this CD.

Sophia singing along with the
One Hundred Sheep CD.

LEARNING TOOLS

Dice

Olivia playing with some of the math dice.

One of the ways to learn and/or review the basic facts is by using dice. 

Basic math equation that Olivia put together
using three different types of dice.

I have a variety of dice that the girls can use.  Some have the basic six dots representing numbers on them (white ones).  Others are special ones:

- Blue dice with the numbers 1-6 on them.
- Green dice with the numbers 7-12 on them.
- White dice with different symbols (e.g., plus, minus, times, divided by).
- Yellow dice with Roman numbers.
- Big red and orange dice with little white dice inside it. Both the dice have the traditional 1-6 dots on each side.

A variety of dice to use with math games.

Electronic Flash Cards

Learning Resources has a Minute Math Electronic Flash Cards in which the girls are presented with different facts (e.g., 2+9, 8x7) and need to type in the answer. The "game" is based on speed and accuracy. There is a voice that tells the player if she typed in the correct answer.

Sophia testing herself on multiplication facts.

Sophia likes this "game," but Olivia finds it frustrating.  So, when Sophia needs/wants to do something different for math, she'll use the Electronic Flash Cards.  

Learning Wrap-Ups

Both the girls learn best when there is a hands-on component to the lesson.  One of the things that I found at the last homeschool conference was a set of Learning Wrap-Ups. Each Wrap-Up focuses on a different process (e.g., addition, subtraction, multiplication, division). 

Olivia testing herself on addition facts.

To use them, the girls start with the first number on the left side and add/multiply it by the number in the middle of the key.  Then they find the answer on the right hand side and bring the yarn to the other side and wrap it around the backside before bringing it to the second number on the left side. They repeat the process until all the numbers and answers have been wrapped.

Olivia with the finished Wrap-Up.
The string was where it should be on the back,
so she got all the answers correct.

The Wrap-Up is self-checking on the back. The key has a raised pattern to show where the yarn should be. If the yarn matches the pattern, then all of the answers were done correctly.

GAMES

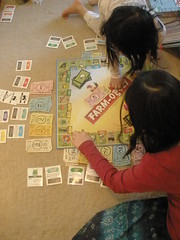
The girls have many games that they enjoy playing that have a math component to them:  Horse-opoly, Life, and Farm-opoly.

Farmopoly - Homeschool Math Lesson
The girls playing Farm-opoly.

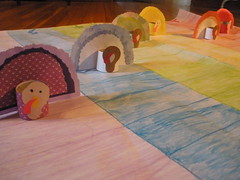
In addition to purchased games, we've also made our own math games.  For Thanksgiving, we made a turkey racing game (see below) that involved counting and probability.  The girls had fun making and playing the game, and having it be a part of Thanksgiving activities in the future.

Turkey Racing Game
Homemade math game.

REAL LIFE APPLICATION

Bringing math into everyday activities provides the girls with a learning experience in a real-life setting, and helps enhance comprehension of what they are learning.

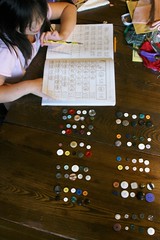
Counting by 5s and 10s
Sophia learning to skip count
by 5s and 10s using buttons.

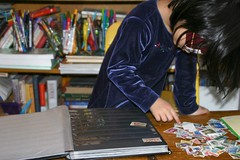
An early math skill is sorting, although it is one that people use in their daily lives. One of the ways that sorting was incorporated into homeschooling is through stamp collecting.  The girls each have their own books for stamps, and have enjoyed sorting them into categories (e.g., horses, flowers, pandas, wild animals).

Olivia Working on Her Stamp Collection
Olivia sorting through stamps when she was very young. 
She still has and adds to her stamp collection.

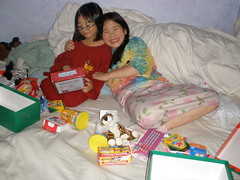
Another way that the girls have used math is when they have sorted items to donate.  Each year we do Operation Christmas Child.  The girls enjoy choosing items to put in the boxes, and then dividing and sorting them at home. 

Olivia and Sophia Sorting Operation Christmas Child Items
The girls sorting items for Operation Christmas Child boxes.

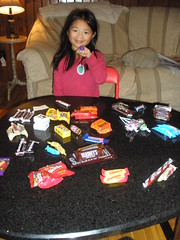
Of course, each October the girls look forward to sorting candy they get when they go out for Halloween.  They will compare what each one got, and often will trade candy.

Olivia Sorting Halloween Candy
Olivia with candy she sorted.

Math also is used when studying science. 

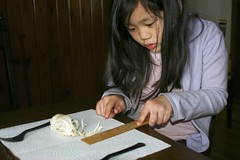
Sophia Measuring the Jaw
Sophia measuring the length of a bone.

One of the easiest ways to tie the two subjects together has been when we have been able to measure something tangible (e.g., feathers, depth of a woodpecker hole in a tree, the circumference of a tree, the length of a bone).

Sophia Measuring Snow Depth
Sophia measuring the snow depth.

The girls enjoy cooking and baking.  Reading a recipe and then measuring the ingredients is something that I have involved them in well before they were doing their math books.

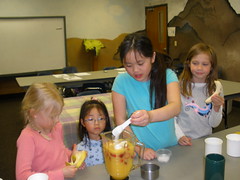
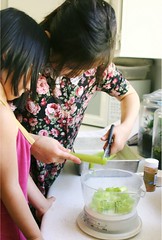
Making a Strawberry Smoothie
Sophia measuring and adding an ingredient
to make a fruit smoothie.

I've had a food scale for many years, and it seems like in the past few years that it has been used more frequently by the girls - whether they are making food in the kitchen or weighing an item for a science lesson.

Girls Putting Mushrooms on Scale
The girls were weighing some mushrooms they found
on the nature trail.

Sophia Measuring and Weighing  Rhubarb
The girls are cutting and measuring rhubarb
to make dessert.

Money is something that the girls have enjoyed learning about in math.  Rather than just using pictures in math books, the girls receive a bit of money for doing some chores.  They also receive money periodically as gifts from grandparents and relatives. 

Originally, I had the girls set up save-spend-give jars and a percentage of each amount they earned or was gifted was divided into the three jars in a 50-40-10 percent ratio (respectively).  Now, I have them do a 50-50 split - save half/spend half.  Of the spending money, some they use as donation money. 

The girls have their own wallets with money and gift cards, and have learned to interact with cashiers; and vendors at craft shows and farmer's markets. They have to learn to use only the money they have available (no loans or borrowing money). This has taught them the value of budgeting and patience (especially if they need to save for a larger item). I'm hoping that they carry this into their adult life and save half of what they earn.

Sunday, July 3, 2011

Buffalo Farm, Strawberry Picking, & More => Kid-friendly Summer Activities & Link-Up Party


Welcome to the fifth week of our Fun in the Summer Sun event!

Each Monday until September 7th
Mama to 4 Blessings along with Harvest Moon By Hand,
Adventures of Mommydom, Sweet Diva, and Sweet Phenomena
will be hosting Fun in the Summer Fun link up events.

Here's the line up:
1st Monday of each month: link up your "Kid-friendly summer activities"
2nd Monday of each month: link up your "Kid-friendly summer crafts"
3rd Monday of each month: link up your "Kid-friendly summer recipes"
4th Monday of each month: link up your "How to stay cool in the summer heat"

*~*~*~*~*~*~*

This week the focus is on kid-friendly summer activities.  Some of the things we've enjoyed doing during the past week include:

Visiting a Buffalo Farm

Sophia sitting on the Eichten's mouse.

On Wednesday, we visited Eichtens farm which is an all-natural artisan cheese company and buffalo farm. They produce a Dutch Gouda and a variety of other European-style cheeses.

Olivia sitting on the dairy cow statue.

The bison at Eichtens are totally free from any growth hormones, antibiotics, or other medications. Their animals are raised on native pasture grasses (grass fed), and hay/oats. They raise the feed the bison consume.

Some of the buffalo herd at Eichten's.
There were quite a few young ones in the herd.

According to Eichtens' website, "A strong relationship between the human and buffalo has existed for thousands of years. Bison sustained the lives of the explorers and settlers going west as well as the Native American.

The older and younger animals sat right next to one another.

"They were believed to be the most important of the wild animals in the development of North America. Once an integral part of the Native Americans' way of life, the American Bison is again a central part of the lives of many Americans today.

The girls wanted to sit on the buffalo statue.
They weren't the first one with the idea - there was a
well-worn path from the dirt road to the buffalo.

"The Bison stand as a symbol of the American West, an animal of survival and our American Heritage."

Picking Strawberries


Olivia holding some strawberries she picked.

Also on Wednesday, we picked two flats of strawberries. 


Sophia looking for strawberries at the berry patch.

We're going to make a variety of food from the strawberries as well as eat them plain.  This year, we're going to try canning a strawberry-lemonade drink so the fresh strawberry taste can be enjoyed during the winter.

Providing an Abode for the Toads

We've been seeing hundreds of baby toads here, and came across an idea for helping the toads survive the hot, summer heat.

Olivia holding a baby toad.

In the May 2007 issue of Family Fun, one idea for children to enjoy their backyard is to make a home for toads.  As the article noted, "These hungry amphibians can be a big help in keeping garden pests, such as slugs, grubs, and potato beetles under control.  Entice them to hang out around your plot by creating a shady retreat." 
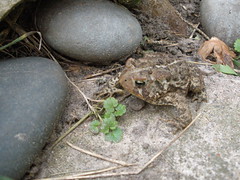
American Toad Found While Gardening
American Toad that we found in the garden
when we were planting flowers.

The article continued, "Pick a spot that's protected from the wind and where the soil is moist, and dig a few shallow depressions.  In each one, lay a terracotta flowerpot on its side and then fill it partway with sandy soil."

Now it's your turn!  What kid-friendly summer activities does your family enjoy doing?


Pink - The Summer of Color (Week 3)

There's a ten-week challenge called The Summer of Color that's on Twinkle Twinkle Like a Star. The Summer of Color encourages participants to focus on creating an item (or more) in a specific color each week.  This week the color is pink.

I made two different embroidered cards - one is a thank you card and the other is a blank greeting card.


To make the "thank you" card, I used the DJ Candy Heart font from dafont.com (a place to download free fonts from the internet) to print out the word "thank you."

I placed a piece of watercolor/drawing paper over the paper which was on top of a light board (you could also hold it up to a window to see the lettering) and lightly traced the letters with a pencil.

Using a needle, I put holes in the paper over the letters. (It's important that you don't do it too close or your paper will rip as you sew which mine did in a couple of places. If it does, just punch a new hole in the paper and re-sew when you get to that part.)


After erasing the pencil lines, it's time to begin sewing.  Using 6 strands of embroidery floss, I sewed (using the backstitch) from hole to hole.

After cutting the lettering out, I placed foam stickers on the back and affixed it to the pink decorative paper which I had glued onto a 4"x6" card (it's an 8"x6" piece of watercolor/drawing paper folded in half).

This is the second time that I've embroidered on paper, and it is not a forgiving craft. You don't have much flexibility to change (essentially) once you've punched the holes into the paper (you can't take away what you've already punched).


You also need to be careful not to bend the paper as you embroider because that will show up in your final product.

With that being said, I did enjoy doing hand-embroidered cards, and would like to make more cards with different words on them.

Green - The Summer of Color (Week 2)

There's a ten-week challenge called The Summer of Color that's on Twinkle Twinkle Like a Star. The Summer of Color encourages participants to focus on creating an item (or more) in a specific color each week.  Currently the challenge is on Week 3, but I wanted to start from the beginning and do all ten weeks.

During the second week, the color was green.  I made two embroidered gift tags.  The Dala horse is based on a traditional Swedish folk-art motif and was from a contemporary Swedish craft book.  The tree is from an embroidery book in which the author/artist created designs and items for every color. 


Each of the tags is made from 100% wool felt and embroidered with cotton floss. After I embroidered the design and cut out the horse or tree, I cut out a matching piece of watercolor/drawing paper. I glued the paper onto the felt design using fabric glue.


After letting that dry, I strung some embroidery floss through the embroidered design and paper.  The tags can either be used to embellish gifts and/or hung on a Christmas tree to be enjoyed year after year.

Blue - The Summer of Color (Week 1)

There's a ten-week challenge called The Summer of Color that's on Twinkle Twinkle Like a Star. The Summer of Color encourages participants to focus on creating an item (or more) in a specific color each week.  Currently the challenge is on Week 3, but I wanted to start from the beginning and do all ten weeks. 

As I looked back on my pictures, I realized that I had already done two projects in the first week's color (blue) during June. 

One was a blue bunting that will be for Olivia's half birthday in July.  I had never made a bunting before, and wanted to see if I could make one.  I made two different versions - a red,white, and blue one for the Fourth of July; and the blue one pictured below.


What I like about making buntings is that it uses up scraps of fabric or reuses fabric that was for something else (e.g., bedsheet, shirt, pajamas).  At nine feet long, the bunting will add a decorative and festive touch to Olivia's upcoming birthday celebration.


The other blue item I made was a tablecloth with puzzle pieces made from blue fabric. I selected about a dozen pieces of different fabric and cut out squares from each piece. Then, I ironed on the iron-on fabric adhesive to the back side of the fabic.

I traced 24 puzzle pieces from one of Olivia's puzzle onto the adhesive backing and then cut out each puzzle piece.
I could have ironed this tablecloth before taking a picture of it.
Why create more work for myself?
It will be folded and then need to be ironed again
before Olivia's 4-H demonstration in about a week.

Olivia placed each piece where she wanted them on the tablecloth (she is using it for a 4-H demonstration about making a jigsaw puzzle sandwich). I pinned and then ironed them in place. I asked her if she wanted me to machine stitch or hand embroider around each piece, but she liked the look of the tablecloth without the stitching.

The white fabric is some that I had on hand.  Again, it was a great way to use up some fabric and put it to good use. 

Year of Wonders - 52 Books in 52 Weeks - Week 27

This week, as part of the 52 Books in 52 Weeks challenge, I'm reading Year of Wonders by Geraldine Brooks. 


The description on the back cover summarizes this historical fiction book well: 

When an infected bolt of cloth carries plague from London to an isolated mountain village, a housemaid named Anna Frith emerges as an unlikely heroine and healer. 

Through Anna's eyes we follow the story of the plague year, 1666, as her fellow villagers make an extraordinary choice: convinced by a visionary young minister they elect to quarantine themselves within the village boundaries to arrest the spread of the disease.

But as death reaches into every household, faith frays. When villagers turn from prayers to murderous witch-hunting, Anna must confront the deaths of family, the disintegration of her community, and the lure of love.  As she struggles to survive, a year of plague becomes instead annus mirabilis, a "year of wonders." 

I began reading this book and didn't want to put it down 38 pages later.  Picked it up again in the evening and reluctantly put it down at 65 pages.  The author writes with great regard for period detail, and uses elegant prose. 

Inspired by the actual remote British village (Eyam) commemorated as Plague Village because of the events that transpired there in 1665-1666, the author tells this story from the perspective of 18-year-old Anna Frith.  Ann was widowed by the mining accident that took her husband's life.

After her husband's sudden death, she is unable to work the mining claim that had provided a decent living for her family.  Instead, Anna is reduced to working as a servant at the village rectory and to taking in a border sent her way by Michael Mompellion, the rector.

Unfortunately for everyone in Eyam, the new cloth that was brought into the village by this traveling London tailor was infected with the "seeds" of the plague that was soon to devastate the village.

The Church in Eyam contains detailed displays and accounts
of when the village went into voluntary quarantine
when "The Plague" was imported in infected cloth from London in 1665.

Eyam, a village of less than 400 citizens, had one church (see picture above) and Michael Mompellion (its rector) was depended upon for his leadership and moral guidance. He asked his congregation to close the village off, with no one allowed in or out until the plague had run its course.

Reluctantly, the villagers agreed that it was the right thing to do. Little did anyone expect that two-thirds of those sitting in the church that day would not be alive one year later.

The Year of Wonders is both a captivating and harrowing account of the bubonic plague, and its effect on a community as well as the people - rich and poor...child and adult...alike.  It's a fascinating look at what happens to a group of people who made the decision to cut themselves off from the rest of the world to await their fate.

As more and more people die the painful death that comes with bubonic plague, some find a strength that they never knew they had while others become filled with doubt and all of the worst aspects of human nature. Eventually, Anna, and Michael and Elinor Mompellion provide the care and comfort that makes it possible for the village to honor the pledge that it made to protect its neighbors.

Geraldine Brooks fills the Eyam/Plague Village with realistic human beings who, in barely twelve months, display all the best and worst that human beings have in their nature. The people she describes in Year of Wonders are no different than the people you might encounter the next time that you find yourself in a natural disaster that temporarily cuts your area off from the rest of the country.

Saturday, July 2, 2011

Simple Woman's Daybook (July 2nd)

FOR TODAY

Outside my window...there's a clear blue sky.  The pine trees are still after swaying back and forth last night during the thunderstorm.

I am thinking...about how nice the cool air felt this morning when I let the dogs out. After a heat index of over 100 degrees over the past couple of days, this is a welcome relief.

I am thankful...to have been able to spend part of my birthday with my sister.  We enjoyed a morning of strawberry picking with Sophia and Olivia, and then visiting a buffalo farm where we all enjoyed a nice lunch together. 

From the learning rooms...the girls and I had a fun week focusing doing the "Smart Summer Challenge." This week's theme was "Me on the Map" - so everything we did we looked at from a geography angle - whether it was embroidery, paper cutting, 4-H projects and demonstrations, or visiting different farms. 

In the kitchen...I have two flats of strawberries that will are being eaten fresh.  Later today, I'm going to try some new recipes - for strawberry-lemonade; a salad with strawberries, asparagus, and walnuts; and a strawberry pie.

I am wearing...a hooded sweatshirt and pajama pants.  It's still early morning and no one is awake yet...except some of the cats.  The dogs went back to bed after going outside.

I am creating...items for The Summer of Color. I just found out about this ten-week blog party this morning, and am excited about it.  I've been doing more writing and less creating than last year, and want to get back into doing more of the visual arts/crafts again.  Having a weekly challenge focused on a particular color will be a good motivator to start creating again. 

I want to catch up and do the first three weeks (the colors for each week are blue, green, and pink); while working on the fourth week (July 4th-11th). Yellow is the focus for the fourth week.

I am going...to visit my mom and dad this morning.  Sophia, Olivia, and I will be going out to breakfast with them (they are both home-bound so it's going out to eat is something they enjoy). We're going to help weed their vegetable garden, clean the carpets in two rooms, and replace the batting in a quilt I made for my dad many years ago.

I am wondering...when I'm going to sit down and figure out the schedule for next year for homeschooling.  I want to use many of the books and resources I have on hand this year rather than buying as much new curricula as I have done in the past. 

As much as I like Sonlight (which I've used for the past few years), it is quite expensive. Perhaps picking and choosing from Sonlight and supplementing it with what I already have will be the best route to go during the 2011-12 school year.

I am reading...Twisted Tree by Kent Meyers but didn't like it. After 92 pages, I just couldn't get into the book. I found it to be a rather grim book.  There was a review in a book for book clubs, and it sounded intriguing as did the discussion questions.  However, from the onset, the book was more on creepy than what I wanted to read.

The next book I'm going to start reading is Year of Wonders by Geraldine Brooks. According to O, The Oprah Magazine, "Year of Wonders is a vividly imagined and strangely consoling tale of hope in a time of despair."

I am hoping...that the lawn mower comes back soon. It has been at the repair shop now for over a week and the grass is getting really long.     

I am looking forward to...bringing a couple of peonies and tiger lilies indoors today, and putting them in vases.  I'm going to help my dad (who has Alzheimer's Disease) cut some flowers that are blooming at his home, and put them in vases as well. He use to cut flowers during the summer and bring them in for my mom and him to enjoy. 

I am hearing...the fan.  Not much of anything else.  It's very quiet and peaceful at this time of the morning.

Around the house...I'm getting projects done that I've wanted to get done for some time now. I went through a basket of "to do" projects and did them as I went through the basket. No putting them aside to work on later. I either did them, helped the girls do their projects, or put them in the donation bag.

Yesterday, I did mending, sewing, and needlefelting. I helped Olivia with another embroidery project; and Sophia with sewing a dress and an embroidery project. 

I am pondering...how nice it was to see several friends during the past couple of weeks, and how I need to make time to stay connected with people. It's so easy to get wrapped up with caregiving that other aspects of my life are put on hold.

One of my favorite things...seeing all the baby toads that the girls have been finding, observing, and then releasing.  It's also been so nice to hear the wren singing every day, and watching the parents bring food to their babies.  There are three wren families here this year which is great. I saw a monarch yesterday in the butterfly garden yesterday (it always makes me happy to see butterflies).

A few plans for the rest of the week...visit my parents (today), celebrate the Fourth of July (Monday), take Sophia to harp lessons (Tuesday), take my dad to his quarterly doctor appointment for Alzheimer's Disease (Thursday), do fun/educational activities related to the theme of "government" with the girls, and start some creative projects this week focused on different colors (most likely doing quilting and embroidery).

Here is picture for thought I am sharing...this is an eastern tiger swallowtail butterfly that Sophia, Olivia, and I saw on Thursday morning. We stopped for a bit at a lake before Sophia's harp lesson.  As we were walking back from the lake, this butterfly was drinking some water from the road and then was flying around us at eye level. It spent quite a while flying and landing around us.

It was a beautiful butterfly, and the photograph below doesn't do it justice.  Nonetheless, it captures a few moments in time that were memorable to us.

Eastern tiger swallowtail butterfly that was
flying and landing right by the girls and me.

To see other people who are participating in the Simple Woman's Daybook during June, please click HERE.