Thursday, August 29, 2013

Homeschool Planning for 2013-14

Since early-August I've been planning the 2013-14 homeschool year. I registered for an online class called "Sketching it Out :: A Four Week Planning Session" led by Lisa Boisvert Mackenzie.

Originally, it was a four-week planning session. However, it has since expanded to eight weeks. The original participants went through the four-week planning process; and then could choose to begin again. This has been helpful to re-visit some of the earlier topics covered and fill in sections that I didn't have time to address during the first process.

At any rate, the focus of the class was an exploring the rhythm of the year in the context of planning a homeschool year. We began by getting a planner. I had several on hand, so I picked a small, maroon 3-ring binder. I added a pencil case and lined paper.

3-ring binder for academic work,
tabbed dividers, and a pencil case.

I also added some information I printed out from Lisa's website and links; some of the ideas from conversations on the Yahoo group set up for the class; and other ideas from the internet that focused on creating rhythm in the home and within homeschooling.

I began pinning ideas on Pinterest for different subjects:
=> Waldorf Rhythm, Routines, and Meal Times
=> Waldorf-Inspired Home

The next step was to create a school calendar. For us, that means a yearly calendar since I consider homeschooling more of a learning lifestyle than a set period of days when the girls learn. That being said, there is a "start date" and "end date" of the more "formal" homeschooling. This year, that is September 3rd and May 30th respectively.

School calendar.

Normally, we go on a "not back to school" trip the day after Labor Day for a few days. This year, however, we will not be going on a trip. Instead, we will do a "not back to school picnic" on September 3rd - the day after Labor Day.

Also on the calendar are days that there are no school or a holiday. This year on holidays we will focus on activities related to the holiday rather than doing traditional school work.

The calendar also shows birthdays and anniversaries (e.g., Adoption Days); breaks; and when we start and end the time period where we focus more on alternative ways to learn (e.g., 4-H, county fair, state fair).

Wheel of the Year.

Next, I looked at the different holidays that we will be celebrating and learning about this year; and found pins on Pinterest for them. We will be celebrating additional holidays and special days (e.g., New Year' Day, Mother's Day), but these are the core ones that had quite a few ideas that I wanted to remember.

JANUARY
=> Epiphany
=> Tu B'Shevat
=> Chinese New Year

FEBRUARY
=> Brigid's Day
=> Candlemas
=> Groundhog's Day
=> Valentine's Day

MARCH
=> Mardi Gras
=> Lent
=> St. Patrick's Day
=> Spring Equinox

APRIL
=> Passover
=> Easter

MAY
=> May Day
=> Memorial Day

JUNE
=> Pentecost or Whitsun
=> Summer Solstice
=> St. John's Tide

JULY
=> Fourth of July

AUGUST
=> Lammas

SEPTEMBER
=> Labor Day
=> Autumn Equinox
=> Rosh Hashana
=> Michaelmas

OCTOBER
=> Yom Kippur
=> Halloween

NOVEMBER
=> All Saints Day
=> All Souls Day
=> Martinmas
=> Adoption Day Celebrations
=> Chanukah
=> Thanksgiving

DECEMBER
=> Advent
=> St. Nicholas Day
=> St. Lucia Day
=> Las Posadas
=> Winter Solstice
=> Christmas Eve and Day
=> 12 Days After Christmas
=> New Years Eve

Monthly activities on a circular calendar.

I created a wheel of the year after I found a pin that I liked. using a free PDF pattern from Daily Colours.

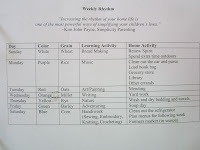
Then I looked at the weekly rhythm that I would like to start doing this year. Some of the ideas are based on Rudolph Steiner's beliefs and/or what some families using a Waldorf methodology/lifestyle follow (e.g., color of the day, grain of the day) while others are what works best for our family.

Rhythm of the week.

I noted the color of the day, grain of the day, activity of the day that involves Sophia and Olivia, and an activity of the day for me. Some of the activities that I do, the girls can help (e.g., Soup Day), but most are personal things that I want or need to get done.

SUNDAY
=> White
=> Wheat
=> Bread Making
=> Renew the Spirit

MONDAY
=> Violet
=> Rice
=> Music
=> Errands

TUESDAY
=> Red
=> Oats
=> Art and Painting
=> Mending

WEDNESDAY
=> Orange
=> Millet
=> Writing
=> Yard Work

THURSDAY
=> Yellow
=> Rye
=> Nature
=> Wash and dry bedding + towels

FRIDAY
=> Green
=> Barley
=> Adventuring (field trips, visit my mom, volunteering at the nursing home)
=> Soup Day

SATURDAY
=> Blue
=> Corn
=> Handiwork (e.g., sewing, embroidery, crocheting, knitting)
=> Menu Planning (also includes cleaning out the refrigerator)

Daily activities on a circular weekly calendar.

Once the color of the days were set, I thought that the best way to implement that was by having them be a part of the meal. For example, it may be the color coasters, place mats, tablecloth, table runner, and/or candles that we use.

I also looked on Pinterest for ideas for food that incorporates the different grains. I was surprised at the lack of recipes for millet. Apparently it's an under-rated grain.

I also made a rhythm of the week wheel. Daily Colours (the website mentioned above) has a free PDF pattern. However, I ended up using only the back and pointer. The colors on Wednesday and Thursday were the reverse of what I wanted to do in my family. (I prefer the flow of red-orange-yellow-green rather than red-yellow-orange-green since it follows the look of a rainbow.)

So, I made the circle and divided it into seven sections. I wrote the daily information into each section, and then colored in each part with the appropriate Prismacolor colored pencil.

One of the other things I did that ties into both the monthly holidays and special days; and the weekly grains was go through a binder that I have with lots of recipes that I would like to try. The recipes were divided by type (e.g., appetizer, main dish, bread, vegetables). This did not lend itself well to easily finding recipes.

To address this challenge, I went through all the recipes and pulled out ones that I'd like to try during a particular month, at a specific holiday/special occasion, or that included the grain of the day.

After the recipes were divided, I put each grouping into a plastic sheet protector. In this way, I can easily find recipes that use peaches, for example, since they are in the August sheet protector. (This is the month that peaches are readily available in Minnesota.)

The next step for me was to figure out what to teach on a daily basis. Honestly, this is where I got stuck for well over a week. The girls each have some work left to do from the 2012-13 school year. Since they enjoyed what they were doing, I wanted to continue with it into this year. There were other subjects or activities that I let go in favor of new ones that we will be adding this year.

The other challenge is that funds are quite limited this year. That means there is no extra money to purchase curriculum that I would like to try. Rather, I went through the resources I have on hand as well as look at free resources online to create the curriculum for the 2013-14 homeschool year.

A page from Sonlight's curriculum.
This is the one that Sophia will be finishing this year.
Already, there is quite a bit done on this particular week.

As I have done in the past, I look at the girls' interests, skill levels, educational levels, and learning styles. Although both girls have a strong interest in reading and literature, Sophia has done particularly well with Sonlight's curriculum.

Page from Sonlight's science curriculum schedule.

Thankfully, Sonlight includes so much into one level of of curriculum, that it can be stretched out into 1 1/2 - sometimes 2 years. In Sophia's case, she will complete what she started last year by January 2014. At that point, she will move onto Ambleside Online since it's a free curriculum and follows Charlotte Mason's educational philosophy.

Page of Ambleside Online's schedule for Olivia.

Olivia will be starting with Ambleside Online in September. Since she is working with the local elementary school to receive assistance with some learning, auditory processing, and short-term memory issues, some of her subjects are covered in a way that works well for her: through workbooks.

This is quite a different path than both a Waldorf and Charlotte Mason approach, however, for Olivia it works well. The workbooks are supplemented by "living books" from the library which gives her some quality reading on subjects addressed in the workbooks.

She also will be doing Beyond Five in a Row. During the first semester, she'll be working on four books (two fiction and two non-fiction). There are a wide variety of hands-on activities for her to which she is looking forward to doing.

One of the pages in the planning binder.
There are three of these per week - 
each row has a different subject.

In addition, the girls each have a variety of subjects that they learn about during the year:

A to Z Book (Olivia is creating a book about different subjects that begin with each letter of the alphabet)
Art
Character Education
Foreign Language (French for Olivia; Spanish for Sophia)
Grammar
Handwriting (standard for Olivia and Spencerian for Sophia)
Holidays
Journaling
Latin/Greek (Sophia only)
Literature (listen to 1 Newberry award book per month)
Math
Music (piano for Olivia; piano, harp, and violin for Sophia)
Nature Journaling
Physical Education (sports, equine vaulting, dog training, dog agility training - not all at the same time)
Poetry
Religion
Science
Service/Volunteering
Social Studies (includes geography and history)
Speech Therapy (Olivia only)
Spelling
Typing
U.S. Geography
Vocabulary
Writing
4-H

Another page with more subjects
that the girls will study in the 2013-14 school year.

Using free printable sheets from Donna Young's website, I did a plan for these subjects as well as using Sonlight's, Ambleside Online's, and Beyond Five in a Row's schedules for 9 weeks. This will take us to November 2nd. At that time, I will complete another 9 weeks of planning based on what has and hasn't been completed. I have the schedule for the academic portion of the girls' year in a purple 3-ring binder. There are tabbed-dividers that separate the plans by week.

One of the many types of planning sheets 
available from the Donna Young website.

The last component of planning for the upcoming home- and homeschooling year including creating a larger binder with non-academic subjects and home management items.

Binder with non-academic subjects and 
home management items.

Organized Home has many free printables that will be invaluable this year in terms of keeping organized. The tabbed sections in the white 3-ring binder include:

- Contact numbers - includes emergency numbers, frequently-used numbers, and a list of birthdays/anniversaries

- Menu planning - this has a plan for theme dinners when things get a bit more hectic and we don't want to spend a lot of time in the kitchen, or making meals for various school subjects (e.g., meals that focus on different states, meals from Beyond Five in a Row).

Some of the meal themes dovetail nicely with the grain of the day. For example, on Monday the grain is rice so I chose "Asian Night" as the theme. On Saturday, the grain is corn so I thought "Mexican Night" might fit well. Here is the weekly plan:

Sunday - Sunday Dinner - meat with potatoes and carrots. The leftover meat can be used for sandwiches during the week. Have a very light meal in the evening if anyone is hungry (e.g., cheese, crackers, fruit).

Monday - Asian Night

Tuesday - Crockpot Night

Wednesday - Pasta Night

Thursday - Leftovers

Friday - Soup Night with Fresh Bread

Saturday - Mexican Night

I've also included several printables from Organized Home in this section including weekly and monthly meal planners.

Shopping List - Copies of a shopping list. One will be posted in the kitchen to add to each week. In this way, when we run out of something it can be immediately added to the list.

Food Inventories - There are sheets for the freezer, pantry, and larder. The larder, in our case, is part of a closet that holds heavier canned goods (e.g., peaches, pears, tomatoes, applesauce) as well as the top shelves of a built-in bookcase that hold lighter canned goods (e.g., jams, jellies, salsa).

Recipe Locations - There are pages that have the name of favorite recipes, the cookbook/source, page number, and comments.

Monthly Rhythm - This is my chart that has five columns: month, mood, symbols/color, activities, celebrations.

One of the pages that has the monthly rhythm.
This page still needs to be retyped 
so that it includes the hand-written information.

Monthly Sections - I have a tabbed section for each month. It starts with August right now because that's the current month. Once this month passes, it will go to the back of the monthly section so that September is first.

Each section has a list of the holidays and when they are in 2013-2014. I've also included some ideas, instructions, and information that relates to some of the holidays. Following that is the plastic page protector that has the recipes for the month.

This is December's section. 
The first part has a list of holidays and
the second part has a sheet protector filled with recipes
that can be made for the month's holidays and celebrations.

Seasonal Chores - Organized Home has a free printable that has a fall and winter checklist; and spring and summer checklist.

Weekly Rhythms - This is the typed version of the daily color, grain, learning activity, and home activity. There also are daily to-do sheets from Organized Home.

Weekly rhythm.

Grain Sections - The next seven tabbed sections are labeled with the grain of the day - starting with wheat and ending with corn.

Protector sheet with
a variety of recipes using rice.

Patterns for Meal Time Accessories - I printed out some ideas for making tables look welcoming and pretty. There also are patterns to create napkins and place mats.

Blessings - There are some blessings I've collected that I would like to print out on cards made from watercolor paper that the girls painted.

One of the meal blessings in the binder.

Daily Rhythms - This section is a reminder of what I would like my daily rhythm to look like:

Wake up before the girls and:
- Get dressed
- Let the dogs out, take them for a walk, and feed them
- Make hot chocolate
- Write in my journal
- Start the laundry (if needed)
- Review the meals for the day, and take out anything that needs to be thawed
- Prepare breakfast

I'd like to play a board or card game with the girls each day. Integrating an element of play into each day is a goal I'd like to work on during 2013-14.

The next section focuses on family values. In terms of family values, I'd like to have the following words describe my home: contentment, love, acceptance, comfort, spiritual, truthful, generosity, helpfulness, exploring, learning, togetherness, openness, happiness, caring, compassion, wonder/discovery, reflective, excitement, enthusiasm, gratitude, and service.

The last section focuses on a family mission statement. I have a rough draft of one; and would like to work on finalizing that during 2013-14.

I also included several daily to-do lists from Organized Home. These will come in handy - especially during November-January when there is a lot to be done on a daily basis.

Daily Chores - This section has ideas for keeping a home clean. I have a proposed schedule for daily cleaning that I am interested in seeing if it will work or not this year. It is:

Sunday: Bedrooms
Monday: Mudroom
Tuesday: Offices
Wednesday: Bathrooms
Thursday: Dining Room
Friday: Living and Family Rooms
Saturday: Kitchen

Following that are more comprehensive daily chore lists that I pinned from Cedar Ring Mama. At some point during Autumn 2013, these would be nice to review and adapt to my home.

First Aid Inventory and Medicine - Organized Home has a inventory sheet for first aid supplies. I also would like to list everyone's current medications they are taking.

Bills -  There are forms on Organized Home that are for each month. The top half has lines, and the bottom part has the name of the bills, date they are due, and the amount owed. There also are important dates and a monthly calendar on each sheet.

Social/Support/Craft Groups - This section will have information about any groups that the girls and I are participating in and/or leading. Once the groups begin in September, this section will have more things in it and may be sub-divided for each group.

So, what happened to the maroon binder? It has information that I still want to read, think about, and integrate into our daily lives and homeshool. This will be an ongoing resource that I can refer to, add to, and adapt the 2013-14 homeschool plan by as I make my way through the information.

Information about handiwork in the maroon binder.

I am very grateful to have taken this online class. It will add a dimension to our lives and to homeschooling that was not fully developed or - in some respects - completely absent. The plan is definitely a work in progress as I see what feels right for our family and what doesn't feel like a good fit.

Friday, August 23, 2013

Bringing Literature Alive: Breadcrumbs

During August, we read Breadcrumbs by Minnesota author Anne Ursu. Today, we met with a few other girls as part of a book club that we hosted during the summer.We did a variety of activities that tie into reading the book.

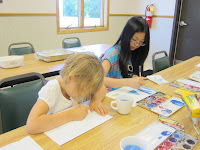
Painting
Sophia's trio of trees.

Since the majority of Breadcrumbs took place in the woods, the children created paintings using watercolors and crayons. The idea for the project came from this pin which leads to Art Projects for Kids. The pin and instructions said to divide the background into three sections. None of the girls wanted to do that - they all wanted to have one-color (rather than divided) skies.

We also didn't use paper-punch holes as snow. Rather, some of the girls used white or silver color crayons to make dots or snowflakes in the sky. This was a nice touch to their paintings.

The first step was to trace three different triangle shapes onto a piece of paper. Then, add a squiggly line at the bottom to represent the snow.

Olivia was painting the sky while 
another book club participant drew her design.


Next, add a line from the ground up through the tree to represent the trunk. Then, add "V" shapes to the trunk to represent branches.

Sophia rinsing out her brush 
as she painted her trees.

Now, it's time to paint. The girls used natural watercolors - some the color straight from the little circles and in other cases, they blended a couple colors to create their own shades.

Olivia painting the trees.

All of the girls painted the trees first and then the sky.

Sophia putting the finishing touches 
on her painting.


I'm always fascinated by watching children do art. Given the same art supplies, each comes up with such different images. It is a joy to watch them creatively express themselves.

Olivia's finished watercolor and crayon painting.

Origami/Paper Folding

On page 82 of Breadcrumbs, the author wrote about photographs of snowflakes taken by Wilson Bentley over a hundred years ago. They called him “Snowflake” Bentley, and he was the one who discovered that no two snowflakes are alike.

The children listened to the book Snowflake Bentley by Jacqueline Briggs Martin read to them. They also were able to see some of the snowflakes that Bentley photographed. The book, Snow Crystals by W.A. Bentley and W.J. Humphreys, has over 2,450+ illustrations of Bentley’s work.

After that, the children made an origami star/snowflake.

Olivia and another participant making a window star/snowflake
from German kite paper.


This is a simple and alternative version of paper snowflakes that some people hang in their windows in winter.

Sophia's trio of snowflakes.


To hang the star, the children will place a few loops of clear tape on the back of the star and press it onto your window. The light from the sun will illuminate the pattern.

Paper Cutting

Sophia making an origami snowflake and 
Olivia making a paper-cut snowflake.


Using origami paper in two different shapes (a square and circle), the children created two paper snowflakes by cutting shapes out of the folded paper.

Olivia's trio of snowflakes.


They found the square one easier to fold and cut while the circular one was more difficult to fold and conceptualize for cutting. Yet, the girls were almost equally split between preferring the square versus circular snowflakes.

Math

We played “Melt a Snowflake” – a dice/board game that involves shaking two dice, adding the total dots, and coloring in a part of a snowflake on a game board. The pin for this idea leads to Mrs. Samuelson's Swamp Frogs and has PDF game boards to use.

Playing "Melt a Snowflake."


The children took turns and whoever colored in the most spaces on the game board won the game.

Counting the dots on the dice and 
finding the space to color in on the game board.

There are different versions of the game - one that can be played with two dice and one with three dice (to result in smaller and larger sums respectively).

It was a fun way to squeeze some math into the summer...disguised as a game.

Sports

Several times in the book, the author writes about Joe Mauer and the baseball that Jack gave Hazel. We looked at The World’s Greatest Baseball Players by Matt Doeden, and read a little about Joe Mauer.

The reason why he is such a great baseball player was lost on the girls. However, more interesting for them was the fact that he is 6 feet 5 inches tall!

Dance

The children were able to touch and try on (if they wanted to) a pair of pointe shoes that were mine when I was in junior high school.

Examining the pointe shoes.


This tied into the part of the book (on page 171) that was about the red “dancing shoes – real ballet slippers” that Hazel found in the woods. The shoes make reference to Hans Christian Andersen’s fairy tale called Red Shoes.

Trying to stand on her toes.

We looked at some photos from the book Ballet for Beginners – Featuring the School of American Ballet by Mary Kate Mellow and Stephanie Troeller. The girls tried doing each of the basic positions (first, second, third, fourth, and fifth).

Learning the different positions.
This one is second position.


Music

Since the story makes many references to snow, ice, and winter, I thought about one of the common ballets performed in December: The Nutcracker.

The Washington County Library has CDs available of different orchestras playing Tchaikovsky’s music. We listened to the CDs while the children worked on their activities. Two pieces that directly tied into the book were: Nutcracker and Marie Depart of the Pine Forest and Waltz of the Snowflakes.

Food

We sampled two different types of food today: Turkish Delight and Meringue Snowflakes. In the book, there were references to The Lion, The Witch, and The Wardrobe by C.S. Lewis.

In one part, the White Witch asks Jack if he wants some Turkish Delight. This is a recipe the children tasted. It’s from Aslan - Adapted from The Chronicles of Narnia by Frederic Thomas.

Turkish Delight

Turkish delight.


3 envelopes unflavored gelatin
½ cup cold water
½ cup hot water
2 ½ cups granulated sugar
¼ teaspoon salt
3 tablespoons lemon juice
½ teaspoon lemon extract
About ½ cup confectioners’ sugar

Soften the gelatin in the cold water. Set aside. In a saucepan, bring the hot water and granulated sugar to a boil, stirring all the while. Lower heat. Add the salt, and stir in the softened gelatin until completely dissolved. Cook at a simmer for 20 minutes. Remove from the heat and let cool for 10 minutes. Stir in the lemon juice and lemon extract. Rinse a 6 inch square pan with cold water. The pan should be wet but not have standing water. Pour the mixture into the pan. Cover with a lid or plastic wrap and allow to stand in a cold place overnight.

Sift some of the confectioners’ sugar onto a plate. Moisten a knife in very hot water and run it around the edges of the pan to loosen the candy. Invert the pan over the plate. It may be necessary to work on the edges a little to loosen them enough to turn the candy out on top of the sugar.

Cut the square into equal-width strips. Roll each strip in sugar; and then cut into cubes. Roll each cube in additional sugar to coat well.

The girls ready to taste the Turkish delight 
at the same time.


The children also tried meringue snowflakes that were flavored with mint extract. They were a hit! The girls all asked for seconds...and thirds. The pin for the recipe leads to a lovely image of a meringue snowflake. None of ours turned out as well visually. Oh well...the children didn't mind.

Meringue Snowflakes

Meringue snowflake that Sophia made.

2 large egg whites, at room temperature
1/2 teaspoon cream of tartar
1 cup confectioners’ sugar
1/4 teaspoon flavored extract, such as lemon, peppermint, orange, or almond
2 tablespoons colored sugar or edible glitter

Heat the oven to 200º. In a large bowl, using an electric mixer on medium speed, beat the egg whites and cream of tartar until frothy, about 3 minutes. Set the mixer speed to high and beat another 3 minutes or so until the eggs whites are fluffy.

Add the confectioners’ sugar, 1 tablespoon at a time, and continue beating until the egg whites are stiff and glossy, about 5 minutes. Then beat in the extract.

Line two large baking sheets with parchment paper. Use a pencil to draw snowflake patterns on the paper. The meringues will not spread, so they can be drawn fairly close together. Turn the papers printed-side down and stick them to the baking sheets by dabbing a little meringue in each corner.


Spoon the meringue into a large pastry bag fitted with a 1/4-inch round tip and pipe it, erring on the thick side so the snowflakes will be less fragile, onto the paper-lined sheets following the patterns. Sprinkle the meringues with colored sugar or edible glitter.

A meringue snowflake.


Bake the snowflakes until dry but not browned, about 1 hour. Carefully slide the parchment paper from the baking sheets to wire racks and let the meringues cool completely.

Using scissors, cut the paper between the meringues to separate them. Then gently peel away the paper from each one, keeping one hand under the snowflake to support the edges. The meringues will stay crisp for up to 2 weeks if stored in an airtight container at room temperature (do not refrigerate them). Makes about 20.

Olivia checking out the meringue snowflake.

Theater/Play

Breadcrumbs referred to many fairy tales in the story as well as has one part in which Hazel and her friend are creating their own fairy tale.

The girls in costumes.


So, today the children were able to try on a variety of costumes and have fun creating their own story based on Breadcrumbs as well as any other ideas they came up with.

Enjoying an impromptu play.

This was the last book club meeting of the summer, so having a chance to dress up and play together was a highlight of the morning for the girls.

Having lots of fun with the costumes and 
play they are making up as they go along.


To hear and see how quickly they could come up with a story and act it out was fun to watch.

Sophia the fairy queen holding 
a fairy princess.

Thinking back to the first book club meeting we had in June, the girls were so quiet and reserved since they didn't know one another. Seeing the smiles on the girls faces this morning made me realize how much they had enjoyed spending time together this summer learning and doing activities with one another.

Thursday, August 1, 2013

Celebrating Lammas

I've been planning the upcoming school year, and have been looking at celebrations and holidays that occur throughout the year. One I had not heard of before is called Lammas.

Traditionally, Lammas marked the closing of one growing season and the safeguarding of another through the winter. Lammas is recognized as a Christian holy day, and is celebrated by the church on August 1st. The celebrations often took place the last day of July or the first day of August, with the harvesting of grain. The sacredness of grain has been noted as far back as humanity itself.

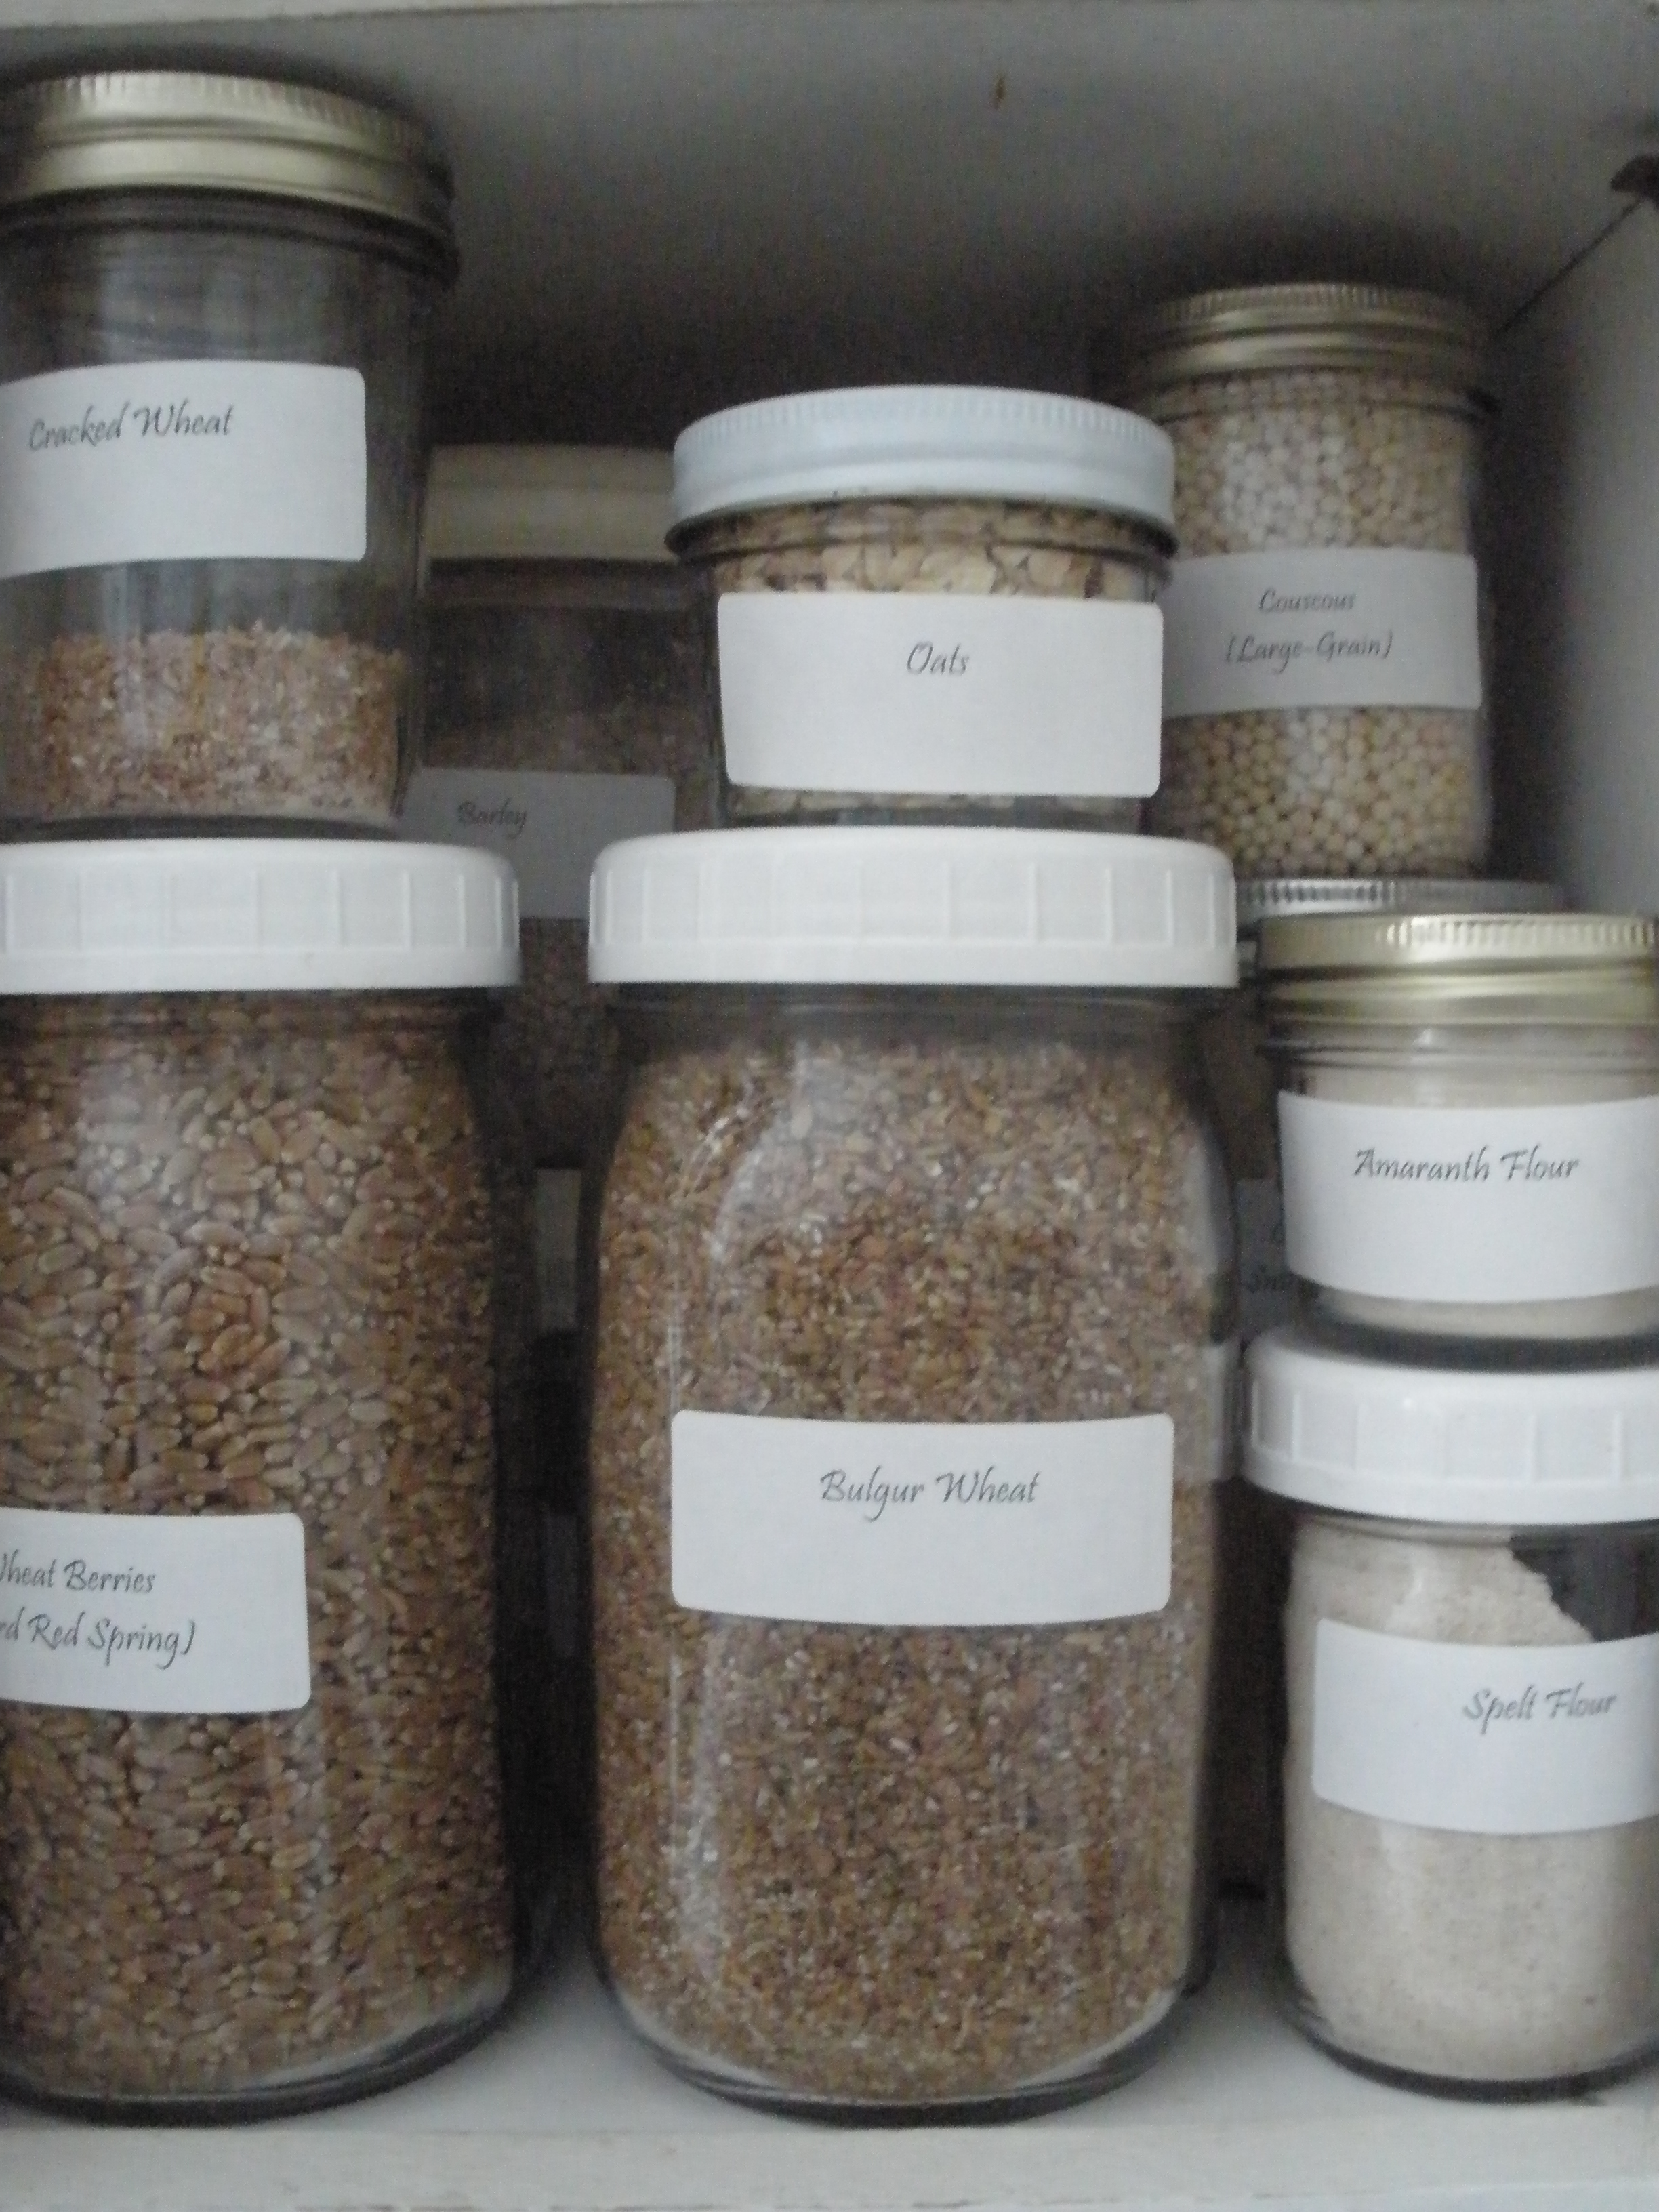
Wheat Berries and Flours
Variety of wheat berries and grains in the cupboard.

It is also a cross-quarter day, one of the four High Holidays or Greater Sabbats of Paganism. "Lammas" was the medieval Christian name for the holiday and it means "loaf-mass," for this was the day on which loaves of bread were baked from the first grain harvest and laid on the church altars as offerings. Associations of grains to the Gods or Goddesses of death and resurrection were also present.

This year we tried a variety of recipes to celebrate the holiday. Several came from Pinterest while others came from recipe books I own.

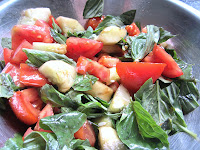
For lunch, we enjoyed Tomato, Avocado, and Cucumber Salad. Actually, it included everything except the avocados since I didn't purchase them far enough in advance for them to ripen. At any rate, the salad is flavorful and uses ingredients that are being harvested in this area.

Tomato, Cucumber, and Basil Salad that we made.

Heirloom Tomato, Cucumber and Avocado Salad
Adapted from Yummy Mummy
Source: Pinhttp://pinterest.com/pin/212795151116276456/ and Yummy Mummy.
Serves 12

Ingredients:
5 cups mixed heirloom tomatoes wedges
2 small English hothouse cucumber, halved lengthwise and sliced
2 avocados, peeled, pitted and sliced
1 bunch fresh basil, sliced or torn
2 tablespoons extra virgin olive oil
2 tablespoons balsamic vinegar
Sea salt
Freshly cracked pepper

Instructions:
Place tomatoes, cucumber, avocados, and basil in a large serving bowl or platter. Mix together the olive oil, vinegar, salt, and pepper. Drizzle over the top of the salad and mix ingredients. This can be made several hours in advance, covered, and refrigerated.

*~*~*~*~*~*~*~*~*

Four-Grain Batter Bread that we made.
This is delicious! We will definitely make it again.

We also had Four-Grain Batter Bread from the Betty Crocker Cookbook.

Ingredients:
4 1/2 to 4 3/4 cups all-purpose flour
2 tablespoons sugar
1 teaspoon salt
1/4 teaspoon baking soda
2 packages regular active or fast-acting dry yeast
2 cups very warm milk (120°F to 130°F)
1/2 cup very warm water (120°F to 130°F)
1/2 cup whole wheat flour
1/2 cup wheat germ
1/2 cup quick-cooking oats
Cornmeal

Instructions:
In large bowl, mix 3 1/2 cups of the all-purpose flour, the sugar, salt, baking soda and yeast. Add milk and water. Beat with electric mixer on low speed until moistened. Beat on medium speed 3 minutes, scraping bowl occasionally. (Note: I didn't use a mixer; I mixed everything by hand.)

Stir in whole wheat flour, wheat germ, oats and enough remaining all-purpose flour to make a stiff batter.

Grease 2 (8x4-inch) loaf pans with shortening or cooking spray; sprinkle with cornmeal. Divide batter evenly between pans. With floured hands, pat tops of loaves to round. Sprinkle with cornmeal. Cover; let rise in warm place about 30 minutes or until batter is about 1 inch below tops of pans.

Heat oven to 400°F. Bake about 25 minutes or until loaves are light brown. Remove from pans to cooling rack; cool.

*~*~*~*~*~*~*~*~*

Blessed Berry Lemonade that we made.

For the beverage, we had Blessed Berry Lemonade. The pin leads to Wiccan Wonderland. I'm not sure the image on the pin is the correct one for the lemonade since it turns out to be a bit more frothy with specks of blueberries throughout it.

Nonetheless, it is a refreshing drink. It is sweetened only by honey, so it not a super-sugary drink. It tastes very natural.

Blessed Berry Lemonade for Lammas
Source: Llewellyn's Sabbats Almanac: Samhain 2009 to Mabon 2010
Serves: 8

Ingredients:
1/2 cup honey
1 cup lemon juice
3 lemon chamomile tea bags (we used 2 chamomile tea bags and one lemon tea bag)
2 cups blueberries
6 cups water

Instructions:
In a small saucepan, dissolve the honey in lemon juice over low heat. Place tea bags in a blender and pour lemon juice over them. Allow to steep for 9 minutes.

Remove tea bags and puree with blueberries and water. Refrigerate for at least 2 hours. Serve over ice.

The blueberries starting to swirl around 
in the Vita-Mix Mixer.

*~*~*~*~*~*~*~*~*

The girls ready to have dinner.

For dinner, we had meatballs which have a variety of whole-grain bread crumbs (to tie into Lammas). The recipe is one that I often make. I had to make them in the afternoon since the girls had an equine vaulting lesson later on. When we came home from that, they were ready to eat. We also had more of the tomato basil salad from lunch.

Meatballs for dinner.

Meatballs
From Kinderhaus Cooks

Ingredients:
1 pound lean ground beef
1 cup bread crumbs
1/2 cup grated Parmesan cheese (we didn't include this)
1 teaspoon dried parsley
1 clove garlic, minced
1/2 cup milk
2 eggs, well beaten
Salt and pepper to taste

Instructions:
Preheat oven to 250 degrees. Combine all ingredients and mix thoroughly. Form 1 1/2 inch meatballs and bake on greased cookie sheet (with sides) for 30 minutes or until no longer pink.

*~*~*~*~*~*~*~*~*

Muffins with white chocolate chips, 
mandarin oranges, and coconut.

We also had Lamb's Inn Chocolate Chip Muffins. The oranges in it reminded me of the warm summer days, so I thought it was an appropriate addition to our Lammas dinner.

Lamb's Inn Chocolate Chip Muffins
From Kinderhaus Cooks
Made 12 muffins and an 8" pan

Ingredients:
3 cups flour
1 cup sugar
3/4 teaspoon baking soda
1 tablespoon baking powder
1 cup orange juice
2/3 cup oil
2 eggs
2/3 cup chocolate chips (I used white chocolate chips)
11 ounces mandarin oranges, drained and cut in half
1 cup shredded coconut
2 tablespoons melted butter
1/3 cup sugar

Instructions:
Mix flour, sugar, salt, baking soda, and baking powder. In separate bowl, mix orange juice, oil, eggs, chocolate chips, and mandarin oranges. Mix try ingredients into the orange juice mixture. Spray muffin tins with non-stick spray. Fill 3/4 full.

Make topping by mixing coconut, melted butter, and sugar. Top each unbaked muffin with the topping. Press topping down lightly. Bake at 350 degrees for 20-25 minutes.

*~*~*~*~*~*~*~*~*

For dessert, we enjoyed Panna Cotta. The pin leads to Cafe Johnsonia. We don't have blackberries growing around here as shown in the pin, so we used strawberries.

Strawberries on panna cotta that we made. 

Buttermilk Panna Cotta
adapted from Martha Stewart

Ingredients:
1 1/2 teaspoons unflavored gelatin
1 2/3 cup buttermilk
1 cup heavy cream
1/2 cup sugar
1 tsp. pure vanilla extract (or 1/2 of a vanilla bean)
Fresh fruit, for serving

Instructions:
Place 1 cup of buttermilk in a heat-proof bowl or top of a double boiler. Sprinkle the gelatin over the top and let sit for 5 minutes.

Bring 2/3 cup heavy cream and 1/2 cup sugar to a boil in a small pan. Pour over the buttermilk and gelatin. Put the bowl over a pan of simmering water (or double boiler) and stir until gelatin is completely dissolved, about 5-10 minutes.

Remove from heat and stir in remaining 2/3 cup buttermilk and 1/3 cup heavy cream, and the vanilla extract. Stir and strain through a fine-mesh sieve into a large measuring cup (1 quart). Pour into six 4 oz. ramekins or custard cups. Place the cups on a baking sheet and cover with plastic wrap. Refrigerate until set, about 4 hours.

To serve, unmold panna cotta by dipping the ramekin in hot water for a few seconds and run the tip of a thin knife around the edges and invert onto a platter, or alternately serve the panna cotta in the ramekin. Top with fresh fruit. Best if eaten within 2 or 3 days.

*~*~*~*~*~*~*~*

Other highlights from Lammas:

The girls went out to look for monarch eggs and/or caterpillars. We have an abundance of milkweed this year and have noticed the butterflies flying around it.

Sophia and Olivia looking for monarch eggs or caterpillars.
They found three monarch eggs.
Hopefully they hatch soon so we can watch the caterpillars grow, and 
then transform into butterflies.
We always enjoy raising and releasing them each summer.

They also were working with Cooper on training him. They want him to learn some basic commands before they start agility training with him. He has lots of energy, so this is a great way to burn some of it off.

Cooper focused on the stick as Sophia throws it.

We had many birds visiting the feeders today. The highlight, though, was a hummingbird who seemed to excited to drink from the feeder. It would land, drink, flap its wings quickly, visit another hole, and repeat the process over again.

It's not a great picture, but a hummingbird 
visited the feeder today.

The girls had their final lesson for equine vaulting for this session.

Sophia balancing on the back of Willy.
Many of the skills they do are hands-free of the horse.
The horse, with the hands-free activities, 
is almost like a balance beam.

They did a show with other class members for family members. 

Olivia standing on Willy's back.
She is able to do this when Willy is trotting.

The girls do individual skills as well as work together. Since they have taken equine vaulting for the longest time out of the class, they work as a team. It's been a nice way for them to do a sport together they both enjoy; build trust with one another; and learn to work and communicate well together.