This summer Sophia, Olivia, and I are thinking about participating in the local farmers market. There will be vendors who produce and sell vegetables, fruits, baked goods, plants, flowers, and crafts. Home based business owners also will be there.
In preparation for this potential venture, I have been gathering some tips from others who have experience in the field. These are top 10 ideas to get started:
1. Have an inviting space. Some tips I found about creating an inviting space include:
Know your target audience. It's important to think about who your target audience is and focus on attracting attention from this market. For example, if you are selling items for children, then ensure that the theme of your display is vibrant and young. The theme should complement your items, not outshine them. The attention-grabbing booths seem to be ones that are
clean, bright, and colorful.
Invest in a 10' x 10' tent. Since the farmers market is held outside, a canopy/tent is a great investment. It’s useful to have panels on each side that can roll up or down, depending on the weather. Determine how well the tent will perform in wet weather and in high winds; and if you can hang things from the tent’s frame. Tents like these can be purchased at discount stores or online.
Gather white sheets from thrift shops or garage sales
to cover tables and/or use as booth dividers if the canopy you're using doesn't have sides.
Create fabric pendant banners to decorate the tables and tent. This
tutorial explains how to make pendant banners.
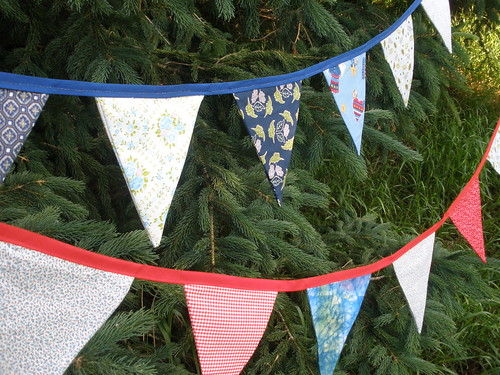
Two buntings that I made.
Have colorful pom poms to decorate the front and ceiling of the tent.
Martha Stewart has a pom pom tutorial.
Use height to fill your booth and attract attention. Boxes that you packed your merchandise in, covered with the same cloth you use for your table, can create different heights. Having different levels allows your items to be seen from further away and by more people at once. Use magnetic hooks or clips to attach to your tent’s legs and hang packaged merchandise from them.
Decorate the pavement with chalk - write "welcome" to make your space more inviting.
2. Use cute signs for prices and information.
This
tutorial shows how to make tabletop chalkboard signs that stand up on their own. Another idea is to use
craft sticks and chalkboard paint.
Have a big arrow sign outside the tent to bring people in. Keep with the chalkboard theme by cutting some scrap wood and spray-painting it with chalkboard paint. Here's a
tutorial about how to do that.
To make a large sign, have an office supply store print your logo. Use spray glue on the back and attach it to a piece of foam core.
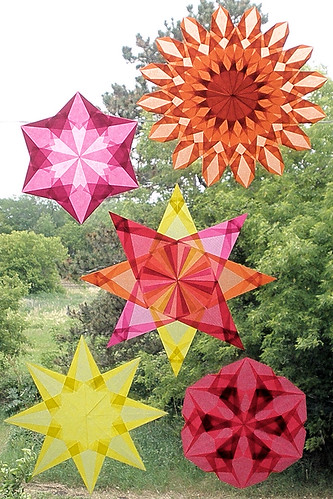
Have a sign that says, "I take orders!" This could be used for a variety of items. For example, bringing a sample book that shows the pictures of the window stars that I make and samples of the paper colors available would be helpful to have.
Examples of window stars that I make.
Or, if we decide to sell Watkins products, orders can be taken and brought the following week.
3. Have business cards available.
Have business cards on the tables for each person who is crafting. If you have a shop on Etsy, put a discount code on the back of the card so you can track how much traffic/business is a result of the booth at the farmers market.
One way to
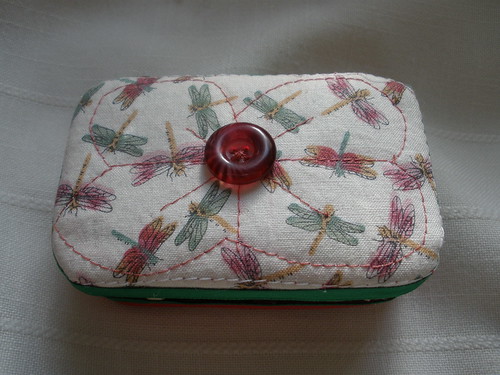
display and store business cards is by using a leftover mint tin.
Altered mint tin with a quilted top and interior.
Another way is to have a larger
sign inviting people to take a business card and visit your shop on Etsy.
Every product should have a tag on it with all your contact information. I just use my business card, hole-punched with a ribbon. This gives both the buyer and, if the item is being purchased as a gift, the recipient your contact information.
4. Accept credit cards.
Many crafters/vendors mention that a good percentage of their sales are done via credit cards. Paypal has introduced
Paypal Here an attachment that goes on a smart phone that allows credit card payments to be taken.
If you do accept credit cards, make sure you have a sign posted with the type of credit cards you accept. Not everyone is going to ask if payment by a credit card is accepted, especially folks who may be new to farmers market/craft show shopping.
5. Use antique or upcycled items to display products.
Use
old luggage to create an interesting display of your products. The link shows the old luggage as also having a miniature shelving unit in it to add extra display space.
Since we'll be at a farmers market, we can tie into that theme by
displaying small items in egg cartons. Other farm-related items could be incorporated into the display as well (e.g., chicken wire, barn wood).
6. Plan and determine what you want to sell.
Take time to plan the summer and what will be offered each week (if it changes). Have a variety of items at different price levels (inexpensive to expensive) to reach a broader customer base.
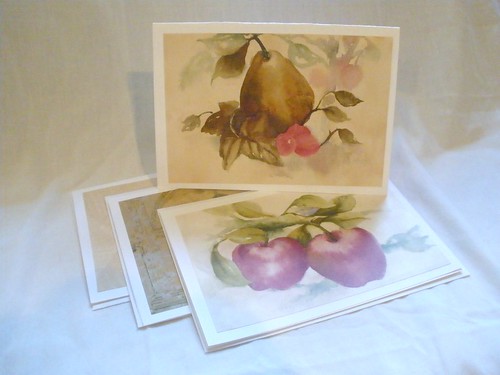
Set of upcycled greeting cards
made from wallpaper samples.
If possible, have a small space to demonstrate what you are making. People are curious to know how things are made. Depending on what product you sell, you can prepare a few things beforehand so you can show the steps or if you don't want to let people to know your secrets, just show them how it is completed.
A sampler in progress.
Doing the feather stitch.
Don't put too many items on your table(s). Try to find the right balance between showing what you have to offer and giving people a variety from which to choose. A cluttered table is not selling.
7. Take items that are necessary to doing business.
Make a list of items that will be needed, and ensure you have them at each week. Some suggested items include:
=> Apron or waist pouch with pockets for change
=> Art/Craft items for sale and extra inventory to replace all the items you sell
=> Bags, boxes, and packaging materials for purchases (include a business card in each bag)
=> Basic beauty kit for you (e.g., brush, lip gloss, hair-ties, barrettes, hand lotion, deodorant)
=> Binder clips (to keep table coverings from blowing around)
=> Box to store extra cash and credit cards slips
=> Broom/dust pan (small one is fine)
=> Bungee cords
=> Business cards and holder/sign
=> Business license
=> Calculator
=> Camera
=> Candy to give away and a holder for it
=> Cash – $120 is a good amount to start with. $40 ones, $40 fives & $40 tens
=> Cell phone
=> Change of shoes and clothes (in case it rains)
=> Clipboard for customers to sign credit card slips
=> Clothespins
=> Cooler with ice
=> Craft show/farmers market details (e.g., starting time, break-down time, organizer’s contact info)
=> Credit card processor
=> Credit card sign (don’t assume people will ask)
=> Displays
=> Dolly or luggage carts
=> Extra backs for earrings and other extras suitable to your craft
=> First aid kit (e.g., band aids, pain relievers, eye drops, allergy medicine)
=> Fishing line (good to hang stuff from tent and affix items to table)
=> Folding chairs (though it is better to stand than sit)
=> Garbage bags
=> Insect repellent (all natural so you don't spray chemicals around other people)
=> Invoice/receipt book
=> Labels and price tags (Beautiful labels will add to your overall presentation, shabby labels will detract from it. The most important factor is legibility. If you have terrible handwriting print out you labels. Ensure your spelling and grammar is correct.)
=> Lint Roller
=> Mints
=> Mirror
=> Money-marking pen
=> Notebook for mailing list sign-up and for writing down custom orders
=> Pens, markers
=> Paper (scrap to write notes on; and nice paper for last-minute signs)
=> Paper towels
=> Paper weights
=> Plastic sheeting for rain coverage (to cover your tables in an emergency)
=> Promotional materials besides business cards (e.g., stickers, pins, pencils. People love freebies)
=> Safety pins
=> Sales tax chart
=> Scissors
=> Sewing kit (needle and thread)
=> Sheets/material for sun protection pinned to tent back wall or sidewall (if needed) (use white to match the tent/canopy)
=> Signage (both on the tent and on the tables)
=> Snacks
=> Stick pins (pin lightweight objects to table to keep from blowing away and pin the edges of table cover to keep from blowing)
=> Sunscreen
=> Tablecloths or sheets to cover display tables
=> Tables
=> Tape (double sided, duct, scotch, packaging. Better to be prepared than not.)
=> Tent/canopy with removable walls (white is recommended)
=> Tent weights or buckets of sand for weight OR pre-formed concrete filled buckets for tent poles (especially useful when setting up on asphalt)
=> Tissues
=> Toilet paper
=> Tools (e.g., screwdriver, hammer, pliers, wire,zip ties, crafting [to make any repairs])
=> Twine or rope
=> Water
=> Wet wipes and hand sanitizer
=> Window/glass cleaner for the mirror
8. Talk with customers and potential customers.
Think about an opening line to say to your customers when they visit your booth. For example, “Hi, let me know if you have any questions.” Anything beyond that - as an attempt to keep a potential customer in the booth longer through conversation - can have someone leaving quicker than desired.
One tip that I found interesting was that when people compliment your work, don't say "Thank you" because that is a conversation stopper. Say, "Yes, they are great because..."
Remember to smile - even if you are not selling a lot and are disappointed in sales; are hungry, or grumpy. Someone said, "I’ve walked out of booths before just because the people behind the table looked disinterested or unhappy. No one wants to interact with miserable people, especially for an items that aren’t the necessities of life."
Standing is a much better vantage point for engaging customers. Sitting down has the potential to send the message, “I’m taking a break, don’t disturb me,” and that is not what you want. Although taking breaks is a necessity, try to stand as much as possible…you can rest later.
Put a little tray with something edible on your stand. Often times, this will make people stay at your booth a bit longer. Staying with the farmers market theme, this booth offered
candy in a chicken feeder.
9. Make visiting your booth fun and the sale memorable.
One vendor offers lottery tickets to her customers. She makes her own lottery tickets for her shop on Etsy. Each customer receives a lottery ticket. On one ticket, there is a code for $25 of free products in her shop. This is the
tutorial for making lottery tickets.
Invite people to sign up or drop their business card into a container for a free drawing to win a piece of your artwork. Have them include their name, address, and/or email address. Instant list for future marketing purposes!
Run a farmers market weekly special and use signage to promote the details. It’s important to give an added incentive to purchase something from you that day. Take one of your lower-end products and create an easy way for people to purchase more of them (e.g., buy 2, get 1 free).
Have some items available for children who will often bring their parents to your table. You might make a sale that way.
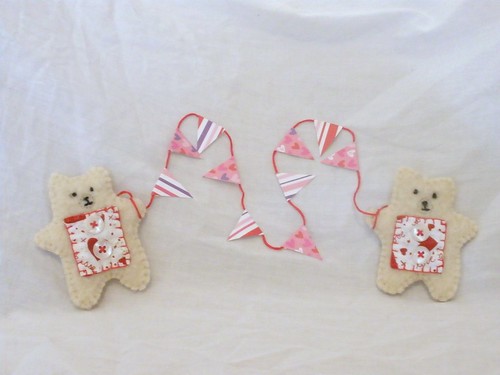
Set of bears with bunting.
When completing a sale, wrap it nicely - either placing it in a special bag or gift wrapping it. Add a little freebie (e.g., a postcard, coupon, button, lottery ticket for a discount on a future purchase).
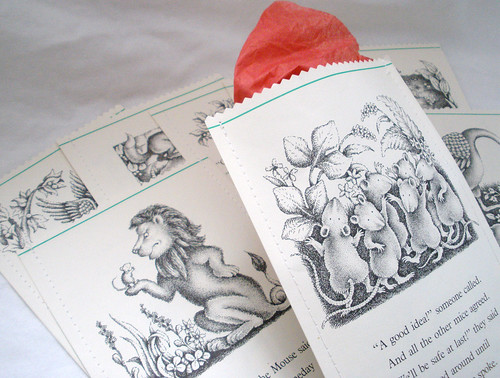
Bags made from vintage children's books.
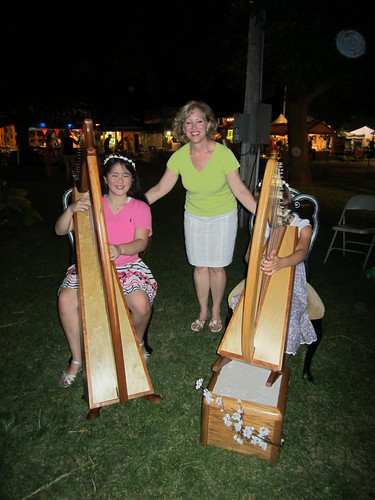
Have live music. In our case, Sophia could play her harp and have a collection dish in front of her.
Sophia with her harp instructor after
a performance at the County Fair.
10. Be Presentable.
Consciously or unconsciously, customers often base their purchasing decisions on their first impression of you. Be clean, neat, well dressed, and well groomed.
Also consider wearing a name tag or having your business logo inscribed on t-shirts.


