Friday, February 12, 2016

Outdoor Mom's Journal - February 2016

Each month I'm doing the Outdoor Mom's Journal which is an idea from the Handbook of Nature Study website. Below are my answers to the monthly prompts.

During our outdoor time this week we went....to the barn, around the backyard, and to the mailbox. We were sick so spending time outdoors was at a minimum.

The most inspiring thing I experienced was...seeing cardinals at the feeder outside my bedroom window. I changed the type of birdseed this past week to one designed for cardinals. Sure enough, they started appearing. There are both males and females; and we are hoping that they nest here again this spring.

Cardinal and black-capped chickadee 
at my feeder.

Our outdoor time made us ask (or wonder about)...if the cardinals that I was seeing had lived here before.

I did some searching on the internet and found out that cardinals don't migrate; and tend to live within a .6 to 1.2 mile range from where they were born.

Northern cardinals establish small territories surrounding their nest. Males will chase other male cardinals and intruders away from their territory to protect the young.

They also live to be 15 years old. So, quite possibly, these are cardinals that have been here before or perhaps have been at neighboring farms. Now, I need to figure out how to make our farm the best one for the cardinals so that they will stay here and we can enjoy their beauty year-round.

In the garden, we are planning/planting/harvesting....I've acquired the little pond and fountain that my parents used to have on their deck. I remember my dad had some plants and a goldfish or two in there. When the season changed, he gave the goldfish to a neighbor.

This spring, I'm trying to think about the best place to put the pond in the ground. We have another one that is in the butterfly garden that I would like to get going again. The birds enjoyed having a source of water and would sit on the rocks and drink from the little waterfall.

I am reading...the Wildlife Habitat Education Program manual for the 4-H Wildlife Project Bowl. This is a 300+ page manual that describes the 16 ecoregions in the United States, the wildlife found in each ecoregion, and wildlife management practices. It's an interesting book packed with information.

I've enjoyed reading articles in the paper that reference some of the terminology and concepts in the manual. Had I not been reading this, I would not understand as well what the articles were referencing.

I am dreaming about…the bulbs that I planted this past fall and hoping that they will bloom this spring. I also am hoping that the roses and lilies that I transplanted from my parents' gardens will bloom here and that they made it through the winter.

A photo I would like to share...at our 4-H Wildlife Project Bowl meeting, I encouraged the youth to bring in natural items that they had collected that wanted to show and talk about with others on the team. There was a diversity of items including: insects, butterflies, antlers, shells, feathers, and even a taxidermied duckling.


A table filled with items from nature that
4-H youth shared with one another.

The stuffed animals were brought by two girls as part of the team mascot contest. Each team (junior and senior) will have a team mascot that they will have with them when they are at the regional meet next month.

Strawberry Lemonade Concentrate

Earlier this week, I posted a recipe for a concentrate that I made during the summer that included strawberries, pineapple, lemon juice, and sugar. When I was making that batch of concentrate, I also made a Strawberry Lemonade Concentrate (basically the same thing without the pineapple).

Like the other recipe, this one also came from Canning Homemade. This recipe is equally as easy to make and process. It makes 6-8 pints or 3 quarts of canned concentrate.

Strawberry Lemonade Concentrate that I made.

6 cups strawberries, cleaned and hulled
4 cups freshly squeezed lemon juice or bottled lemon juice (either works fine)
6 cups sugar

In a food processor or blender, puree the strawberries in batches.

Transfer strawberry puree to a stainless steel saucepan over medium-high heat. Do not boil. Add lemon juice and sugar and stir to combine.

Using a thermometer heat to 190 degrees Fahrenheit, stirring occasionally. Because this recipe has sugar it will get to temperature rather quickly, pay close attention to the thermometer. Remove from heat.

Ladle mixture into jars leaving 1/4 inch headspace. Wipe rim, add hot lids and tighten rings just finger tight. Process in water bath canner at a boil for 15 minutes.

To reconstitute, mix one part concentrate with one part water, tonic water or ginger ale. Adjust concentrate to suit your taste.

Wednesday, February 10, 2016

Mardi Gras Meals with Recipes

Normally we don't celebrate Mardi Gras. However, I thought it would be a good excuse to try a few new recipes and ideas I saw on Pinterest. There are some ideas that I pinned to a Mardi Gras board on my account. Looking at them, I picked out three to try this year: Mardi Gras King Cake and Mardi Gras Lunch.

For breakfast, I made Mardi Gras King Cake from a pin I saw on Pinterest that led to Taste of Home. It takes about 2 1/2 hours from start to finish to make, so it's important to allow enough time in the morning if you want this for breakfast.

We ate the Mardi Gras King Cake shortly after it came out of the oven so the filling, bread, and frosting were all warm.

Mardi Gras King Cake that I made.

We all thought it tasted good, although there was quite a bit of filling in comparison to the bread. The frosting also could be cut in half. We normally don't use that much frosting on homemade rolls.

Ingredients

1 package (1/4 ounce) active dry yeast
1/2 cup warm water (110° to 115°)
1/2 cup warm milk (110° to 115°)
1/3 cup shortening
1/3 cup sugar
1 teaspoon salt
1 large egg
4 to 4-1/2 cups all-purpose flour
2 cans (12-1/2 ounces each) almond cake and pastry filling

GLAZE:
3 cups confectioners' sugar
1/2 teaspoon vanilla extract
3 to 4 tablespoons water
Purple, green and gold colored sugar

Directions

In a large bowl, dissolve yeast in warm water. Add the milk, shortening, sugar, salt, egg and 2 cups flour. Beat on medium speed for 3 minutes. Beat until smooth. Stir in enough remaining flour to form a soft dough (dough will be sticky).

Turn onto a floured surface; knead until smooth and elastic, about 6-8 minutes. Place in a greased bowl, turning once to grease top. Cover and let rise in a warm place until doubled, about 1 hour.

Punch dough down. Turn onto a lightly floured surface; divide in half. Roll one portion into a 16-in. x 10-in. rectangle. Spread almond filling to within 1/2 in. of edges. Roll up jelly-roll style, starting with a long side; pinch seam to seal. Place seam side down on a greased baking sheet; pinch ends together to form a ring. Repeat with remaining dough and filling. Cover and let rise until doubled, about 1 hour.

Bake at 375° for 20-25 minutes or until golden brown. Cool on a wire rack. For glaze, combine the confectioners' sugar, vanilla and enough water to achieve desired consistency. Spread over cooled cakes. Sprinkle with colored sugars. Yield: 2 cakes (12 servings each).

Nutritional Facts

1 serving (1 slice) equals 227 calories, 4 g fat (1 g saturated fat), 10 mg cholesterol, 123 mg sodium, 44 g carbohydrate, 1 g fiber, 3 g protein.

For a Mardi-Gras theme dinner, we had bacon, lettuce, and tomato sandwiches presented in a different way.  The idea came from a pin on Pinterest that led to JDaniel4's Mom.

The mask shape is cut from a tortilla. Behind the mask was hardwood smoked bacon, sliced cherry tomatoes, and lettuce. On the side, were veggie straws (to represent confetti).

Ingredients for a BLT with veggie straws on the side.

The mask shape is just a decoration. Sophia used a full tortilla and filled it with the BLT ingredients to make a BLT roll. I did the traditional BLT sandwich on a multi-grain, whole-wheat bread.

Dinner with a Mardi Gras theme.

Olivia doesn't like BLTs, so I made her a cheese quesadilla since we had plenty of tortillas.

I also served Dirty Rice for dinner. It was from a package that I purchased when I visited Louisiana and wanted to bring back some local food to enjoy at home.

Package of rice I bought in Louisiana.

It was easy to make - one pound of ground hamburger that was browned and drained. Added 2 1/4 cups of water plus the package of seasoned rice.

Hamburger with water and rice mixture.

Cooked it for about 20 or so minutes.

Dirty rice.

Everyone liked the rice. I was surprised that Olivia even enjoyed it since it was a bit on the spicy side.

For dessert, we had Mini King Cake Cookies. The recipe came from a pin that led to Flying on Jess Fuel. The cookies have a very strong almond taste. We all liked it, but the amount of extract could be reduced slightly if less of an almond taste is desired.

Mini King Cake Cookies


Cookies that I made and 
Sophia frosted and decorated. 

Ingredients for the Cookies

¾ cup margarine
¾ cup sugar
3 ½ cups sifted flour
5 tsp baking powder
½ tsp salt
2 tsp almond extract
4 eggs

Ingredients for the Frosting:

2 cups powdered sugar
2 tsp flour (we didn't use this)
1 tsp almond extract
4 tbsp milk

Directions

Preheat the oven to 375 degrees. Put the butter in a microwave-safe bowl and melt it. (Note: The person who wrote the recipe noted to use margarine since the cookies come out weird if you use butter. So,I used 1/2 cup margarine and 1/4 cup butter and they turned out fine. )

Add the rest of the cookie ingredients to a large mixing bowl. Mix thoroughly.

Roll about 1-tablespoon of dough into balls and put them onto a parchment-lined baking sheet. Bake for about 10 minutes (or a little less).

Olivia with one of the cookies.

A traditional king cake has a little baby, bean, or other trinket hidden inside it. Whoever gets the piece with the baby is king for the day and/or gets to make/buy the next king cake. Place it in a cookie that has cooled completely. (Make sure to let those who are eating the cookies know that there is a surprise hidden inside one of them.)

Sophia is showing a peanut that was in one cookie.

For the frosting, mix the powdered sugar with 2 teaspoons of flour. Add 1 teaspoon of the almond extract and the milk slowly until it is a creamy consistency. Frost and decorate the cookies.

Monday, February 8, 2016

Sweet and Sour Chicken on Chinese New Year

This year for Chinese New Year, all of us are not feeling well. So, we are having a low-key celebration to acknowledge this important date and how blessed our lives have been since adopting Sophia and Olivia.

I took a look at my Chinese New Year board on Pinterest and found a pin for a recipe for Sweet and Sour Chicken that led to Mel's Kitchen. The recipe serves 4-6 people.

The recipes notes that if extra sauce is desired, to double the sauce ingredients. Half of the sauce should be poured over the chicken. The other half should be put into a small saucepan and cooked on the stove at a simmer for 8-10 minutes until it reduces and thickens. Serve it on the side of the chicken.

I did not make an extra batch of sauce. However, the girls both said they would like more sauce next time. It was fine as it was with a single batch of sauce.

Sweet and Sour Chicken that 
I made for Chinese New Year.

INGREDIENTS

Chicken:
3-4 boneless, skinless chicken breasts (about 2 pounds)
Salt and pepper
1 cup cornstarch
2 large eggs, beaten (I used three eggs)
1/4 cup canola, vegetable or coconut oil

Sauce:
1/2 to 3/4 cup granulated sugar (depending on how sweet you want the sauce - I used somewhere between 1/2 to 3/4 cup of sugar)
4 tablespoons ketchup
1/2 cup apple cider vinegar
1 tablespoon soy sauce
1 teaspoon garlic salt

DIRECTIONS

Preheat the oven to 325 degrees F. Cut the chicken breasts into 1-inch pieces. Season with salt and pepper. Place the cornstarch in a gallon-sized ziploc bag. Put the chicken into the bag with the cornstarch and seal, tossing to coat the chicken. (Note: I just added the cornstarch to the bowl that the chicken was in and stirred it.)

Whisk the eggs together in a shallow pie plate. Heat the oil in a large skillet over medium heat until very hot and rippling. Dip the cornstarch-coated chicken pieces in the egg and place them carefully in a single layer in the hot skillet.

Cook for 20-30 seconds on each side until the crust is golden but the chicken is not all the way cooked through (this is where it's very important to have a hot skillet/oil). Place the chicken pieces in a single layer in a 9x13-inch baking dish and repeat with the remaining chicken pieces. (Note: the oil was getting low about when I was three-fourths completed with the chicken. I had to add some more oil to the pan and let it heat to a high temperature again.)

The fried chicken pieces.

Mix the sauce ingredients together in a medium bowl and pour over the chicken. Bake for one hour, turning the chicken once or twice while cooking to coat evenly with sauce.

The finished chicken with sauce.

Serve over hot, steamed rice.

Dinner for Chinese New Year. 
I really should have used our place mats from China. 
However, it was late and we were ready to eat. 
Olivia is working on a 1,000-piece puzzle on the dining room table. 
Thus, the puzzle box is in the picture.

Strawberry Pineapple Lemonade Concentrate

Last July, I made Strawberry Pineapple Lemonade Concentrate. The recipe came from Canning Homemade. There are only four ingredients in the recipe that are combined and then canned. It's a simple process that yields a delicious product that we've been enjoying this winter.

Strawberry Pineapple Lemonade Concentrate that I made.

Strawberry Pineapple Lemonade Concentrate
Makes 6-8 pints or 3 quarts of canned concentrate

3 cups strawberries
3 cups fresh pineapple
4 cups freshly squeezed lemon juice or bottled lemon juice
4 cups sugar

In a food processor or blender, puree strawberries and pineapple.

Transfer fruit puree to a stainless steel saucepan over medium-high heat. Do not boil. Add lemon juice, sugar, and stir to combine.

Using a thermometer heat to 190 degrees Fahrenheit, stirring occasionally. Because this recipe has sugar it will get to temperature rather quickly so pay careful attention to the thermometer. Remove from heat.

Ladle mixture into jars leaving 1/4 inch headspace. Wipe rim, add hot lids and tighten rings just finger tight. Process in water bath canner at a boil for 15 minutes.

To reconstitute, mix one part concentrate with one part water, tonic water, or ginger ale. Adjust the concentrate to suit your taste.

Sunday, February 7, 2016

Right Size...Right Now! - Read 52 Books in 52 Weeks - Week 6

Right Size...Right Now! The 8-Week Plan to Organize, Declutter, and Make Any Move Stress-Free by Regina Leeds.


I checked this book out a long time ago from the library and kept renewing it with the thought it would help go through my parents' home as my sister, brother, and I went through all their possessions and either divided them among ourselves, donated them, or threw them out.

After going through the majority of their home and being able to make relatively easy choices about where things would go, I looked at this book and thought it would be better for my sister who is moving from her home after living there 17 years and into a condo.

The plans and ideas offered in this book are for people transitioning to a new home more so than closing out a home due to death of parents. That being said, there were a few things that did apply in my situation that I wanted to remember:

- "I might need it one day" is the rationale that often reflects anxiety created by a traumatic event. The Great Depression created a generation of fearful people.
- "That belonged to my late (parent)." If you have items that fit this category and are trying to downsize, ask yourself:
.....How many items like the one I'm considering did the person leave?
.....Can I choose one or two and then distribute the rest to other family members?
.....Do I have photos of the person wearing, using, or standing next to this item?
.....Will other family members I'm living with like this item or will it take up space?
- Ideas for dealing with inherited possessions:
.....Create an album that holds swatches of fabric from clothes, combine with photos, and/or buttons
.....Take the stones out of setting you don't like and have them reset in jewelry you design.

To us, our house was not unsentient matter - 
it had a heart, and a soul, and eyes to see us with; and 
approvals and solicitudes and deep sympathies; 
it was of us, and 
we were in its confidence, and 
lived in its grace and 
in the peace of its benediction.
- Mark Twain

Regina Leeds has a website that she posted the weekly schedule in her book. She recommended copying and pasting the list to a Word document, and then modifying based on one's home and needs.

Week One: Make a Plan / Create a Budget / Research Movers

Create a move notebook and easy filing system for the notes and materials you’ll amass over the weeks.

Create or adjust your family budget so you know exactly what you can afford in terms of your move.

Research sources for moving boxes.

A little detective work will yield the names of reputable movers.

Schedule meetings with three to five, and see who offers the best deal and with whom you feel the most comfortable.

Do the “fresh eyes exercise.”

Eliminate one difficult item or category from your home to release stuck energy.


Week Two: Mover Meetings / Self Move Research / The Kitchen

Meet with representatives from at least three moving companies. If you decide to hire one, book your move this week.

If you are planning a self-move, get prices for the tools you need to rent, like a truck and a dolly. Be sure they are available on the day you will need them.

Secure transport for unusual, valuable, or oversized items like artwork or a piano.

If you are shipping your vehicle, investigate your options.

If your household is moving many miles and you are shipping your vehicle, research plane, train, or bus tickets.

Engage friends and family for specific move-related duties. If you are doing a self-move, you need a mix of strong and organized friends.

Be sure the charity of your choice will accept the items you wish to donate and can pick them up on the day you designate.

Begin dealing with the emotional issues that threaten to keep you attached to items you no longer need, want, or use or that you can’t fit into the new space.

Clean out cupboards and drawers in the kitchen.

Pack some items if time permits and you have decided not to let the pros simply do it all.

Begin making a shopping list of helpful items you’ll need in your next kitchen.

Start planning a kitchen moving-day box to be loaded onto the truck last.


Week Three: Who Needs to Know / Bedroom / Are you Wasting Time?

Make a list of people and entities that need to know your new address as well as all businesses that serve your home.

Clear out the items from your bedroom that need not make the journey with you.

Pack some items, as this will give you a sense of accomplishment.

Pack items in this room that do not wrinkle easily. If nothing else get the off-season clothing in a box.

Consider which organizing tools will help you enjoy your wardrobe more and preserve it.

Check for the secret time suckers in your life.


Week Four: Bathrooms / Linen Closet / Micro-Living

Downsize the contents of all bathrooms.

Pack whatever items you won’t need until you get to the new location, including linens.

Clean out the linen closet, and donate discards to your vet or local emergency animal hospital.
Consider the benefits and how-to’s of micro-living.


Week Five: Paper Organization

Defang your paper phobia by uncovering the fear behind it.

Try meditation.

Investigate the three main reasons people avoid making decisions about paper.

Sort paper piles; toss, shred, or recycle as needed.

Archive old tax records and projects.

Set up files to catch current material.

Sort through reading matter like magazines, catalogs, newsletters and so forth.

Clean out the existing filing cabinet.

Gather all warranties and instructions, and sort for ease of retrieval.

Set up a simple office file system.

Set up action files.

Consider purchasing basic office supplies.

Cull through small office supplies and decorative items.

Consider the set up of the next office.

Read packing tips.


Week Six: The Family Room / Yard Sales

Go out into nature.

Do a speed elimination in the family room.

Cull your book collection.

Consider creative sources for media donations.

Consider ideas for (non digital) media collections.

Investigate popular outlets for cast-off stuff.

Hold a yard sale.

Plan for the next family room.

Consider the concept of completion and the importance of chores.


Week Seven: Children’s Rooms / Memorabilia / The Dorm / Retirement

Talk to your child about the concept of self-care, and share with her a self-care tip.

Do a speed elimination in your child’s room, or if she is older, let her do her own.

Organize your child’s media collection.

Purge the closet.

Make plans for the next bedroom.

Consider the hold all memorabilia has on us, but especially that pertaining to our children.

Prepare for a dorm move.

Downsize for a move to a retirement home, and think of this new life phase as a time of freedom.

Make the move to assisted living as smooth and comfortable as possible.


Week Eight: The Attic, Basement & the Garage / Final Plans

Clear clutter and pack the garage, attic, and basement.

Plan for storage areas in the next home.


Prepare for moving day:

Set aside first-on, last-off moving-day boxes.

Make sure your labeling system is in place.

Have moving-day supplies (bottles of water, snacks) ready.

Pack any remaining items.


Move!

Begin unpacking and getting rid of boxes.

Sunday, January 31, 2016

Fed Up with Frenzy - Slow Parenting in a Fast-Moving World - Read 52 Books in 52 Weeks - Week 5

For the fifth week of the Read 52 Books in 52 Weeks challenge, I read Fed Up with Frenzy - Slow Parenting in a Fast-Moving World by Susan Sachs Lipman.


The book is packed with great ideas about slowing down as a parent; and doing memorable and meaningful activities with your child(ren). As I paged through the book, I thought, "I've done that..." or "Oh, yes...I remember doing that with Sophia and Olivia."

The activities are aimed more for young children - probably no older than eight years old, maybe nine. That being said, it depends too how they are being raised. If they are accustomed to living a more imaginative, slower, deeper, and richer life - these activities could maybe be stretched for a longer period of time.

The final chapter of the book focuses on slow parenting and offers the following reminders that are valuable to parents with children of any age:

- Evaluate your own desires - Are you signing your child up for activities you would have liked for yourself? Although exposure to many things is delightful and, indeed, a luxury, too much of a good thing can backfire.

- Get enough sleep - Try to have a regular bedtime for yourself and your child(ren).

- Stop running a taxi service - Something is lost when we spend too much time "lost in transportation." Choose between activities, combine errands, or do errands and something fun together.

- Give your electronics the day off - this could be for a weekend, day, or night.

- Say no to more things - often children are overscheduled to the point of creating stress for the whole family. Perhaps explore one or two activities at a time, and carefully consider the costs and benefits of each before adding any new ones.

- Give your kids some downtime - to play, daydream, or explore on her own. Every activity doesn't have to lead to a future goal. Our tendency to over-schedule and overstimulate children can create undue stress for them.

- Cultivate friendships with a variety of people - in terms of different ages or whom you don't know through your child(ren). Sometimes, as a parents, we need to connect with people who reflect different or dormant interests or parts of ourselves.

- Be a tourist in your town - look for new things to see or do around your town.

- Try something new - can be done individually or as a family to rejuvenate your mind, body, and spirit.

- Get physical - laugh, play, walk, and exercise together.

- Practice gratitude - exchanges negative emotions for positive ones.

- Perform service - the world is larger than our experience of it.

- Be in the present moment and do one thing at a time - it makes us more efficient, calmer, and less scattered than we are when we try to do many things at once.

Sunday, January 24, 2016

The Little Book of Big Savings - Read 52 Books in 52 Weeks - Week 4

This wee for the Read 52 Books in 52 Weeks challenge, I read The Little Book of Big Savings by Ellie Kay.


Some of the ideas from the book are reminders of things I want to do; and others are things that I would like to start doing that I've never done:
- Pay extra on your mortgage principal. If you pay your monthly mortgage plus the principal on the next month's payment, and continue to do this, you will find that your mortgage can be paid off in about half the time.
- Make sure you have replacement value on personal property insurance. If you don't, the items that are damaged will be depreciated, which won't leave much of a check to cover the damages.
- Keep a list of all improvements on your home - from a new air conditioner to a water heater.
- As for an itemized hospital bill and review it for duplicate or erroneous charge.
- Apply for college scholarships. Go to www.salliemae.com that has more than 1.9 million scholarships totaling $16 billion. Also see www.fastweb.com that has more than 1.3 million scholarships. Apply for local civic organizations' and community scholarships. High school counselors should have a list of these scholarships.
- Some students make their official part-time job during their junior and senior years "applying for scholarships."
- Use a clothesline when it is warm outside to save money on drying costs.
- When your credit card bill arrives, pay the minimum payment right away. You can always send a larger payment in at the end of the money. That will save you money on interest accruals.
- Set financial goals and determine a budget. Include hidden bills - or bills that don't occur monthly.

Tuesday, January 19, 2016

Keeping a Commonplace Book

Last year I began keeping a Commonplace Book. I wanted to copy quotes I had found or heard from various sources. Having them all in one book would be a good reference not only for me, but for Sophia and Olivia.

I had heard about Commonplace Books through some Charlotte Mason websites I refer to as I was developing Sophia's and Olivia's homeschool curriculum.

I started exploring on Pinterest what examples of Commonplace Books look like; and created a board with examples from various Commonplace Books - contemporary and historical.

Some reflect the person's best penmanship, others are a collection of snippets of quotes and bits of articles taped or glued into a book. Others use yellow "stickie sheets" with notes written on them. Some have beautiful drawings or paintings in them, while others cut out images from magazines or books and include them as inspiration.

A page from my Commonplace Book.

The covers range from plain books to personalized collages. One collage on the board shows a collection of words and images from magazines. Another collage incorporates tactile elements - like laces, scrapbook paper, and fabric.

DIY Planner said, "The Commonplace Books of old were series of books, stuffed with scraps, inspirations, snippets of information, sketches, clippings, photographs, poems, jokes, references, and anything else pertaining to the interest of the person who kept it."

A Commonplace Book is a central resource for ideas, quotes, observations, anecdotes, and information you come across during your life. The purpose of the book is to record and organize the information for later use in your life; in your writing or speaking; or in your business.

Commonplace Books differ from journal (which are chronological and introspective) in that they are not organized chronologically. Rather, the authors of these books would have one or two themes for which they sought information from various sources. They would record the information and review it by themselves or with others who had similar interests.

An article in The New York Review of Books noted that authors of these books made “a continuous effort to make sense of things, for the world was full of signs: you could read your way through it; and by keeping an account of your readings, you made a book of your own, one stamped with your personality … a way of making sense of the world.”

A page from my Commonplace Book.

Within a Charlotte Mason education, a Commonplace Book is a place to record great quotes, poems, and passages from literature. The children and teens choose what they want to include in their Commonplace Book which eventually becomes a resource filled with noble thoughts of others.

Charlotte Mason Help asks, "Don't you find it interesting that the greatest literary figures in history such as Shakespeare, Tennyson, Dickens, Stevenson, Franklin, J. London...did not take creative writing or composition courses? They copied very carefully passages from classic literature and then tried to write the same passage again from memory without looking at the model.

"They used their own words when needed, but tried to sound like the original author as much as possible. Eventually, this carried over into their own writing."

Charlotte Mason had students keeping their own commonplace books by around age 13. She said, "It is very helpful to read with a commonplace book or reading-diary, in which to put down any striking thought in your author, or your own impression of the work, or of any part of it; but not summaries of facts. Such a diary, carefully kept through life, should be exceedingly interesting as containing the intellectual history of the writer; besides, we never forget the book that we have made extracts from, and of which we have taken the trouble to write a short review."

One gets a pretty good idea of a man, his likes and prejudices, 
his quirks and manias, the variousness of his mind 
from reading a commonplace book.
- William Cole

The blog Sage Parnassus noted, "Most people have heard about Thomas Jefferson's commonplace books. The very readable biography by Clara Ingram Judson describes them nicely....[One of the characters] from a perennial, favorite read-aloud, Carry On, Mr. Bowditch, kept a commonplace book. It's how Nathaniel Bowditch learned - reading, then writing, then reviewing what he wrote."

A page from my Commonplace Book.

Tips for keeping a Commonplace Book:

– Read often and widely.

– Highlight what resonates with you as you read (e.g., words, anecdotes, passages, stories, information). .

– Take notes while you read.

- Record wisdom, not facts. Don't just record random pieces of information. The point is to have a book filled with wisdom that you refer to in times of depression, crisis, opportunity, or a new job.

- Transfer information from the book to your Commonplace Book.

- Expand what you record from sources other than books. Speeches, videos, movies, or conversations all are valuable resources.

- Use a book that you enjoy writing in. You also can use notecards that you can rearrange as you want. In fact, Ronald Reagan actually kept quotes on a notecard system.

- Don’t let it pile up. Write in your Commonplace Book on a regular basis.

- Look at other people’s Commonplace Books. Get ideas about ways to improve your book.

- Recognize that this is a project for a lifetime.

Sunday, January 17, 2016

Outdoor Mom's Journal - January 2016

On the Handbook of Nature Study website, Barb started a Outdoor Mom's Journal. Each month, she answers some questions to give a glimpse into what's happening in her world as it relates to nature.

Last year, I did some entries for my own Outdoor Mom's Journal, but wasn't as consistent with it as I had hoped. This year, I'm trying again. Below are the prompts and my responses for January.

During our outdoor time this week we went....for as short as possible distances since temperatures are in the double-digits below zero. In fact, the time spent outside focused more on functional and necessary more so than optional and enjoyable.

As I write this, there's a Wind Chill Advisory that is in effect until noon on Monday (it started yesterday). The Advisory said:
* Expect wind chills to range from 25 and 35 below zero through Monday morning.
* The dangerously cold wind chills will cause frostbite in as little as 30 minutes to exposed skin. This morning it was so cold that it was lowered to only 10 minutes outside.

It offers this precautionary/preparedness action since frost bite and hypothermia can occur if precautions are not taken: Make sure you wear a hat and gloves.

I had to laugh at that. A hat and gloves? Let's try multiple layers of socks, pants, shirts, and gloves/mittens. A scarf or face protector. Some boots. A coat. Even with all those layers, I still come in and my feet and legs are cold.

The most inspiring thing we experienced was...seeing the variety of birds visiting the bird feeder. I enjoy seeing so many birds relying on the food we are providing for them. Some of the smaller birds who visit the feeder have their feathers all puffed up to stay warm.

Our outdoor time made us ask (or wonder about)...how horses make it through these sub-zero days and nights.

One winter, after getting our horses, it was frigidly cold. By the morning, one of the horses (Bailey) was shivering. I felt so bad seeing her like that; and called the vet not knowing what to do. I had never seen this happen before. They told me to feed her hay right away and she should stop shivering within five or so minutes. Sure enough, that's what happened.

They also suggested putting extra bedding down so there was a thicker layer between the ground, cement floor, and their bodies. Keeping this advice in mind, over the past two days, I have put nine bales of wood chips down in the barn. It is nice and thick now. I noticed today that Bailey had been rolling in the chips during the day.

One website I visited, Quora, said that "...quite often, even when shelter has been provided for them, they don't use it except perhaps at night or when dozing. They're fine, really. If you can see snow on their backs, that means their body heat is not escaping to melt the snow."

It isn't snowing (it's too cold) so I can't test that theory. Later this week, when it is supposed to snow again, I'm curious to see if that's true.

On Homesteading Today, one horse owner said, "A wind block, free choice hay, and unfrozen water and they will be fine."

Our horses have a barn and plenty of areas that provide a block from the wind and unfrozen water (I have two heated buckets that keep the water from freezing). When the weather started to go below zero and not move above it even during the day, I put extra hay in the barn at night so they can have it i they want it plus extra hay out during the day (on an approximately five-hour schedule). The horses are leaving some of the hay which is good. It means they have enough to keep themselves warm.

In the garden, we are planning...how to expand our vegetable gardens. Last year, we had seven 3'x4' gardens that had different varieties of tomatoes, peppers, onions, carrots, herbs, and marigolds. We've tried larger vegetables in the past in the same space, but there's not enough sunlight throughout the day.

Back in the late 1990s, I had a very large garden. That area is now the horse pasture, though, so I can't use it for gardening. In addition, the trees have grown in beautifully so it is more shaded than when we first moved here.

So, I'm thinking of how to change the backyard a bit so we have more space to do gardening - fruit and vegetable. There also are a couple of ways of gardening that I'd like to experiment with (e.g., keyhole, straw bale).


Last fall, I planted a lot of bulbs and transplanted some of the flowers that belonged to my parents. I'm hoping these make it through the winter and that we'll have some new colorful flower gardens.

I added nature journal pages about...I printed some pictures at Target to include with my January nature journal entries. Also invested this past week in some Prismacolor pens and Prismacolor watercolor pencils as a way to expand the tools I use for journaling.

This is what the Prismacolor pens look like. 
The tips are fine which is great 
for printing and handwriting.

I am reading...Wildlife Habitat Education Program manual that is part of the 4-H Wildlife Project Bowl reading requirements. As the coach for a junior and senior team this year, I need to read this manual and develop some questions to test the team members. It's an interesting resource. It's just a lot of reading in a short period of time.

I am dreaming about…warmer weather. Even temperatures in the 30s (which are projected for later this week) will feel tropical compared to what the weather is like today.

Two photos I would like to share...are from the last Wildlife Project Bowl meeting. The activity focused on horns versus antlers.

I gave each child and some of the mothers a slip of paper with a description of a quality of either a horn or antler. Each one had to read her/his description and determine if it was referring to a horn or antler.

Once they were in their groups "Horn" or "Antler" each one took a turn reading her/his description. For the most part, everyone was in the right group (there were only two who needed to move over to the "Horn" group). I think everyone learned at least one new thing about horns and antlers.


The photos above show a bison skull with horns (notice they are attached to the skull) and a moose antler. The antler is quite heavy; and it gave us all a good perspective of how large each one is and the weight that a moose carries atop his head.

The bison head is one I've had now for well over a decade. It was from Eichtens in Chisago City. When we were reading the Kaya series (as part of the American Girl books), I wanted to provide Sophia and Olivia with some hands-on experiences related to buffalo. Eichtens said I could look at the bones they had in a pile there. Found the skull with horns which was a great find!

The antler was one that Casey (my dog) found when I was walking her on the Gunflint Trail. It was about mid-Trail and off the side of the road in a forested area. She smelled something and was insistent on wanting to go find it. On our way back home, we stopped on the side of the road and put it in the back of the Jeep. I've had it ever since...a nice reminder of Casey and our many hikes and trips up north.

Clutter Busting Your Life - Read 52 Books in 52 Weeks - Week 3

This week I read Clutter Busting Your Life - Clearing Physical and Emotional Clutter to Reconnect with Yourself and Others by Brooks Palmer.


This book too an interesting look at the root causes of clutter as well as some alternative forms of clutter that aren't generally thought of (e.g., self-criticism, busyness, relationships).

Of particular interest was the section about inherited clutter. Since August, my sister, brother, and I have been working on cleaning out my parents' home. After 42 years of my parents living in the same house and 51 years of being out of their parents' home and living either in their first or second home, they accumulated a lot.

On top of that, they themselves had inherited items when their last remaining parent died in 1982 (my mom's mom) and 1983 (my dad's dad). So, not only were my brother, sister, and I cleaning out items that belonged to my parents, but some items that belonged to our grandparents.

We donated a substantial amount to various non-profit organizations and - unfortunately - had to dump a lot either because it was damaged in some way or it wasn't something that secondhand stores would take.

After donating all those items and getting rid of two dumpsters full of other items, we were still left with a tremendous amount of stuff. My parents took exceptional care of their items, so I am thankful to acquire much of it to either supplement what I would never be able to afford and/or replace lesser-quality or damaged items in my own home.

Still, there is a lot left to go through in my home. I have, thankfully, been able to put it in one of two spaces - a room that is rarely used in the home and in the hobby shed. Once we close on my parents' home, then - I believe - the real work begins here in going through the items I've acquired through inheritance and determine what will stay; what will be passed onto a sibling or other family member; or be donated.

Taking my time with these items also gives me time to reflect and not make rash decisions. I would rather be careful and thoughtful than quickly go through items and have regrets at getting rid of something later.

So, going back to this book. It does have many things to think about as I pare down my life and the things that no longer serve it. Already I know areas that I need to address...I want to get through one thing at a time - and the first thing is transitioning my parents' home for sale and staying present in that process to deal with the grief and loss of a childhood home and my parents.

The notes below from the book will help me as I move through other areas of my life after the home is sold. Other passages I included because I found them interesting:
- When clutter in your lie cuts you off from experiencing the basic relationship with yourself, you can experience anguish over different aspects of your life. You can experience great worry and fear about possible future events. Your relationships with others are often chaotic.
- There's something called the clutter of self-criticism where you criticize yourself for not living up to your own expectations.
- A long to-do list (pages long). That's clutter because it's not something you like to do. It's not in your nature.
- Busyness as a buffer: staying so busy and involved with work at the expense of family. The situation will eventually wear out a person.
- Busyness of life can, for a while, protect us from feeling fragile, hurt, and sorrowful. But we have to stay busy constantly to hold those feelings at bay. We can only take so much before we start to break down.
- Find any places in your body that are tense or irritable. This is where some emotional clutter lives.
- We're easily distracted from the present by our clutter. When there's more than one thing vying for our attention, we get caught up in those things and lose our connection with ourselves and others.
- Overinvolvement only takes us away from what matters: the present.
- When we surround ourselves with things that don't serve us, our attention bounces off everything....We get caught up in everything but the present moment, and this exhausts us.
- Trying to change another person is itself clutter. It hurts the relationship.
- Acceptance of what is, when it can't be changed, gives us peace of mind.
- Sometimes we hold on to the broken pieces of a relationship because we've lost a connection with someone we once held dear and we feel a deep sadness. The person is gone from our life, and we want them back, or we want to remember how wonderful it was to be in love with them. A part of us lives as if we were still in relationship with the person. We are trying to keep the past alive in the present moment, and this creates conflict in our hearts.
- Look for an item that is emotionally loaded. You'll feel tension in your body. The antidote is realizing that you don't want to live with those kinds of feelings. NO one wants to be in pain, physically or emotionally. Anything that warps us doesn't serve us. Don't live on the crumbled foundations of the past. When you find these disturbers from the past, donate, recycle, or toss them. The sooner they go, the better you'll feel.
- Sometimes relationships stop serving us. Maybe we just don't enjoy it anymore, or maybe it's causing us great emotional pain. The relationship now affects our well-being and other aspects of our lives.
- Ask, "How does being with this person make me feel? Does this relationship serve and nourish me or not?
- All relationships go through rough times, and this doesn't mean you need to end them. But sometimes relationships clearly no longer serve the people in them.
- Let go of your desire for a friend's approval, which undermines your own sense of self.
- Do you own any objects that remind you of a past painful relationship? It could be clothes or furniture. Sometimes you may have to let little things go - like a jacket - or big things - like a bed (if you aren't getting good nights of sleep). The quicker you get them out of your house, the sooner you'll feel like yourself again.
- You may discover that resistance to letting go of a cluttered relationship is fear of being alone, which is often the source of clutter. As the clutter begins to go...you may feel uncomfortable in your newly unencumbered space. You are no longer buffered from the difficult emotions that you don't want to feel and you find yourself longing for distractions. Rather than experiencing those feelings, it can feel easier to stop letting go and merge with your stuff again.
- Change can cause fear, sadness, and discomfort, but the majority of the pain is in the healing.
- People who parents have died and left them with inheritance clutter. This can be furniture, books, letters, photographs, papers, clothes, cars, property - anything the relative once owned. It is clutter because they can't let it go because its connection to the deceased makes them feel lie they are letting the person go. The situation makes them feel depressed, tired, and overwhelmed.
- By hanging on to these mementos, we attempt to maintain our connection with the person who died. But in most cases this makes for a weak connection. Nothing fully replaces the deceased person's presence. Our longing remains unmet.
- It's natural when a parent dies to want to preserve their things. Their stuff contains their presence, their attention, their personality. It's as if a person's scent lives on in their things. Though they are gone, it feels like they are still with us. And if those things remain an active part of our lives, it serves to keep them. But often they aren't, and they clog up our living space.
- When we let go of the things from our parents that don't matter to us, our memories of them are no longer clogged up in their stuff. Our parents become a living presence in our hearts, where they resonate much more strongly.
- We don't cherish the people in our lives by hanging on to them through things we don't care for. We cherish them by living an unencumbered life and being free in our hearts to remember who they were to us.
- The best gift we can give our loved ones after we die is not to leave them with our piles of clutter. We can do something about this by going through our things now so that they don't become a tangled mess by the time we're gone.
- Go through your financial papers and get rid of any paperwork that doesn't represent your current financial situation, such as closed credit card and bank accounts. Then arrange your finances in a way that would make sense to a stranger.
- Do you have clothing you no longer wear? Donate it now.
- Let go of old technology you no longer use.
- Keep clutter busting all the rooms in your home, thinking of what message you want to leave the people closest to you.
- The gifts [my parents] have given me were intangible, inside me, and I strive to live my life every day.

Saturday, January 16, 2016

Waldorf Grain Schedule - A Week of Recipes

When Sophia and Olivia were younger, I remember reading about a grain schedule that was used in Waldorf Kindergarten classrooms. Having a schedule provides children (and families) with a sense of rhythm and predictability.

In addition, according to The Parenting Passageway, "A different grain for each day is...connected to the cosmic origins of the days of the week. A different grain a day fits in with the nourishing weekly rhythm the Kindergarten thrives on."

The website continued, "The most common listing of grains...is the following, taken from The Waldorf Kindergarten Snack Book:

Sunday (Sun): Wheat

Monday (Moon): Rice

Tuesday (Mars): Barley

Wednesday (Mercury); Millet

Thursday (Jupiter): Rye

Friday (Venus): Oats

Saturday (Saturn): Corn

"Waldorf teachers and those who cook with whole grains attribute different properties to different grains. According to The Waldorf Kindergarten Snack Book, wheat is often seen as a harmonizer of the organ systems; rice is seen as acting on the digestive system; barley is seen as strengthening to the connective ligaments due to a high silica content and also seen to be soothing to the mucous membranes of the stomach and intestines; millet is seen to have warming properties; rye nourishes the head and bones; oats loosens stiffness and increases stamina and resistance to disease; and corn stimulates the metabolism in muscles."

I thought it would be interesting to try following the Waldorf Grain Schedule for a week using recipes I found on Pinterest that I've wanted to try now for some time. On the schedule I used this past week, I switched two days (Tuesday and Friday). Otherwise, everything matches the above schedule.

Sunday - Wheat

This pin for Baked Cheese Sticks led to the Living Well Kitchen. The recipe called for using cheese sticks. These are well-enjoyed by Olivia, and I forgot to tell her that I was going to use the package of cheese sticks for a recipe. Needless to say, between the time they went into the refrigerator and Sunday, only one cheese stick was left.

So, I thought I'd try cutting regular blocks of cheese. I had Swiss cheese and a Monterey Jack cheese on hand. What I found was that the string cheese held its shape whereas the other block cheese melted despite the breaded covering.

I baked the cheese sticks for only 8 minutes. They probably could have baked for less time. They tasted good, despite their flattened appearance.

Baked Cheese Sticks

The only two cheese sticks that retained their shape.

Ingredients (Serves 2)

1/2 cup whole wheat bread crumbs
1/4 tsp salt-free Italian seasoning
1 egg
2 tablespoon water
4 pieces string cheese, cut in half

Instructions

Preheat the oven to 375°F. Line a baking sheet with foil and spray with non-stick spray. Set aside.
In a sandwich sized zip-top bag, mix together the bread crumbs and Italian seasoning. (I put everything in a bowl so as to not waste a bag.)

In a shallow bowl, whisk together the egg and water, and add 2 cheese stick halves, making sure they are well-covered.

Add the egg-coated cheese sticks to the bag with the bread crumbs, and shake until fully coated. Put the cheese sticks back in the egg and shake in the bread crumbs again.

Put the breaded cheese sticks on the prepared baking sheet.

Repeat process with the remaining cheese halves until all are breaded and on the prepared baking sheet.

Spray the tops of the breaded cheese sticks with cooking spray.

Bake in the preheated oven for 8-10 minutes, until the tops are golden brown and the cheese is just starting to melt.

You can tell which ones are cheese sticks and 
which ones are from the blocks of cheese.

*~*~*~*~*~*~*~*~*~*~*

Monday - Rice

Today, rather than having a Chinese stir fry over rice (which would be something that I typically would have made for a day focused on rice), I wanted to try Rice Paper Rolled Sandwiches that I saw on this pin on Pinterest. The pin didn't lead to a recipe, so it was up to us to figure out what we wanted to put in the sandwiches.

Rice Paper Rolled Sandwiches

We need more practice rolling the sandwiches.

This was a healthy lunch that included shredded cabbage, avocado, carrots, cucumber, and cilantro. We dipped the sandwiches in peanut sauce.

The ingredients ready to be rolled into a sandwich.

There isn't a lot of filling that is needed for each sandwich. If you put too much, there isn't enough rice paper to stretch around the ingredients.

Sophia rolling a sandwich.

We were surprised at how forgiving and flexible the rice paper is after it soaked in water. The key, we found, is to keep an eye on the rice paper as it soaks. One minute it is hard as a rock and the next minute it seems like if you aren't paying attention, you'll have a soggy clump of rice paper on your hands. Ours didn't get to this point, thankfully. One more minute in the water, though, and it would have reached that level.

Sophia and I thought that these type of sandwiches would be especially good in the summer when the produce from the garden or farmers market is ripe and most flavorful. Adding edible flowers would give the sandwiches a decorative and pretty look.

*~*~*~*~*~*~*~*~*~*~*

Tuesday - Oats

Our dessert after dinner on Tuesday was Chocolate-Peanut Butter Granola Apple Bites. The recipe comes from a pin on Pinterest that doesn't lead to anything. Found another pin that has the recipe.

Sophia and I liked this recipe. Olivia said she liked the peanut butter on the apple, but not the granola.

It's an easy snack and healthy dessert; and we would make the recipe again. It also could be eaten as part of a meal. They would be something that would be good to take on a picnic since the granola sometimes falls off the apple. The birds and wildlife could enjoy eating whatever falls to the ground.

Chocolate-Peanut Butter Granola Apple Bites

A Granny Smith apple covered with 
peanut butter and granola.

Ingredients:

2 apples, sliced into wedges (We used Granny Smith which are a bit on the tart side. I think we all would have preferred a sweeter apple)
1/4 cup peanut butter
1/4 cup granola, your favorite
1/4 teaspoon ground cinnamon, for sprinkling (We didn't put cinnamon on the apples)
Semisweet chocolate chips, optional* (We didn't use chocolate chips)

Three ingredients for a simple dessert or snack.

Directions:

Coat the tops of the apple wedges in peanut butter and sprinkle with granola and cinnamon.

Melt chocolate chips in the microwave, stirring in 30 second increments until melted. Be careful not to overheat.

Drizzle wedges with melted chocolate. Set on a large platter and serve.

Tips:

To substitute the chocolate drizzle, you can sprinkle mini chocolate chips on top of the wedges. Or, leave the chocolate out altogether. They’re still delicious.

Olivia eating the apple slice and 
determining whether or not she liked it.

If not eating this immediately, brush each side of apple wedges with a little lemon juice to avoid browning. Makes 16-20 wedges.

Sophia with an apple slice covered in 
peanut butter and granola.

*~*~*~*~*~*~*~*~*~*~*

Wednesday - Millet

Today's grain is millet. This is not an easy grain to find in grocery stores in rural areas. I could find it at the local grain store in the bulk bird seed section. However, I thought it might be more appropriate to find it elsewhere for human consumption. So, the co-op is the place to go to get millet.

At any rate, I found a pin on Pinterest that led to the Alkaline Sisters website. Interestingly, the website said that millet "...is one of the six most important grains in the world and sustains one-third of the world's population as a significant part of the diets in China, Japan, Manchuria, and some areas of Russia, Africa, India, and Egypt; and it has an amazing 10,000 years of cultivation history in parts of East Asia."

The website noted that, "Millet is an excellent source of manganese, phosphorus, and magnesium - all of which are key minerals required for optimal health that you won’t find in white pasta."

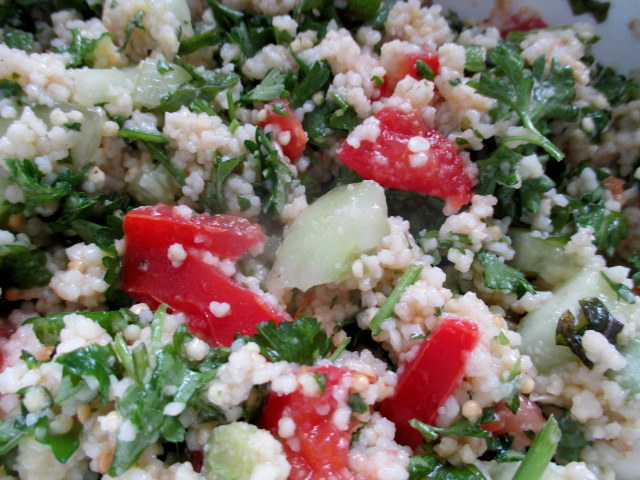
I underestimated the amount of millet I had on hand, so I ended up using couscous along with the millet. What I should have done was cook each grain separately since each had a different length of time it needed to cook. Millet takes about 18 minutes and couscous about 5 minutes. The former needs to simmer and the latter doesn't. Needless to say, the millet was a bit on the firm side while the couscous was overly soft (event though I did take the pan off the stove).

At any rate, once the millet-couscous mixture was added to the other ingredients, the unusual texture of the grains wasn't as obvious. I still like my recipe for tabbouleh that I've had for a good 15+ years. This one didn't seem to have quite as much flavor. It also was missing the black olives and feta cheese I usually include with my tabbouleh.

It was nice to have fresh produce in the middle of winter.


Millet Tabbouleh

Ingredients:
1 cup millet, rinsed
2 cups filtered water
1 tsp celtic sea salt
1/3 cup extra virgin olive oil
juice of one lemon
1 large garlic clove, crushed
1 1/2 cups roma tomatoes, diced small (3-4 romas)
1 1/2 cups English cucumber, diced small (almost 1 cuke)
3 green onions, sliced finely
1 1/2 cups fresh parsley, chopped small
3/4 cups fresh mint, chopped small
1/2 tsp Maldon sea salt flakes

Directions:

In a medium sauce pan bring water to boil, add millet and then reduce heat to low, simmering with lid on for 18-20 minutes.

Remove from heat, and fluff with a fork.  Allow to cool with the lid off for 30-60 minutes. The texture should be firm but not crunchy and neither mushy.

Combine olive oil, lemon juice, and crushed garlic and allow to stand.

Meanwhile chop vegetables as per above descriptions and place in a large bowl.

Add millet when it is completely cool and then pour dressing over mixture.  Toss well, seasoning with sea salt to taste.

Garnish with parsley or mint and serve at room temp or chilled. Flavors will become more pronounced after resting.  Yield: Approximately 7 cups.

*~*~*~*~*~*~*~*~*~*~*

Thursday - Rye

Rye is Thursday's grain. The recipe I selected is one that I saw on Pinterest that led to All Recipes; and is for Swedish Limpu Bread. Unless it is started right away in the morning, it takes a bit too long for me to make on a weekday.

Thursdays are now our "4-H Day" with some weeks having up to three meetings (club and committee) that run from morning to late afternoon. The best thing to do would be to make this recipe on the weekend when I have a bit more time, and then serve the bread on Thursday.

I am going to let the bread rise more next time and 
see how that affects the texture of it.
I'm not sure how to bake it differently so that it doesn't brown quicker 
on the sides touching the pan.
It doesn't affect the taste...I just don't like the way it looks.


When I made the  bread, the kitchen smelled wonderful. From the scent of orange zest, caraway seeds, and fennel seeds boiling in water on the stove and then cooling in the mudroom to the hours when the bread was rising twice...it made me think back to being a child when my dad would make bread on Sundays.

When it came out of the oven, he would ask if anyone wanted a hot slice of bread with butter (actually it was margarine since it was less expensive). My sister, brother, and I would run up the stairs to the kitchen and wait patiently which he used the electric knife to cut the bread for us. It was such a special treat for us.

This recipe, for Swedish Limpu Bread, makes enough for two loaves of bread. It is a denser - an very flavorful - bread. It tastes equally as good right from the oven or cooled. We all liked it, and I'll definitely make it again.

The bread has two types of seeds and orange rind in it.

Swedish Limpu Bread

Ingredients:
5 1/2 cups all-purpose flour
2 (.25 ounce) packages active dry yeast
2 cups water
1/2 cup packed brown sugar
2 tablespoons vegetable oil
2 teaspoons salt
2 teaspoons orange zest
1 1/2 teaspoons caraway seed
1 1/2 teaspoons fennel seed
2 eggs, room temperature
2 cups rye flour

Directions:

Boil water, sugar, oil, salt, orange rind, caraway seeds, and fennel seeds in a saucepan for 3 minutes. Cool until warm.

In a large bowl, whisk together 3 cups flour and yeast. Stir in cooled orange rind mixture. Beat with an electric mixer on medium speed for 2 minutes. Blend in eggs. Add 1 cup flour, and beat 1 minute on medium speed. Add rye flour and enough additional white flour to make a stiff dough.

Turn dough onto a lightly floured surface. Knead for 8 to 10 minutes, or until smooth and satiny.

Shape into a ball. Place in lightly greased bowl, turning to grease the surface. Cover with a damp cloth, and place in a warm spot. Allow to rise for 1 1/2 hours, or until doubled.

Punch dough down, and divide in half. Shape into 2 balls. Let rest for 10 min. Shape into 2 loaves, and place into ungreased 9 x 5 inch loaf pans. Brush with oil. Allow to rise for 1 hour, or until doubled in size.

Bake at 400 degrees F (205 degrees C) for 30 to 35 minutes, or until done.

*~*~*~*~*~*~*~*~*~*~*

Friday - Barley

Today's recipe is for Barley Beef Soup. The pin on Pinterest led to Better Homes & Gardens.

Had I read the instructions early in the day, I would have noticed that it was supposed to start in the morning in the crock pot. At 5:00 p.m., I realized that I would have to find a quick way to make this soup or we weren't having a normal dinner.

With the exception of Olivia (who isn't a big fan of vegetables or this type of soup), we all enjoyed it and would make this recipe again.

Barley Beef Soup

Beef Barley Soup cooking in the skillet.

Makes: 8 servings Prep: 25 mins Cook: 8 hrs to 10 hrs (low) or 4 to 5 hours (high)

Ingredients

12 ounces beef or lamb stew meat (I used beef stew meat - about 16 ounces)
1 tablespoon vegetable oil
4 14 ounce cans lower-sodium beef broth
1 14 1/2 ounce can diced tomatoes, undrained
1 cup chopped onion (1 large)
1 cup peeled parsnip or potato cut into 1/2-inch pieces (I used a potato)
1 cup frozen mixed vegetables
2/3 cup regular barley
1/2 cup chopped celery (1 stalk)
1 cup bay leaf (I didn't include the bay leaves. One cup also seems like a very high amount. I would maybe do 1 or 2 bay leaves, but certainly not one cup.)
2 cloves garlic, minced
1 teaspoon dried oregano or basil, crushed (I used Italian seasoning instead)
1/4 teaspoon ground black pepper

Directions

Trim fat from meat. Cut meat into 1-inch pieces. In a large skillet, cook meat in hot oil over medium-high heat until brown. Drain off fat.

Transfer meat to a 5- or 6-quart slow cooker. (At this point, I didn't transfer things to a slow cooker. I continued adding everything except the barley to the meat. The barley was cooking separately on the stove. I added it once it was done cooking.) Stir in broth, undrained tomatoes, onion, parsnip or potato, frozen vegetables, barley, celery, bay leaf, garlic, oregano, and pepper.

Cover and cook on low-heat setting for 8 to 10 hours or on high-heat setting for 4 to 5 hours. It didn't take nearly that long - about 30-35 minutes - basically until the barley had cooked and I could add it to the other ingredients in the skillet.

Nutrition Facts (Barley Beef Soup): Per serving: 168 kcal cal., 4 g fat (1 g sat. fat, 25 mg chol., 492 mg sodium, 20 g carb., 3 g fiber, 13 g pro. Percent Daily Values are based on a 2,000 calorie diet

*~*~*~*~*~*~*~*~*~*~*

Saturday - Corn

Today I made Jicama Salsa with Blue Corn Chips. The recipe is from a pin I saw on Pinterest that led to My Recipes.

The fresh produce smelled wonderful on a chilly January day. It was almost as if summer were here again when I tasted the fresh cilantro, green onions, and red bell pepper.

If I were to make this recipe again, I would chop the jicama, pepper, and onion much smaller. This could be made in the Vita-Mix Mixer so that the vegetables all are finely-grated. I think the salsa would stay on the chips and the flavors would blend with one another better.

It's a colorful salsa that looks so bright 
when it is on blue corn chips.


Jicama Salsa

Ingredients:

3/4 cup diced, peeled jicama (Note: one jicama makes about 3 batches of this recipe)
1/2 cup chopped red bell pepper
2 tablespoons chopped red onion (I used green and yellow onions instead)
1 minced garlic clove
2 tablespoons chopped fresh cilantro
2 tablespoons fresh lime juice
baked blue corn chips

Directions:

Combine 3/4 cup diced peeled jicama, 1/2 cup chopped red bell pepper, 2 tablespoons chopped red onion, 1 minced garlic clove, 2 tablespoons chopped fresh cilantro, and 2 tablespoons fresh lime juice in a medium bowl. Serve with baked blue corn chips.